


Stuck with the “Access Denied” error in NVIDIA Control Panel? You tweak a setting—maybe enabling G-Sync, adjusting color settings, or customizing resolution—only to be met with a frustrating “Failed to apply selected setting to your system” message. You are definitely not alone.
But don’t worry. You’re not locked out for good. In this guide, we are showing you five effective methods to fix the NVIDIA Access Denied error and get your GPU working the way you want.
5 fixes for NVIDIA Control Panel Access Denied error
Here are 5 fixes that have helped other users resolve the NVIDIA Control Panel Access Denied error. You may not have to try them all; just work your way through the list until you find the one that works for you.
- Update your NVIDIA graphics driver
- Reinstall your graphics driver
- Run the NVIDIA Control Panel as administrator
- Disable Game Bar
- Delete the DRS folder
Fix 1: Update or roll back your NVIDIA graphics driver
One of the most common causes of the “Access Denied” error in NVIDIA Control Panel is an outdated or incompatible graphics driver. The Control Panel relies on the driver to apply and save settings—if the driver is outdated, it may not support newer settings, and if a recent update is unstable, it could prevent changes from being saved.
Updating or rolling back your driver manually requires searching for the correct version, downloading it, and ensuring proper installation, which can be time-consuming and error-prone. If you’d rather skip the hassle, you can do it automatically with Driver Easy.
Driver Easy is a trusted tool that automatically scans your system and lets you update, uninstall, and roll back drivers with just a few clicks. You don’t have to worry about finding the right driver version or dealing with the complexities of manual installation. Driver Easy takes care of everything for you.
- Download and install Driver Easy.
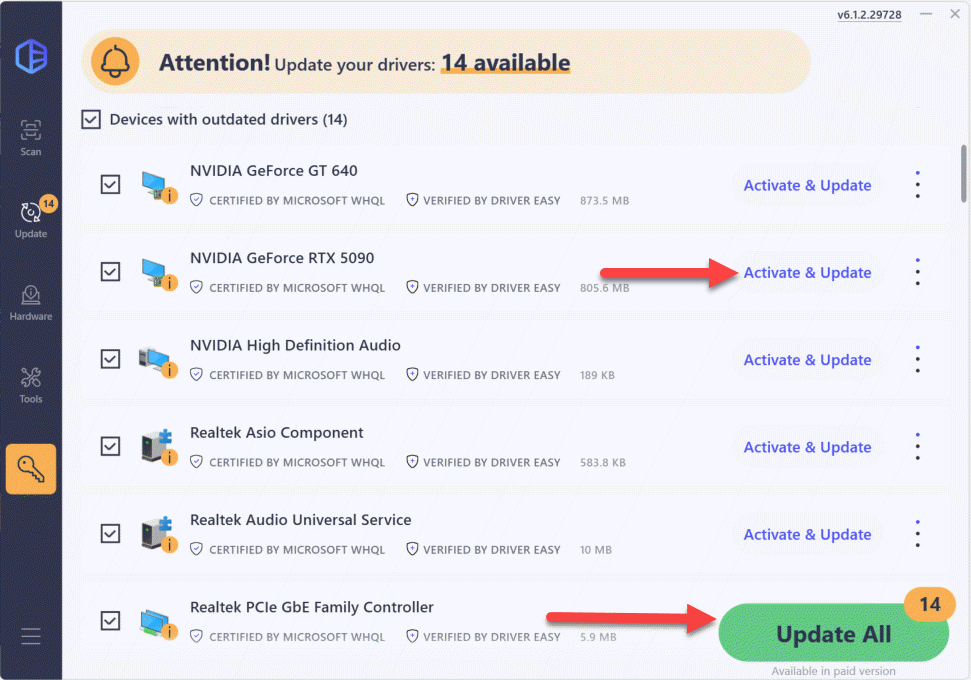
- Run Driver Easy and click the Scan Now button. Driver Easy will then scan your computer and detect any problem drivers.

- Check if your NVIDIA graphics driver is flagged in the scan results. If it is, click Activate & Update to start a 7-day free trial or upgrade to Driver Easy Pro. Either option will automatically download and install the latest NVIDIA graphics driver for you.
- If your NVIDIA graphics driver is in the up-to-date drivers list, you can try rolling it back to a previous version:
- Click the three-dot icon next to your NVIDIA graphics driver and select View All Driver Versions.
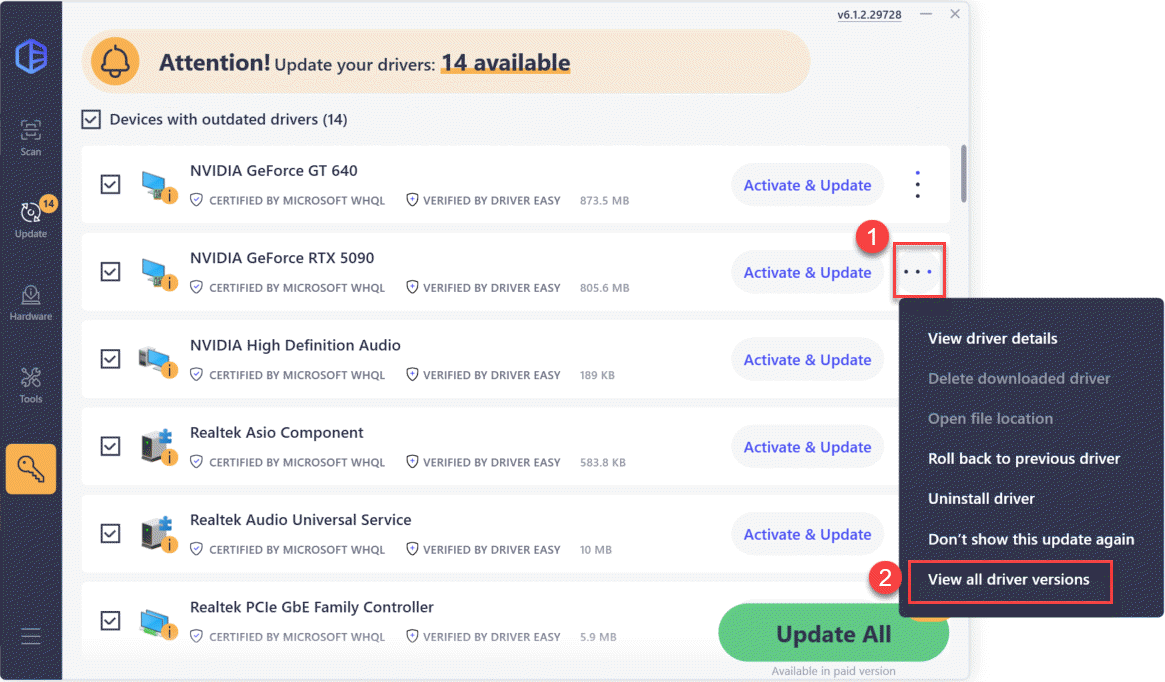
- Try out different versions until you find the one that works best for your system.
- Click the three-dot icon next to your NVIDIA graphics driver and select View All Driver Versions.
- Restart your computer for the changes to take effect.
- Launch NVIDIA Control Panel to see if the Access Denied error is resolved. If yes, then congrats! If the error still pops up, please continue with Fix 2, below.
Fix 2: Reinstall your NVIDIA graphics driver
If updating or rolling back your driver didn’t work, reinstalling the NVIDIA graphics driver might do the trick. A fresh installation ensures that any corrupt files, incorrect configurations, or leftover components from previous versions are removed, which could be causing the Access Denied error.
Here is how to reinstall your NVIDIA graphics driver:
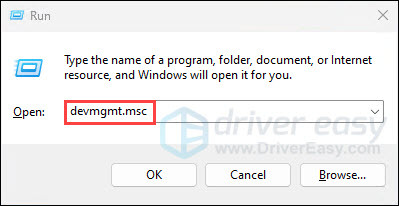
- On your keyboard, press the Windows logo key and R at the same time, then type devmgmt.msc and press Enter.
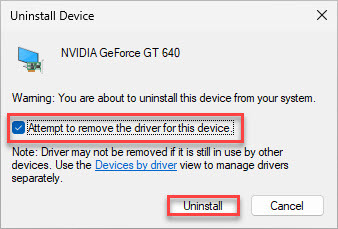
- Double-click on the Display adapters category, then right-click on your NVIDIA graphics card and select Uninstall device.
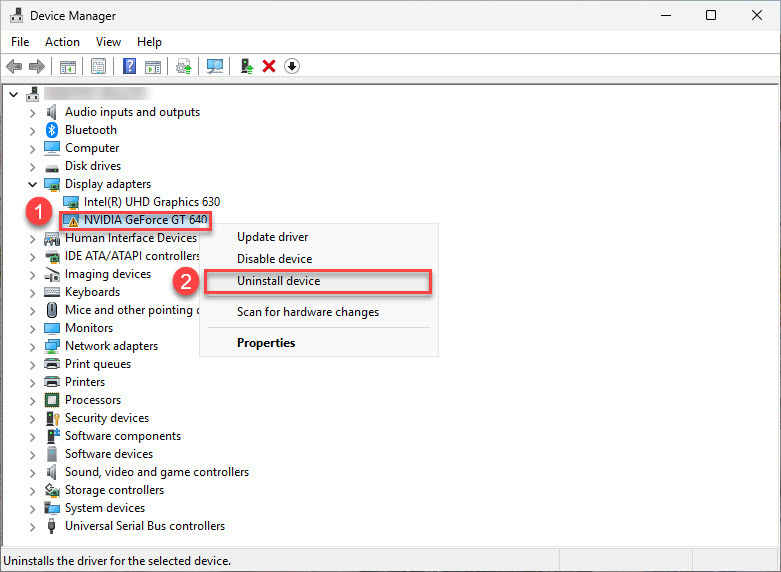
- In the window that pops up, check Attempt to remove the driver for this device if the option appears and click Uninstall to confirm.
- Run Driver Easy.
- Click Scan Now.

- If your NVIDIA driver is missing, flagged as faulty, or outdated, click Activate & Update to reinstall the driver.
- Restart your computer to apply the changes.
- Open NVIDIA Control Panel and try changing a setting. If you can save changes without seeing the Access Denied error, you’re all set! If the issue persists, please proceed to Fix 3, below.
Fix 3: Run NVIDIA Control Panel as administrator
Sometimes, the Access Denied error occurs because the NVIDIA Control Panel lacks administrative privileges to apply changes. Running it as an administrator can help bypass permission restrictions and allow settings to be saved properly.
As a possible fix for the error, you can run NVIDIA Control Panel as administrator to give it elevated privileges:
- On your keyboard, press the Windows logo key and E together to open File Explorer.
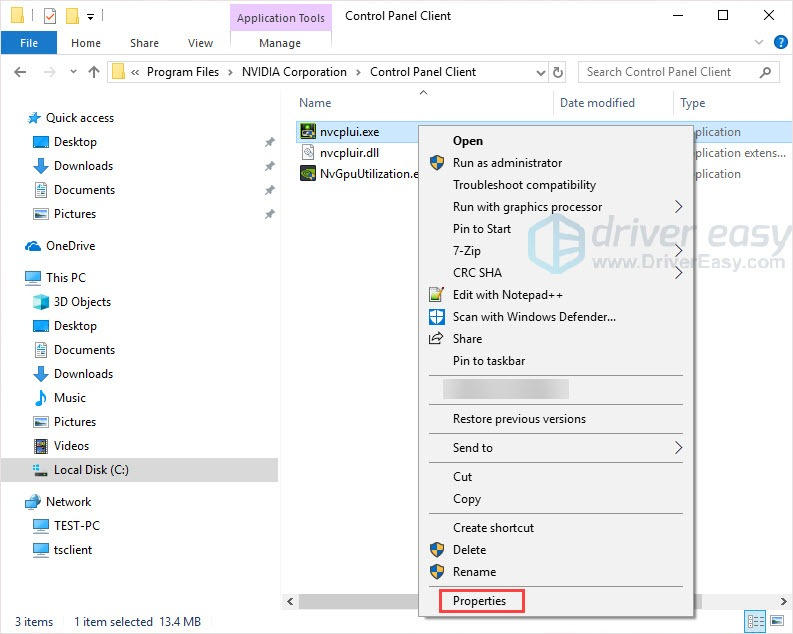
- Navigate to C:Program FilesNVIDIA CorporationControl Panel Client then right-click on the nvcplui.exe and click Properties.
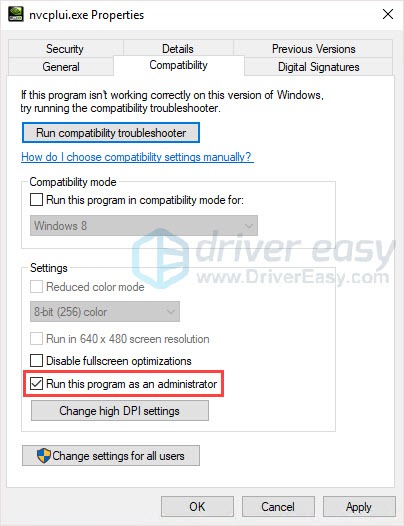
- Under the Compatibility tab, tick Run this program as an administrator, then click OK.
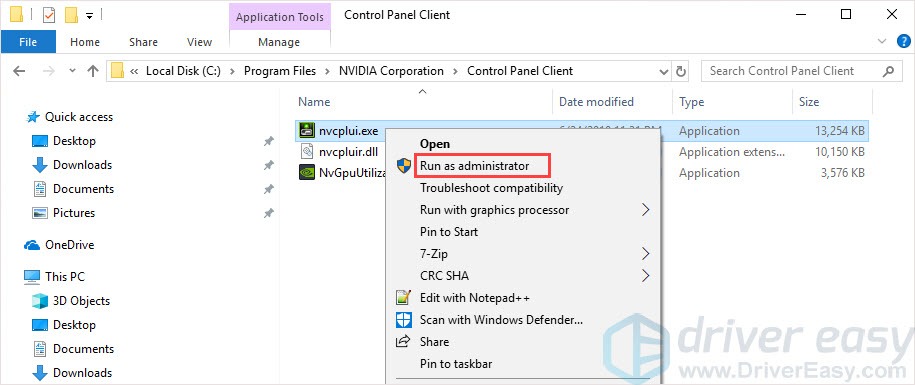
- Right-click on the nvcplui.exe and click Run as administrator.
- Open NVIDIA Control Panel and check if the Access Denied error still appears. If the error is resolved, you’re in the clear. If the issue persists, please move on to Fix 4, below.
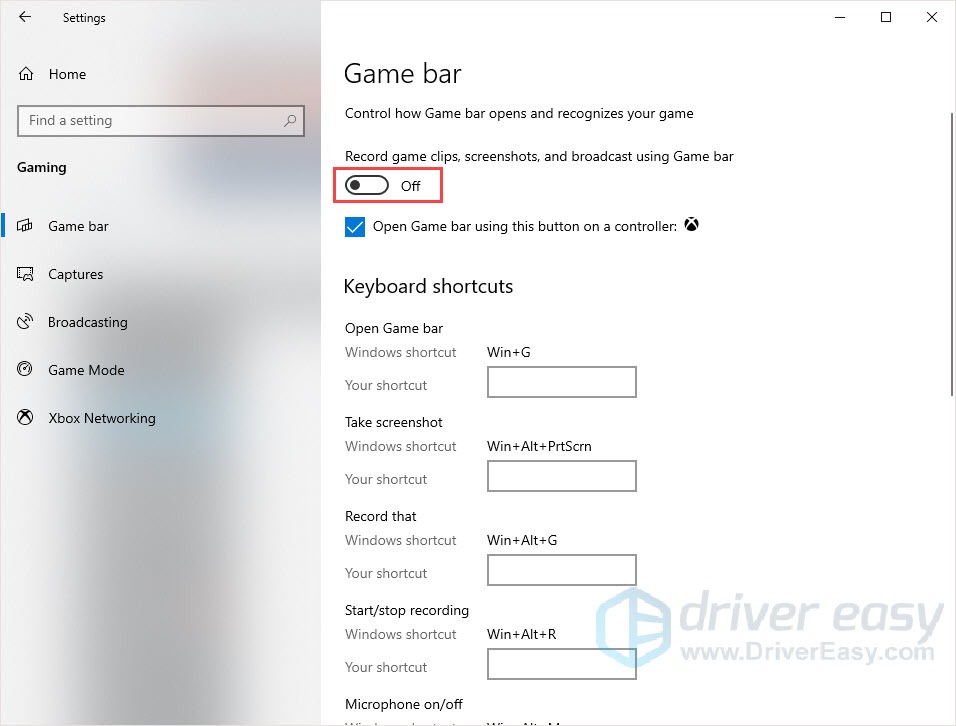
Fix 4: Disable the Games Bar
The Game Bar is a built-in tool in Windows to improve your gaming experience. It is automatically enabled with the Windows update, but it’s also said to interfere with the NVIDIA Control Panel. You can try to turn the Games Bar off to solve this problem.
- On your keyboard, press the Windows logo key + I at the same time to open the Windows Settings.
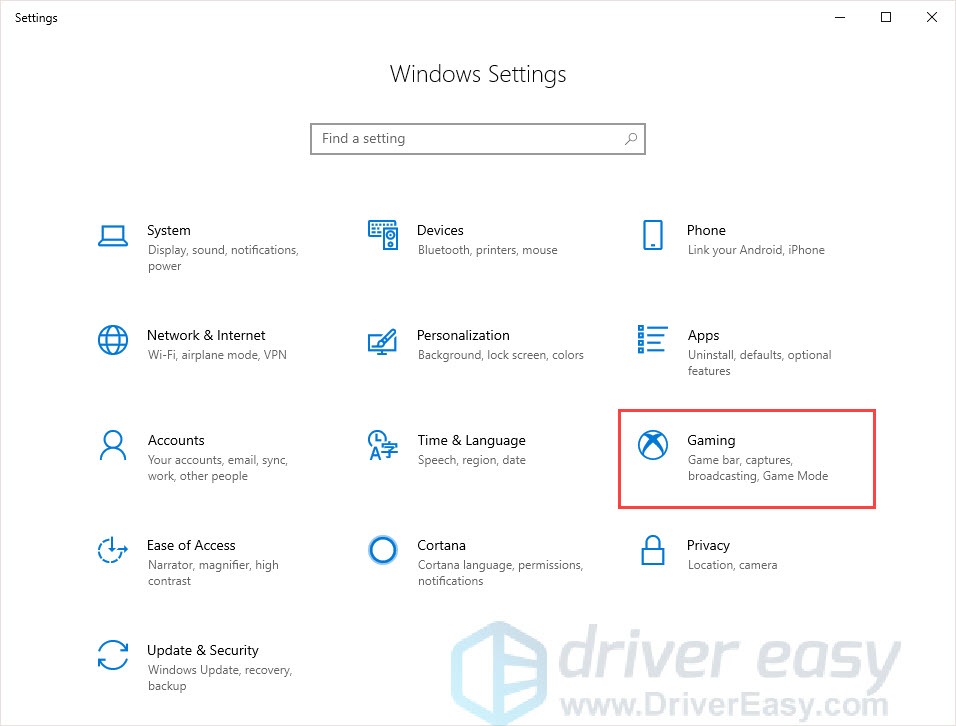
- Click Gaming.
- Turn off the Record game clips, screenshots, and broadcast using Game Bar toggle.
- Restart your PC for the changes to take effect.
- Run the NVIDIA Control Panel and see if the “Access Denied: Failed to apply selected setting to your system” message still pops up.
Fix 5: Delete the DRS folder
NVIDIA stores display settings in a DRS (Display Resolution Settings) folder. If the folder contains corrupted or misconfigured files, it can prevent the NVIDIA Control Panel from applying changes, triggering the Access Denied error. Deleting this folder forces NVIDIA to regenerate fresh settings, potentially resolving the issue.
Here’s how to do it:
- Close NVIDIA Control Panel if it’s open.
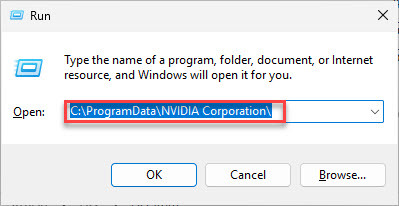
- On your keyboard, press the Windows logo key and R simultaneously, then type C:\ProgramData\NVIDIA Corporation\ and press Enter.
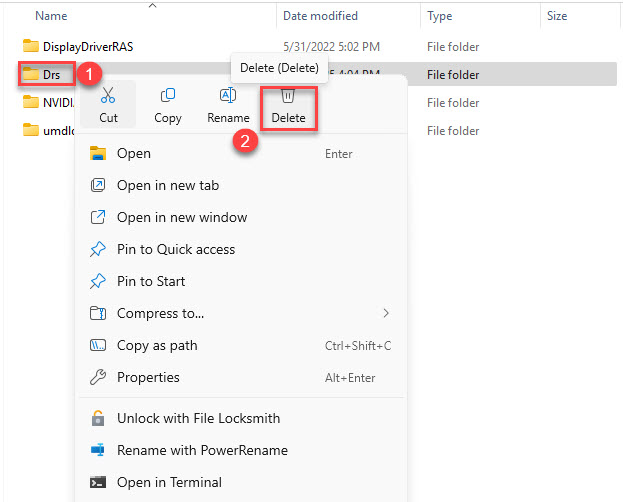
- Locate and right-click the DRS folder, then select Delete.
- Restart your computer.
- Open NVIDIA Control Panel and check if you can now apply settings without the error.