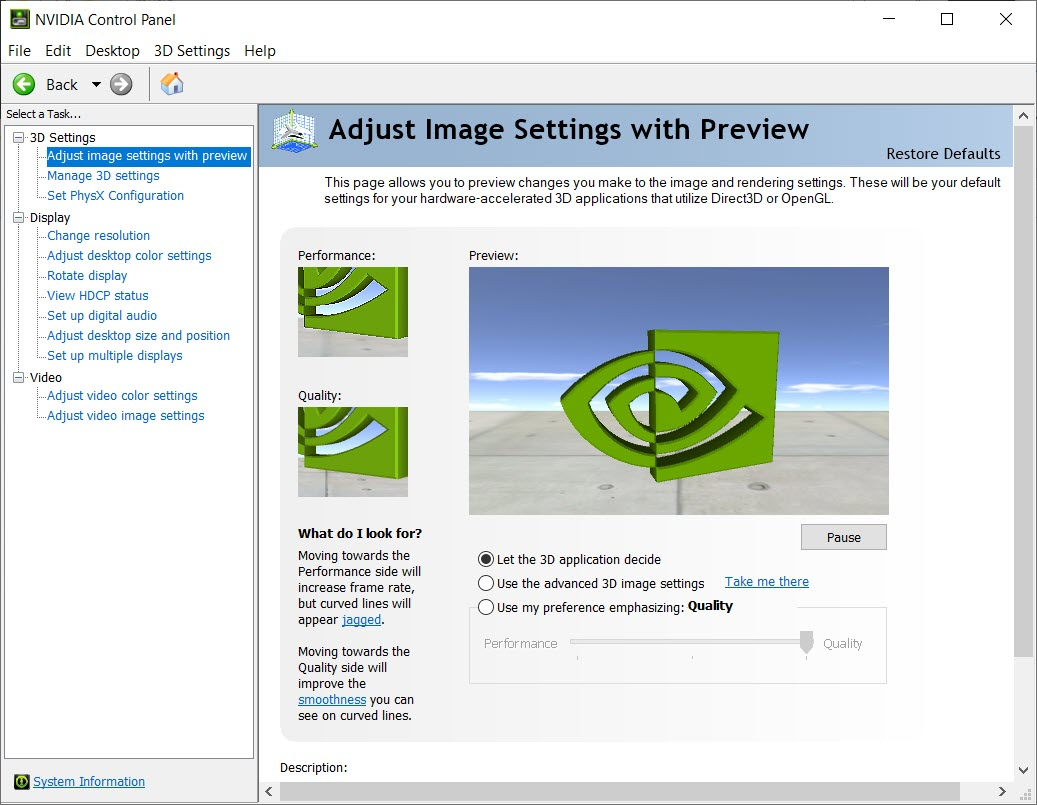
Many users reported that NVIDIA Control Panel keeps crashing on Windows 10. For some the Control Panel crashes when clicking on Manage 3D settings, and for some it just won’t open at all.
But don’t worry. This issue might not be so hard to fix. And here’re some ways you can get the Control Panel working right away.
Try these fixes
You might not need to try them all. Simply work your way down until you find the one that does the trick.
- Run as an Administrator
- Make sure your graphics driver is up to date
- Check files on your Desktop
- Scan and repair your system
- Check for system updates
- Remove conflicting programs
- Rebuild files of NVIDIA Control Panel
- Restart NVIDIA Display Container LS service
Fix 1: Run as administrator
In some cases, it would just be a permission issue. So you can try running NVIDIA Control Panel as administrator and see if it works for you.
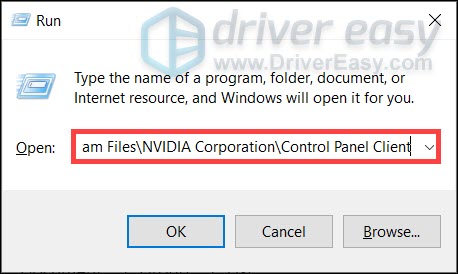
- On your keyboard, press Win+R (the Windows logo key and the R key) and type or paste C:\Program Files\NVIDIA Corporation\Control Panel Client. Then press Enter.
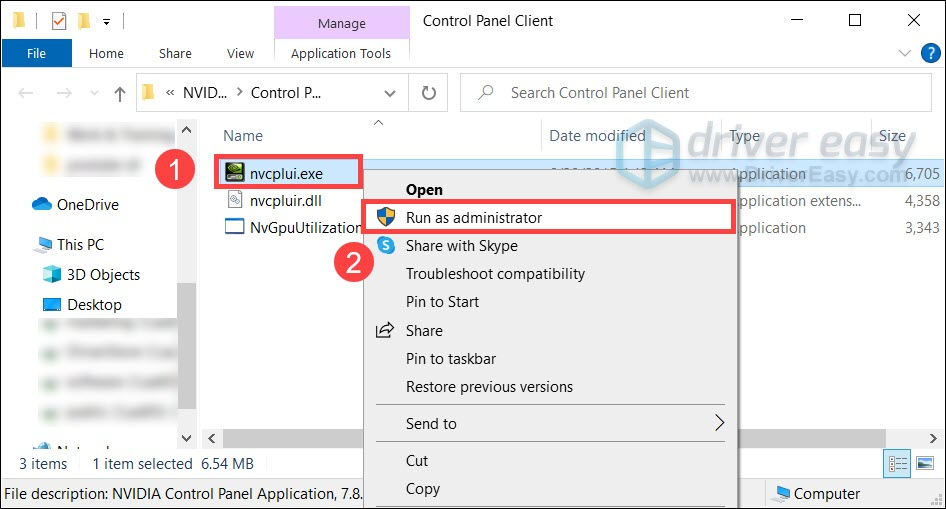
- Right click nvcplui.exe and select Run as administrator.
If this method doesn’t work for you, simply continue to the next one below.
Fix 2: Make sure your graphics driver is up to date
It’s very likely the issue is driver-related, which means you could be using a broken or outdated graphics driver. You should always make sure your drivers are up to date as it’d help you steer clear of lots of issues.
You can update your graphics driver manually, by going to the NVIDIA website, finding the latest correct installer for your model and installing step by step. But if you don’t have the time or patience to do that manually, you can update automatically with Driver Easy. And its restore point feature will help you safely recover from buggy driver updates.
You can update your drivers automatically with either the 7 days free trial or the Pro version of Driver Easy. It takes just 2 clicks, and you get full support and a 30-day money-back guarantee with the Pro version:
- Download and install Driver Easy.
- Run Driver Easy and click the Scan Now button. Driver Easy will then scan your computer and detect any problem drivers.

- Click the Activate & Update button next to the flagged device to automatically download and install the correct version of this driver.
Or click Update All to automatically download and install the correct version of all the drivers that are missing or out of date on your system (You’ll need the Pro version for this – when you select Update All, you’ll get a prompt to upgrade. If you’re not prepared to purchase the Pro version yet, Driver Easy provides a 7-day trial at no cost, granting access to all Pro features like fast downloads and easy installation. No charges will occur until after your 7-day trial period ends.)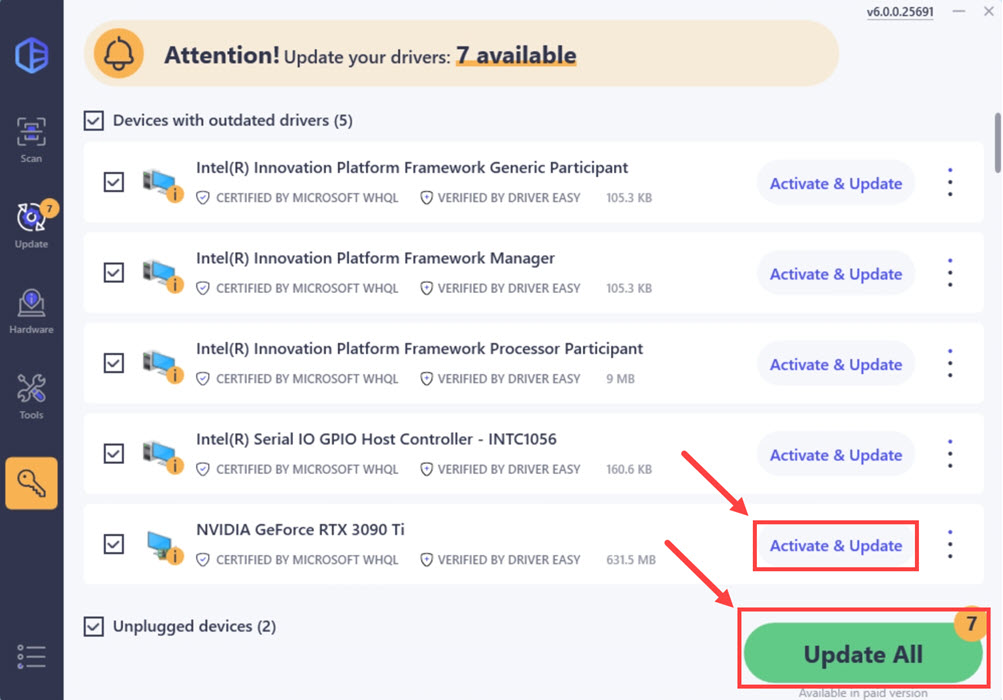
- After updating, restart your computer to take effect.
After updating your graphics driver, restart your PC and check if NVIDIA Control Panel is working properly.
If the latest drivers don’t seem to fix the issue, you can try the next method below.
Fix 3: Check files on your Desktop
It might sound strange, but some users reported that the culprit was some files/folders on their Desktop. According to the feedback, you can check and move any files or folders with a lengthy name. Or you can move everything on your Desktop to another drive and see if NVIDIA Control Panel works now.
If this trick doesn’t give you luck, check out the next one below.
Fix 4: Scan and repair your system
If your PC is having this issue constantly, or the issue occurs after making a major change to your system, chances are you’re looking at a system issue. It’s usually hard to investigate since there could be a million reasons to this. But you can first run a scan to find out what went wrong.
Step 1. Scan corrupt files with System File Checker
1) On your keyboard, press the Windows logo key and R at the same time to open the Run box. Type cmd and press Ctrl+Shift+Enter to run Command Prompt as administrator.

Click Yes when prompted for permission to make changes to your device.
2) In the Command Prompt, type the following command and hit Enter.
sfc /scannow
3) System File Check will begin to scan all system files and repair any corrupted or missing ones it detected. This may take 3-5 minutes.
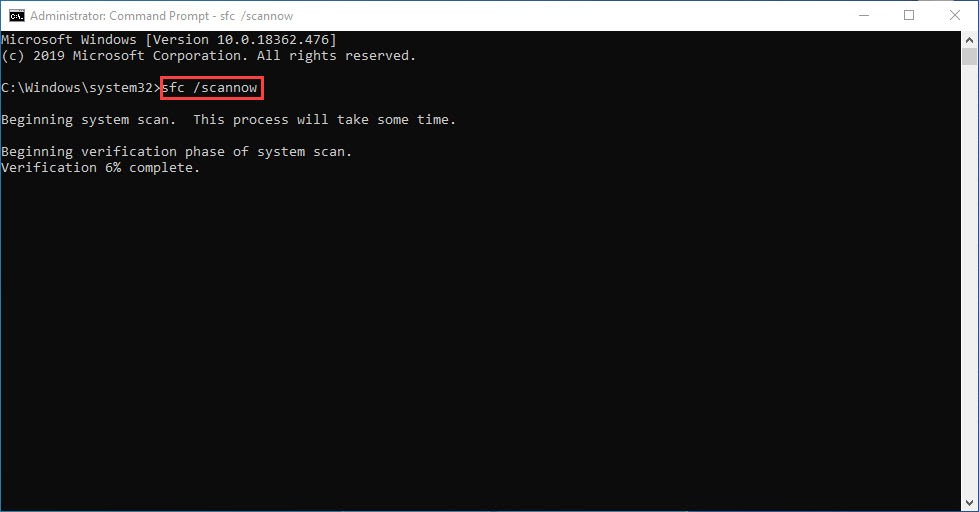
4) You may receive something like the following messages after the verification.
- no errors
- it fixed some errors
- could not fix all errors
- could not fix errors at all
- ……
No matter what message you receive, you can try running dism.exe (Deployment Image Servicing and Management) to further scan the health of your PC.
Step 2. Run dism.exe
1) Run Command Prompt as admin and enter the following commands.
- This command line will scan the health of your PC:
dism.exe /online /cleanup-image /scanhealth
- This command line will restore the health of your PC:
dism.exe /online /cleanup-image /restorehealth
2) After the restore health process finishes, you may get some error messages.
- If restore heath gave you errors, you can always try this command line. This will take up to 2 hours.
dism /online /cleanup-image /startcomponentcleanup
- If you get Error: 0x800F081F with the restore health scan, reboot your PC and run this command line.
Dism.exe /Online /Cleanup-Image /AnalyzeComponentStore
If the System File Check finds any files corrupted, follow the on-screen instructions to repair them, and then restart your computer for the changes to take full effect.
If the problem is still there, you can continue to the next fix.
Fix 5: Check for system updates
You might run into issues if your system is missing some important .NET framework and VC redistributable updates. Normally Windows will update automatically, but you can make sure you have installed all the patches manually.
On Windows 10:
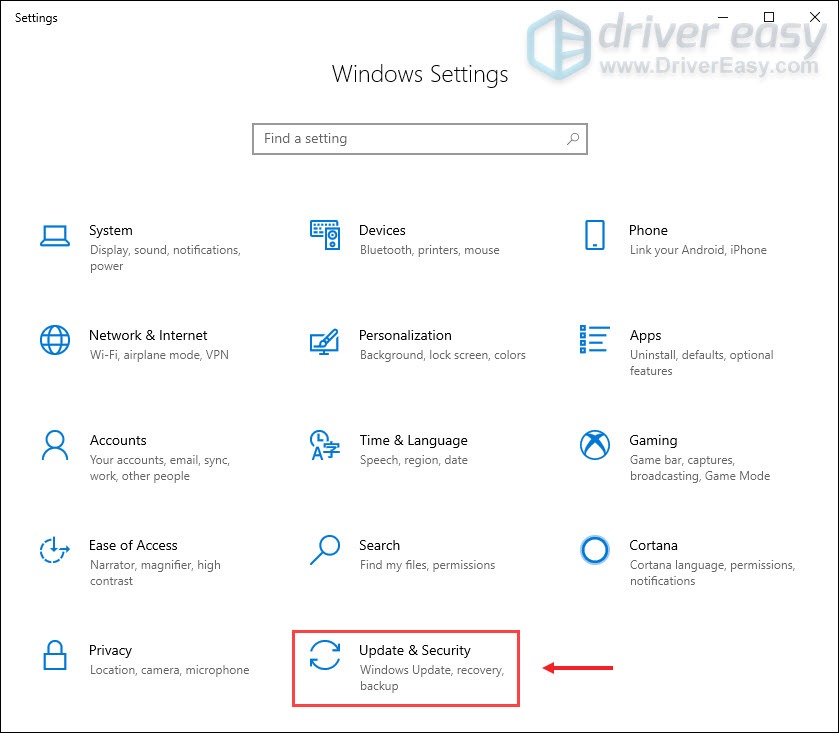
- On your keyboard, press Win+I (the Windows logo key and the i key) to open the Windows Settings app. Click Update & Security.
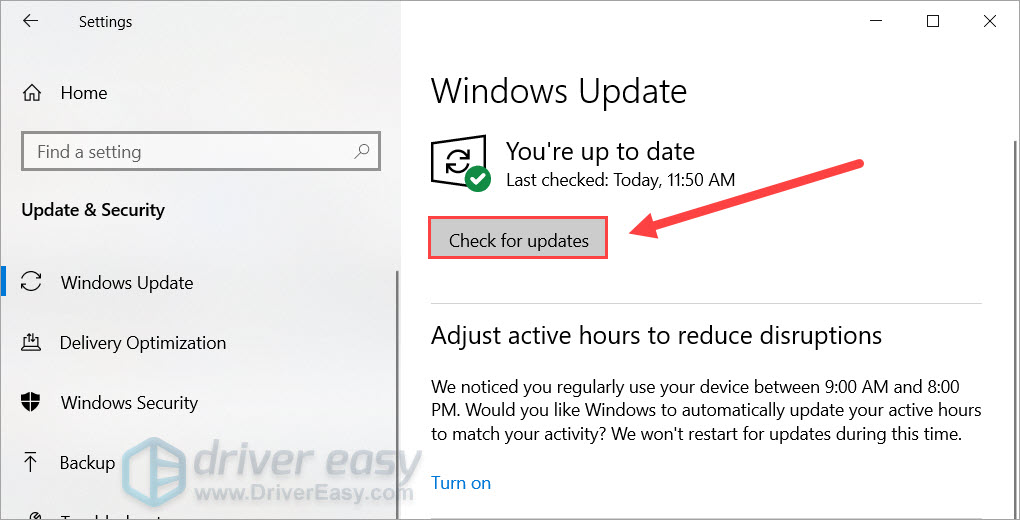
- Click Check for updates. Windows will then download and install the available patches. It might take some time (up to 30 mins).
On Windows 11:
- On your keyboard, hit the Windows key, then type check for updates, then click Check for updates.

- Click Check for updates, and Windows will scan for any available updates.

- If there are available updates, Windows will automatically download them for you. Restart your computer for the update to take effect if needed.

- If there are no available updates, you’ll see You’re up to date like this.

When you’re sure your system is up to date, do a reboot and launch NVIDIA Control Panel.
If the issue persists, you can move on to the next solution.
Fix 6: Remove conflicting programs
According to some users, the conflicting programs include but not are limited to the Opera browser and some major 3D programs. You can start from checking recent changes to your computer, or you can do a clean boot to find out the offenders.
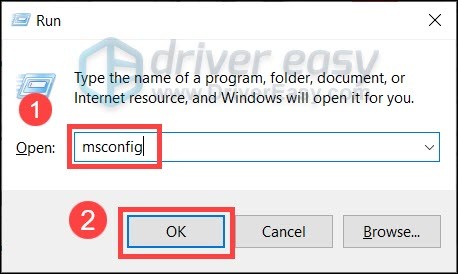
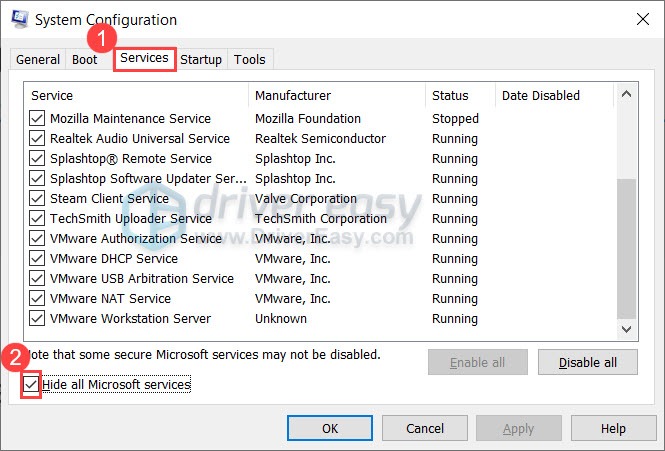
- On your keyboard, press Win+R (the Windows logo key and the r key) at the same time to invoke the Run box. Type or paste msconfig and click OK.
- In the pop-up window, navigate to the Services tab and check the box next to Hide all Microsoft services.
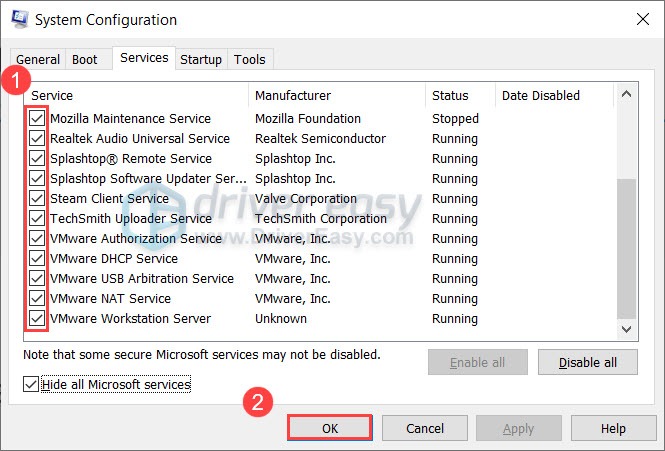
- Uncheck all the services EXCEPT those belong to your hardware manufacturers, such as Realtek, AMD, NVIDIA, Logitech and Intel. Then click OK to apply the changes.
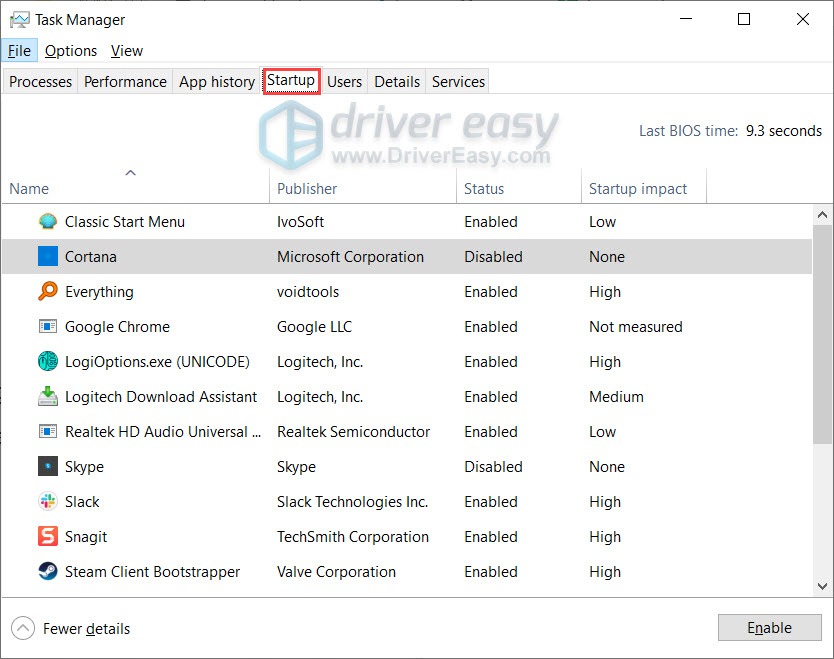
- On your keyboard, press Ctrl, Shift and Esc at the same time to open Task Manager, then navigate to the Startup tab.
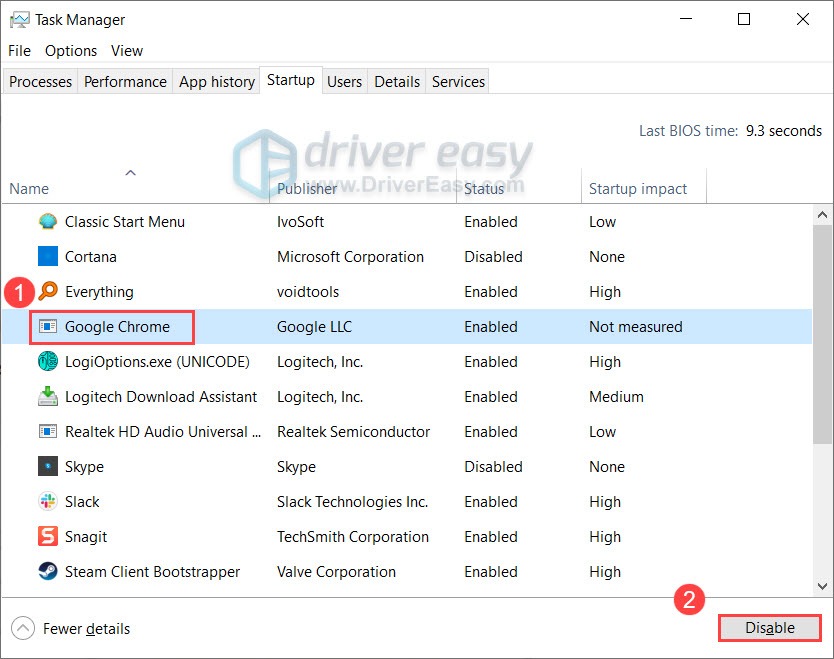
- One at a time, select any programs you suspect might be interfering, and click Disable.
- Restart your PC.
If a clean boot fixes the issue, you can repeat the steps and only disable half of the services and startups to root out the offender.
If the problem lingers on, you can continue to the next fix below.
Fix 7: Rebuild files of NVIDIA Control Panel
The constant crashes can be caused by corrupted files. If that’s the case, you can use the following steps to rebuild the critical components.
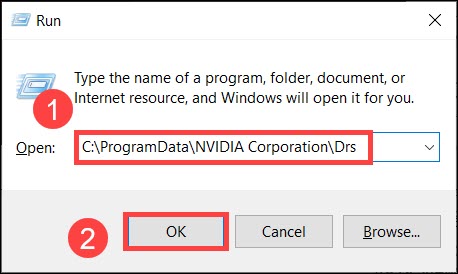
- On your keyboard, press Win+R (the Windows logo key and the R key) and type or paste C:\ProgramData\NVIDIA Corporation\Drs. Then click OK.
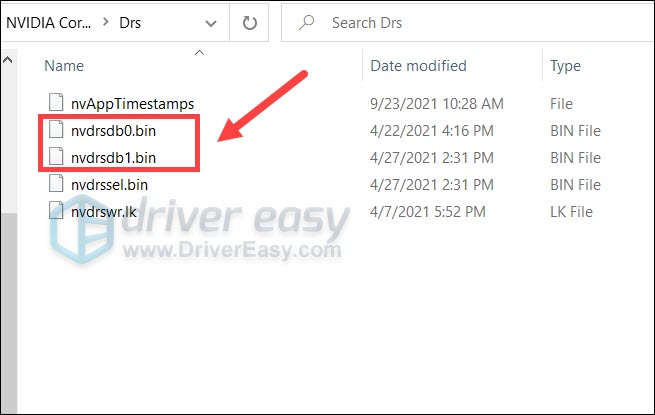
- Delete nvdrsdb0.bin and nvdrsdb1.bin. Next restart your PC and check if NVIDIA Control Panel is working correctly.
Fix 8: Restart NVIDIA Display Container LS service
Your Nvidia Control Panel might not work well if the NVIDIA Display Container LS service is in trouble. To see if this is your case, you can try to restart this service in this way:
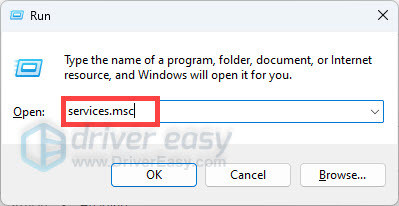
- On your keyboard, press the Windows key and the R key together. Type services.msc and hit Enter.
- Press the N key to fast-locate NVIDIA Display Container LS. Right-click it and select Restart.

See if your Nvidia Control Panel works fine now.
Hopefully this post helps you stop NVIDIA Control Panel from crashing. If you have any questions or ideas, feel free to leave a comment down below.


