When you are trying to enjoy a Friday movie night, it’s upset to see this message in the screen: This display does not support HDCP. Don’t worry, you’re not the only one.
This is a common error that occurs in many displays, and it can be caused by a variety of reasons.
But you can try a general method to fix it first.
General method: Switch off and reboot
HOW: Turn off your TV and unplug all the devices like your set-top box, audio equipment, etc. Let them cool down for about 5 mins. Then plug them back and turn on all the devices.
If the sentence shows up again, go to the next solution.
Check your devices separately
If the general method doesn’t work, you have to check your devices separately to figure out which part goes wrong.
A. Check your cable/adapter:
If the cable/adapter doesn’t work, it could be the reason for the HDCP error. To check whether it’s working or not, just simply insert your cable/adapter to another working device. If your cable/adapter is not working properly, replacing it with a new one will fix the error.
B. Check your set-top box:
If your set-top box can’t react to your command, it might be broken. Contact the manufacturer for customer service to fix your set-top box or get a new one.
C. Check your TV set:
Check your TV set physically and check the software inside.
1. Fix your TV
Does your TV have any physical issues? Will it make some noise when you use it? A bulging capacitor inside your TV could be the reason for the error. So fix your TV set to solve the “not support HDCP” problem.
2. Update your TV software
Nowadays, TV has software inside to support more and more features. Outdated software may cause this HDCP error. So you can go to the manufacturer’s official website to download and install the latest software. This way can help you fix the error.
In this article, we take Sony as an example to demonstrate steps.
1) Go to Sony official website.
2) Type your TV model name into the search box and click Search.
3) Click Download and download the latest software.
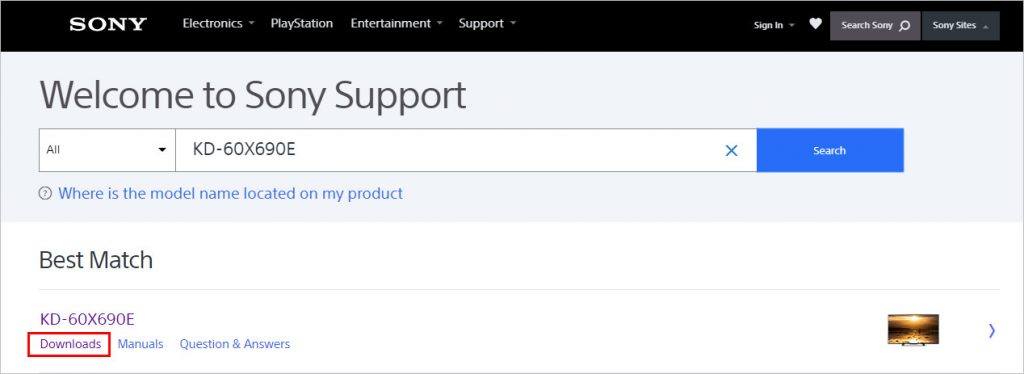
4) Follow the instructions on the website and update your TV software. Then check to see the HDCP sentence will appear or not.
D. Check your Computer:
When you try to play a video stored on your computer on a TV, if you see “This display does not support HDCP” on the screen, you will need to check the computer in addition to the device mentioned above. You’re suggested to check drivers and the operating system on your computer. Because they could be the reason for HDCP error.
1. Update your driver
The HDCP problem is probably being caused by driver issues. Usually, it’s your graphics card driver. To fix it, you can try to update the drivers. If you don’t have the time, patience or computer skills to update the drivers manually, you can do it automatically with Driver Easy.
Driver Easy will automatically recognize your system and find the correct drivers for it. You don’t need to know exactly what system your computer is running, you don’t need to risk downloading and installing the wrong driver, and you don’t need to worry about making a mistake when installing.
You can update your drivers automatically with either the FREE or the Pro version of Driver Easy. But with the Pro version it takes just 2 clicks (and you get full support and a 30-day money back guarantee):
1) Download and install Driver Easy.
2) Run Driver Easy and click Scan Now. Driver Easy will then scan your computer and detect any problem drivers.
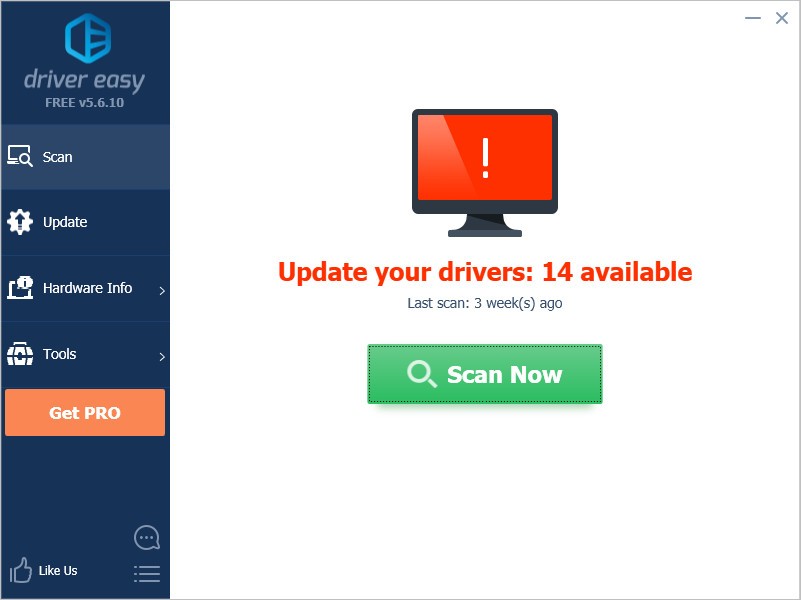
3) Click the Update button next to a device to automatically download the correct version of their driver, then you can manually install the driver (you can do this with the FREE version).
Or click Update All to automatically download and install the correct version of all the drivers that are missing or out of date on your system (this requires the Pro version – you’ll be prompted to upgrade when you click Update All).
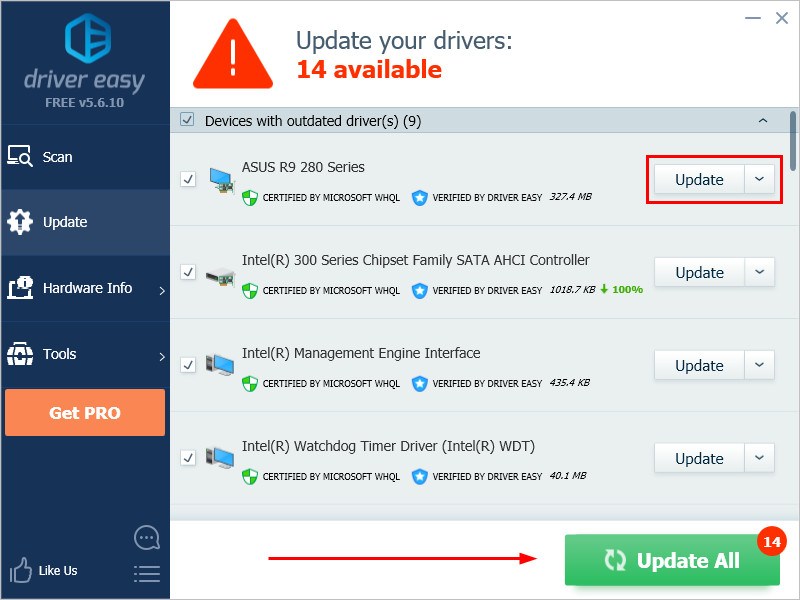
4) Restart your computer and then connect it with your TV set to see if the sentence will appear or not.
2. Update your system
“This display does not support HDCP” error could be caused by the incompatible operating system on your computer. If so, Microsoft will fix it in the next Windows Update program. Therefore, installing the latest update should help.
1) On your keyboard, press the Windows Key (with windows logo) and I together.
2) Click Update & Security.
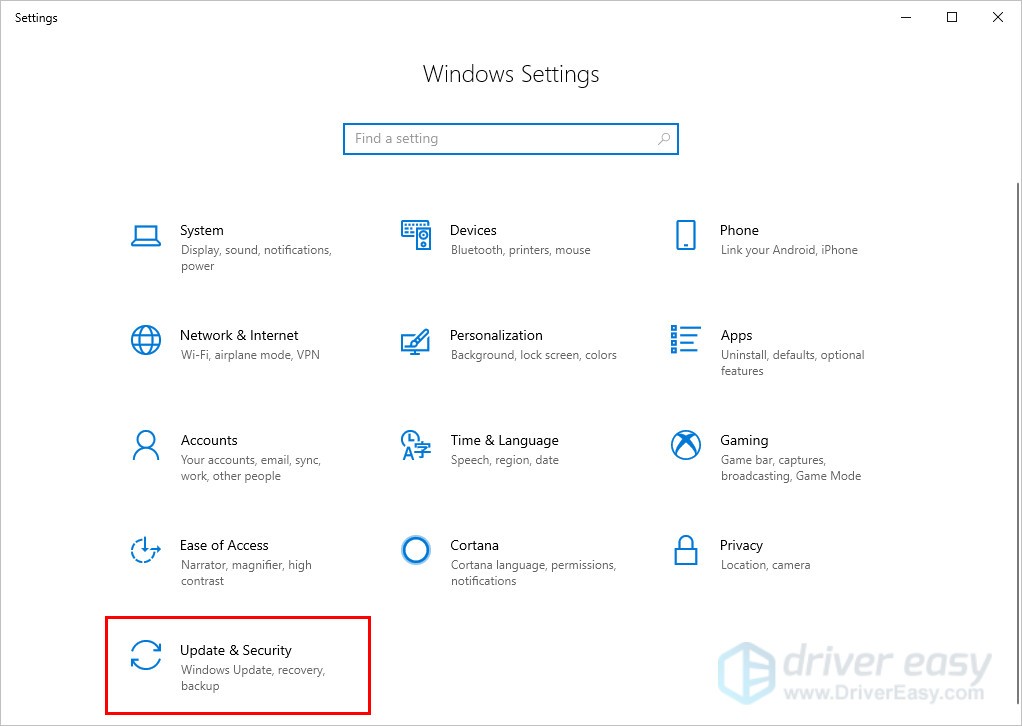
3) Click Check for updates. It will find the latest update for you. Then click Install Now.
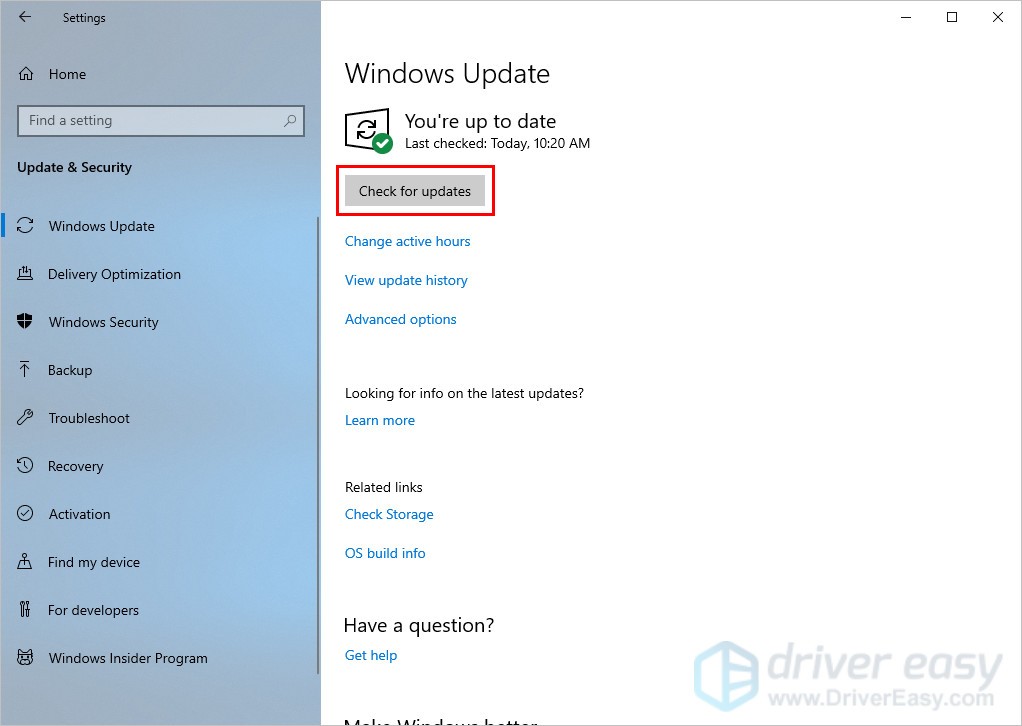
4) Follow the on-screen instructions to finish the process.
5) Restart your computer and then check the message will appear or not.
Note: If the above two methods can’t help you solve the problem, you’re recommended to contact your graphics card manufacturer for customer service.
Hope this article can help you solve the problem. Thanks for reading and you’re welcome to leave comments and questions below. We’ll try our best to help.


