
If you’re on Windows 10, and you’re seeing this error saying that USB device not recognized after you plug in a device, you’re not alone. Many Windows users say that they have seen this notification pop up.
Annoying as it seems, it’s possible to fix. Here are 7 of the most effective solutions for you to try. You may not need to try every one of them; just work from the top down until you find the one fix that works for you.
- Restart
- Try a different computer
- Plug out other USB devices
- Change the Power Management setting for the USB Root Hub
- Update the USB port driver
- Change power supply setting
- Change the USB selective suspend settings
1. Restart
Sometimes, a simple reboot fixes an unrecognized USB device. Plug your USB device out, wait for a few minutes, then restart your computer. Plug your USB device back in again.
2. Try a different computer
Try to plug your USB device into a different computer. If it doesn’t work on the second PC, your device could be at fault. You may want to get it repaired or buy a new one.
3. Plug out other USB devices
Too many USB devices on the same machine might create a conflict, which could stop the running of some devices.
To avoid possible conflict among the devices, it is suggested that you disconnect other USB devices and see if the device that you intend to use works.
4. Change the Power Management setting for the USB Root Hub
- On your keyboard, press the Windows logo key and R at the same time. Type devmgmt.msc and press Enter.
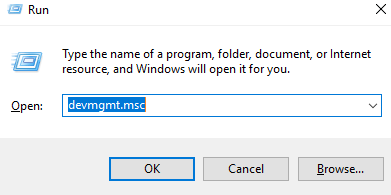
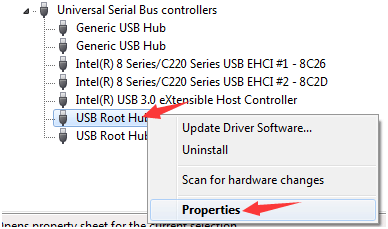
- Click the down arrow to expand Universal Serial Bus controllers. Right-click USB Root Hub option and click Properties.
- Go to Power Management tab and uncheck the Allow the computer to turn off this device to save power. Click OK.
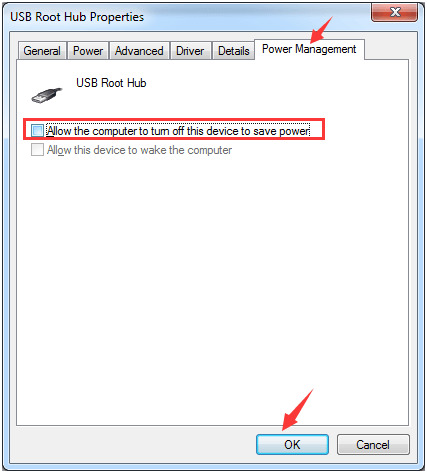
- If you have more USB Root Hubs, you need to repeat this operation a couple of times. Please remember to click OK after each performance.
After the settings, plug your USB device back in to see if your computer can recognize it.
If your USB device is still not working after this, please check the Allow the computer to turn off this device to save power back on.
5. Update the USB port driver
If the above methods don’t work to solve your problem, you’re likely using the wrong USB driver altogether.
There are two ways for you to update your USB port driver: manually or automatically.
Manual driver update – You can update your USB port driver manually by going to the manufacturer’s website of your PC, and searching for the most recent correct driver for it. Be sure to choose the only driver that is compatible with your variant of Windows.
Automatic driver update – If you don’t have the time, patience, or computer skills to update your drivers manually, you can do it automatically with Driver Easy. Driver Easy will automatically recognize your system and find the correct drivers for it. You don’t need to know exactly what system your computer is running, you don’t need to risk downloading and installing the wrong driver, and you don’t need to worry about making a mistake when installing.
You can update your drivers automatically with either the 7 days free trial or the Pro version of Driver Easy. It takes just 2 clicks, and you get full support and a 30-day money-back guarantee with the Pro version:
- Download and install Driver Easy.
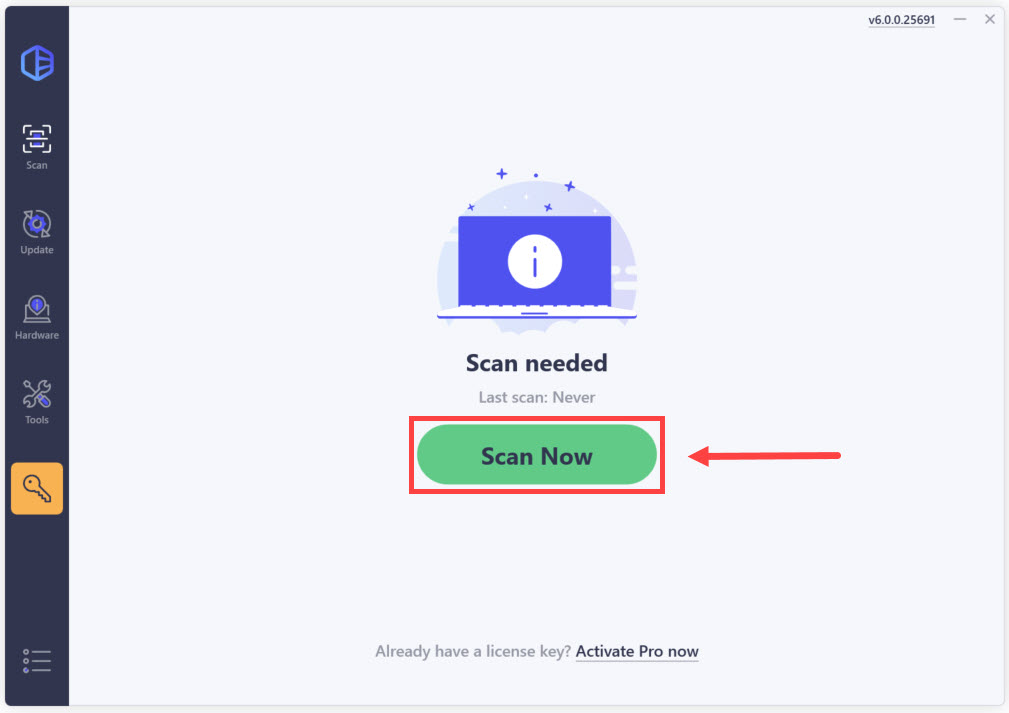
- Run Driver Easy and click the Scan Now button. Driver Easy will then scan your computer and detect any problem drivers.
- Click the Activate & Update button next to the flagged device to automatically download and install the correct version of this driver.
Or click Update All to automatically download and install the correct version of all the drivers that are missing or out of date on your system (You’ll need the Pro version for this – when you select Update All, you’ll get a prompt to upgrade. If you’re not prepared to purchase the Pro version yet, Driver Easy provides a 7-day trial at no cost, granting access to all Pro features like fast downloads and easy installation. No charges will occur until after your 7-day trial period ends.)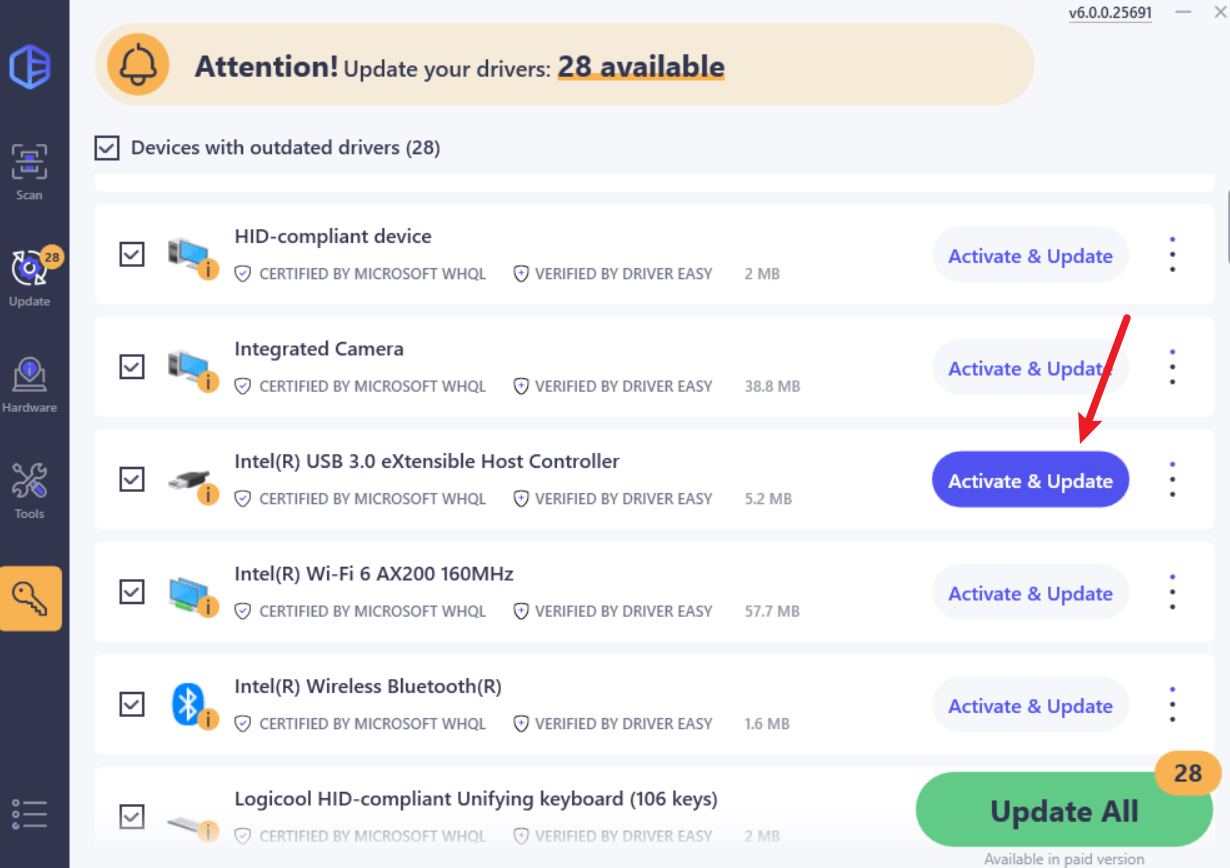
- Restart your computer for the change to take effect.
6. Change the power supply setting
- Follow the path: Control Panel > Hardware and Sound > Power Options.
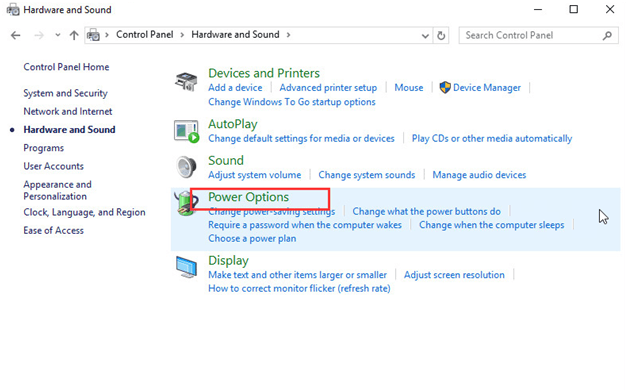
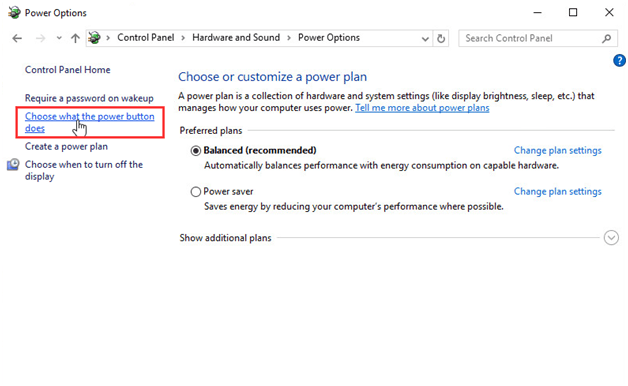
- Click Choose what the power button does.
- Click Change settings that are currently unavailable.
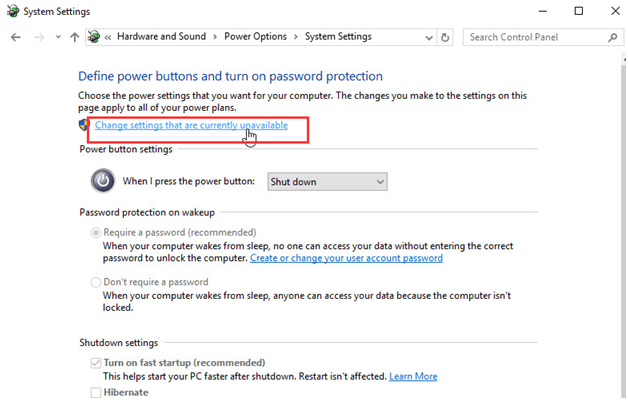
- Uncheck Turn on fast startup and press Save changes.
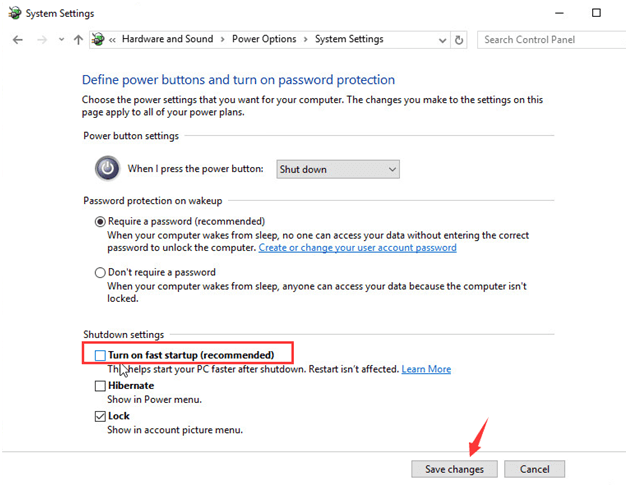
- Restart your computer and plug in the USB device to see if it works.
If your USB device still doesn’t work after this change, please change the settings back and follow the next method.
7. Change the USB selective suspend settings
- Go to Control Panel and click Power Options.
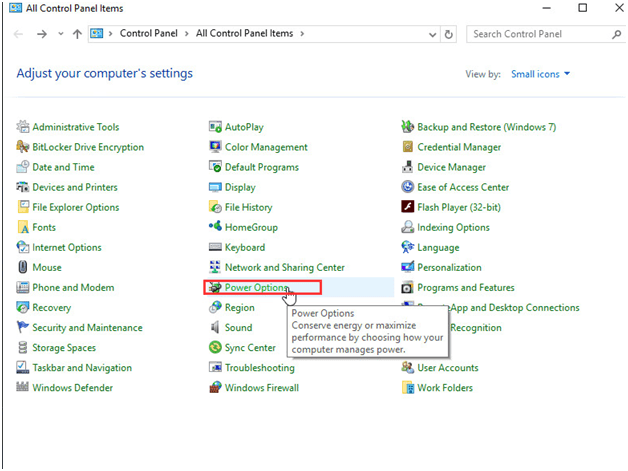
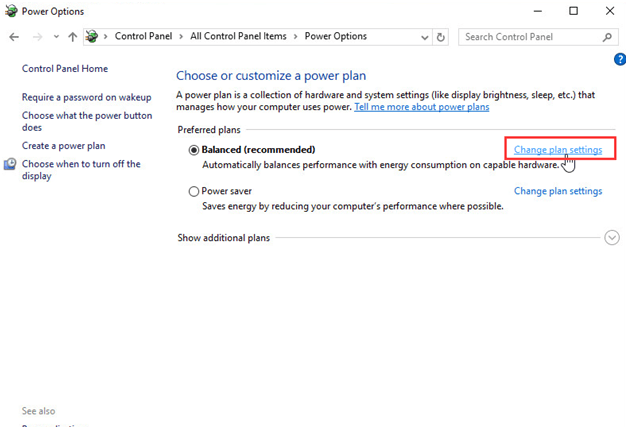
- Click Change plan settings.
- Click Change advanced power settings.
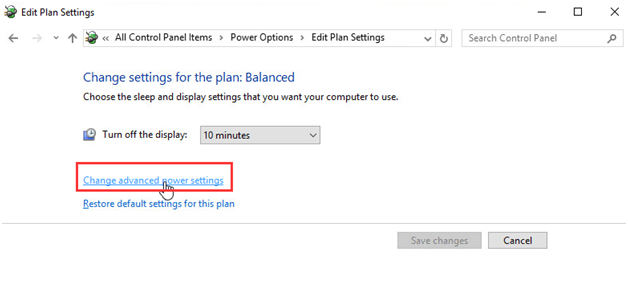
- Expand USB settings and USB selective suspend settings.
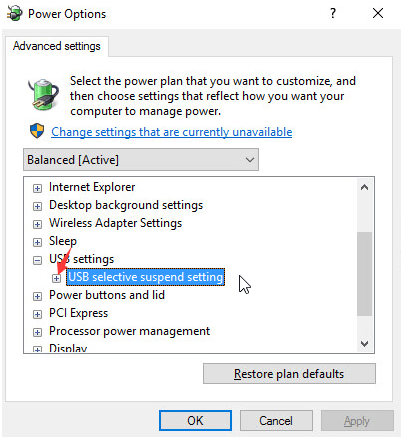
- Disable both On battery and Plugged in settings.
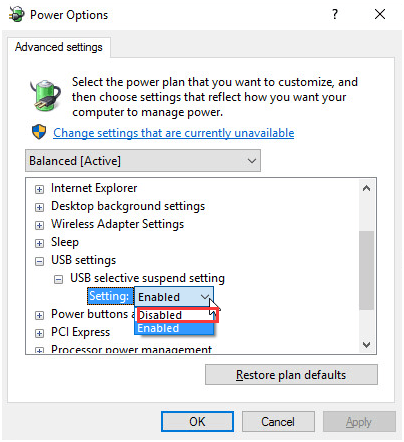
- Click Apply and OK.


