


Your Windows 10 computer won’t shut down? You must be very confused and frustrated. But don’t give up hope… We’ve found the answer for you.
Try the following tried and true solutions. And if the previous one solution didn’t solve your problem, try another one.
Solution 1: Turn off fast startup feature
As many users reported, to turn off the fast startup feature help them get rid of the error. Thus once you are facing such error, try this quick fix first.
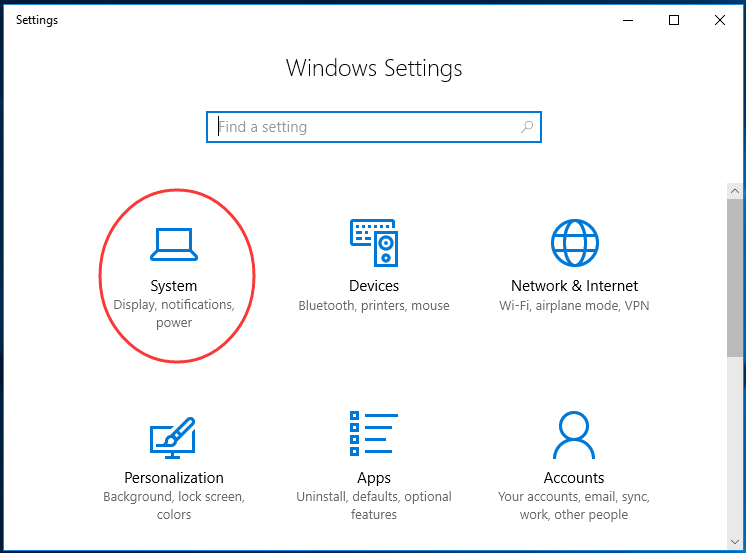
1) Press Windows key + I key to open the Settings window. Then click System.
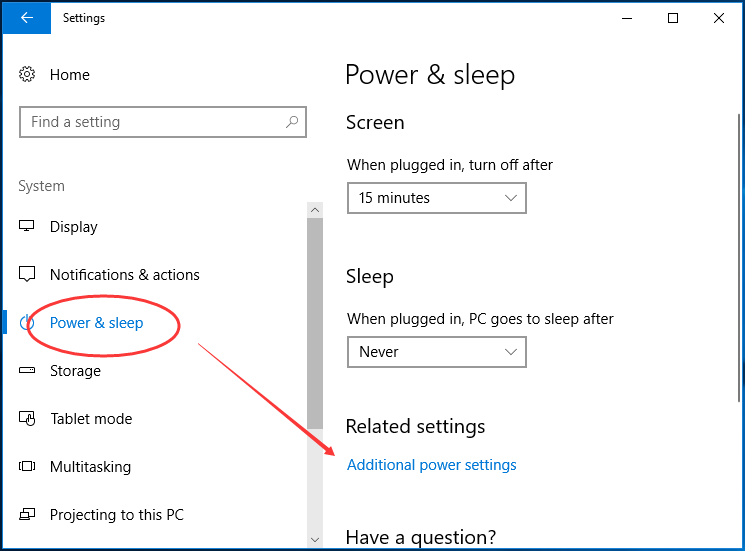
2) Click Power & sleep > Additional power settings.
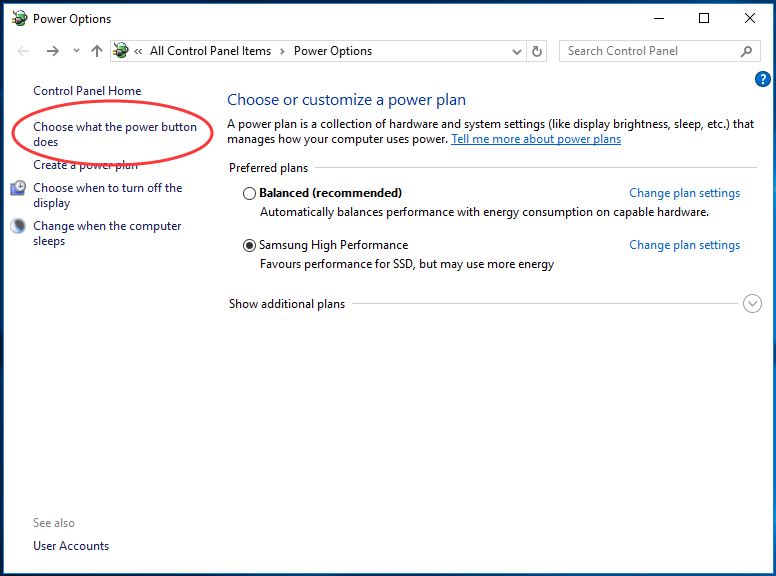
3) Click Choose what the power button does.
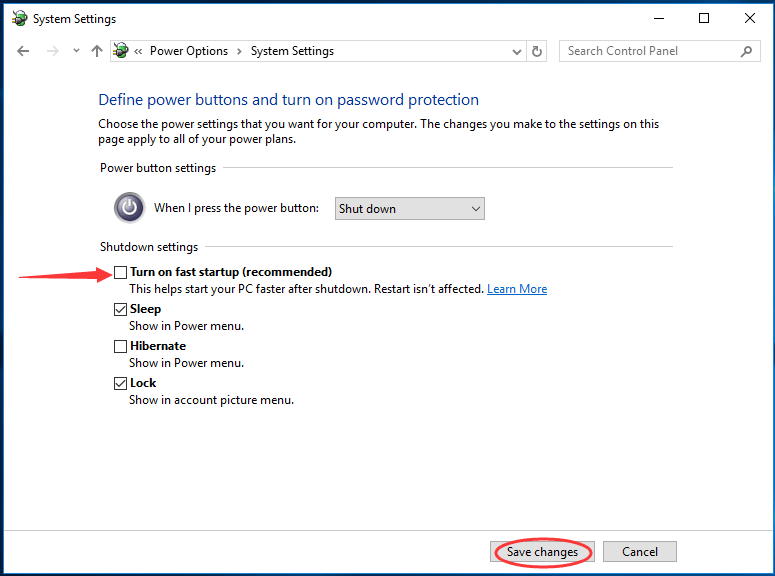
4) Click Change settings that are currently unavailable.
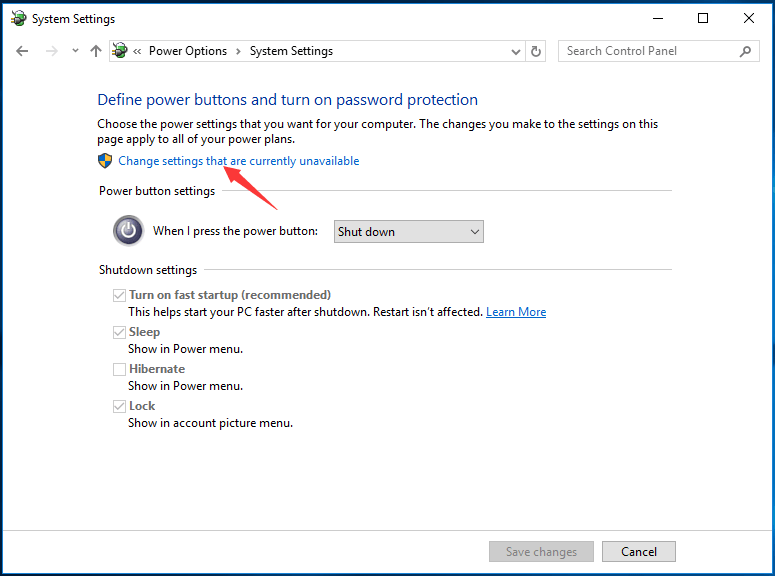
5) Uncheck Turn on fast startup. Then click Save changes.
Now try to shut down your Windows 10 to see if the error has been fixed.
Solution 2: Update your device driver
Your computer won’t shut down normally could be caused by the wrong, corrupted device drivers on your Windows. You could probably solve it through updating all the available drivers on your Windows.
There are two ways to update your device drivers: manually or automatically.
Manually — You can update your device drivers manually by going to the manufacturer’s website, and searching for the most recent correct driver for each. Be sure to choose only drivers that are compatible with your variant of Windows versions. In this way, you need to check for the drivers that needs to be updated one by one.
Automatically — If you don’t have the time, patience or computer skills to check and update your device drivers manually, you can, instead, do it automatically with Driver Easy. Driver Easy will automatically recognize your system and find the correct drivers for your exact devices, and your variant of Windows versions, and it will download and install them correctly:
1) Download and install Driver Easy.
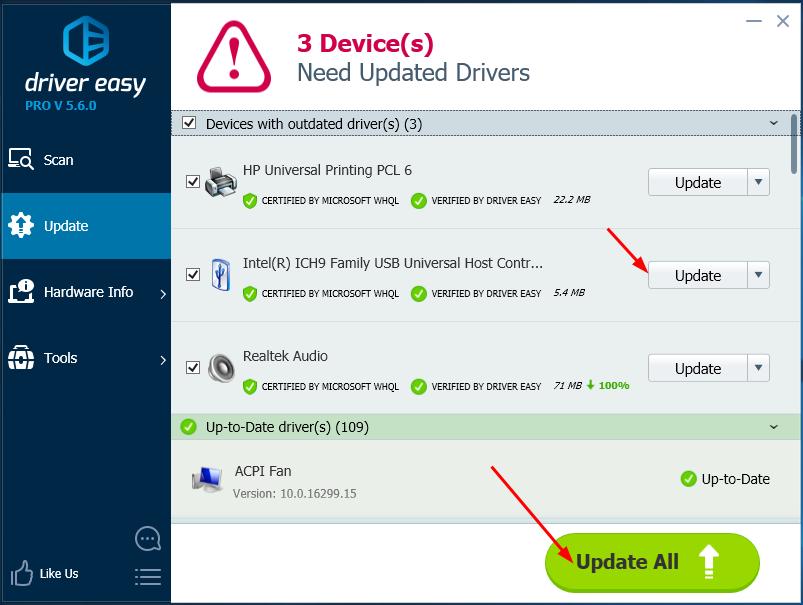
2) Run Driver Easy and click the Scan Now button. Driver Easy will then scan your computer and detect any problem drivers.

3) Click the Update button next to any flagged driver to automatically download and install the correct version of that driver (you can do this with the FREE version).
Or click Update All to automatically download and install the correct version of all the drivers that are missing or out of date on your system. (This requires the Pro version which comes with full support and a 30-day money back guarantee. You’ll be prompted to upgrade when you click Update All.)
4) Restart your computer and after a while try to shut it down to see if it goes fine.
I am working on Windows 7 Proffeional 32 bit. How can I get I get it fixed? Follows the steps on the registry but “HiberbootEnabled” is not there. Please anyone hep me out.
It appears the help on here is about the same as a hog gone wild under a juniper tree!
first one worked, thanks a lot,
The first one worked, thanks a lot, seems to be a bug with Windows 10 Fast Startup option.
First one worked, thanks.
This solved it for me:
HKEY_LOCAL_MACHINESYSTEMCurrentControlSetControlSession ManagerPowerHiberbootEnabled=0
It’s already “zero” there. Did you mean to change it to 0? or to 1?
Hey, maybe it wasn’t 0 for him xD
Thanks. THIS IS THE ONLY SOLUTION THAT WORKED.
Tried it and it didn’t work.