Is Windows 11 the future? So far it’s still hard to tell. But right now, many users are already having audio problems on the latest Windows. If you’re also having no sound issues on Windows 11, don’t worry. In this tutorial, we’ll show you how to fix that easily and quickly.
Try these fixes:
You might not need to try them all. Simply work your way down until you find the one that does the charm.
- Make sure your device is working
- Run the troubleshooter
- Set up your output device properly
- Update your audio driver
- Check for the latest system updates
- Scan and pair Windows
- Reset Windows
Fix 1: Make sure your device is working
Before you start, you need to make sure the output device (speaker/headphone) is working without any issues.
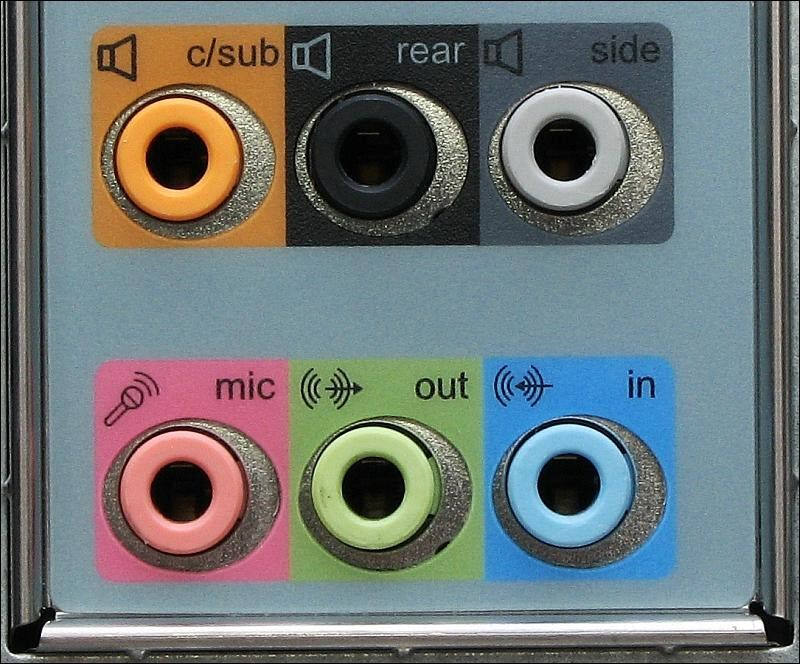
First you need to make sure the device is connected to the right port of your PC. You can also check by testing it on another computer or device (e.g. your phone). Note that some headphones come with switches that need to be turned on manually.
If the output device works as expected, simply continue to the next step.
Fix 2: Run the troubleshooter
Windows has a built-in troubleshooter that fixes basic issues automatically. You can run the troubleshooter and see if it’s just the wrong setting.
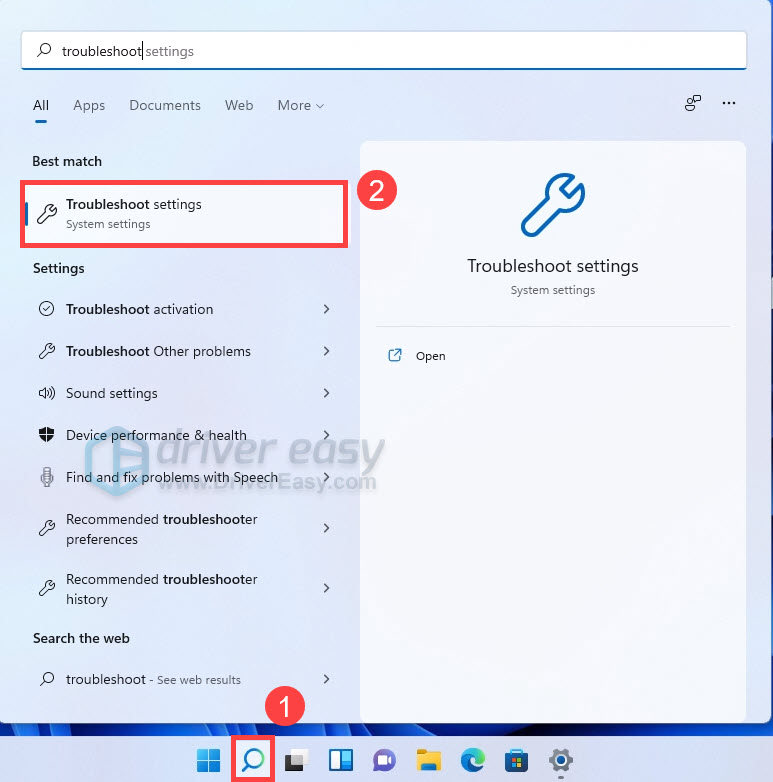
- On the taskbar, click the search icon and type troubleshooting. Select Troubleshoot settings.
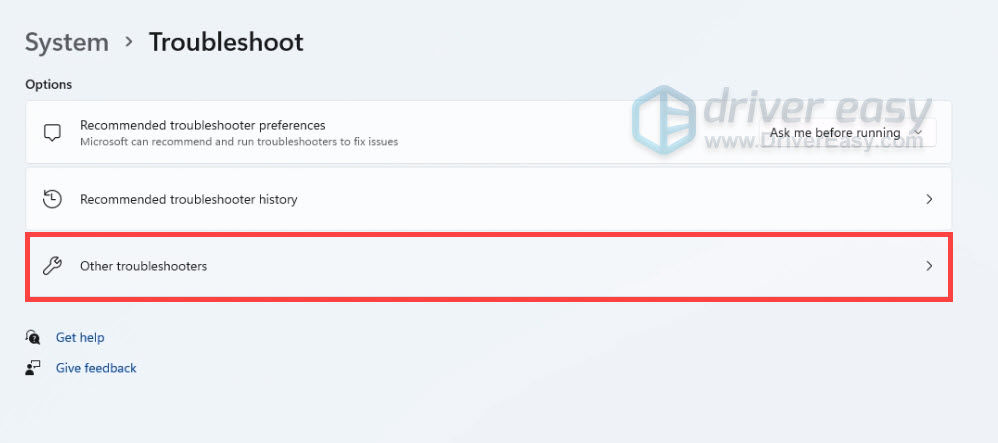
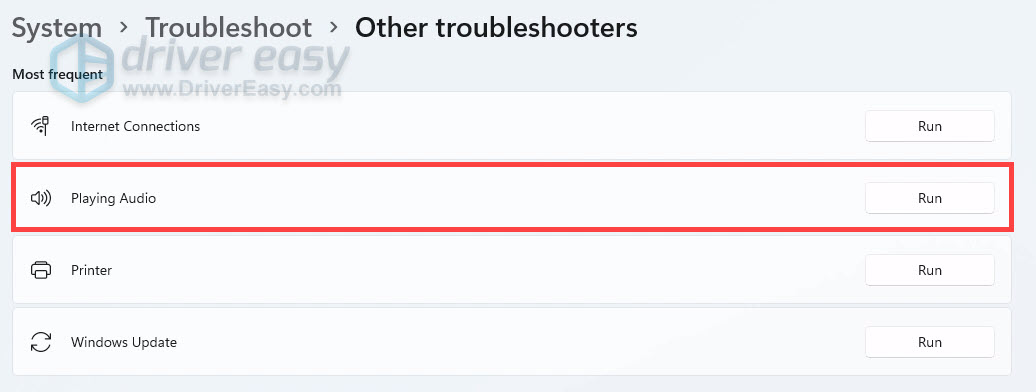
- Select Other troubleshooters.
- Select Playing Audio. Then follow the on-screen instructions to proceed.
If the troubleshooter doesn’t get the audio back, you can take a look at the next fix.
Fix 3: Configure output device properly
Next you need to check if you have configured the audio settings correctly. Normally Windows will take care of this automatically, but it’s best you take a look yourself.
Here’s how:
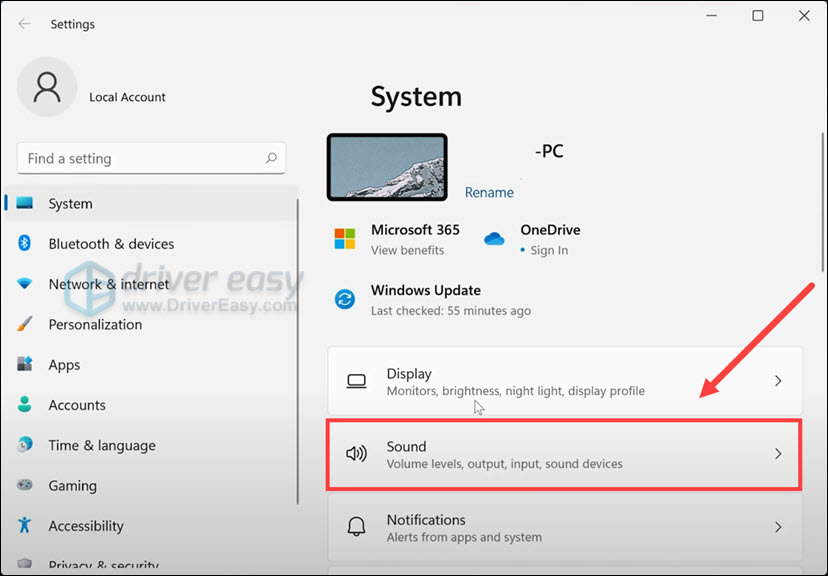
- On your keyboard, press Win+I (the Windows key and the i key) to open Windows Settings. Click Sound.
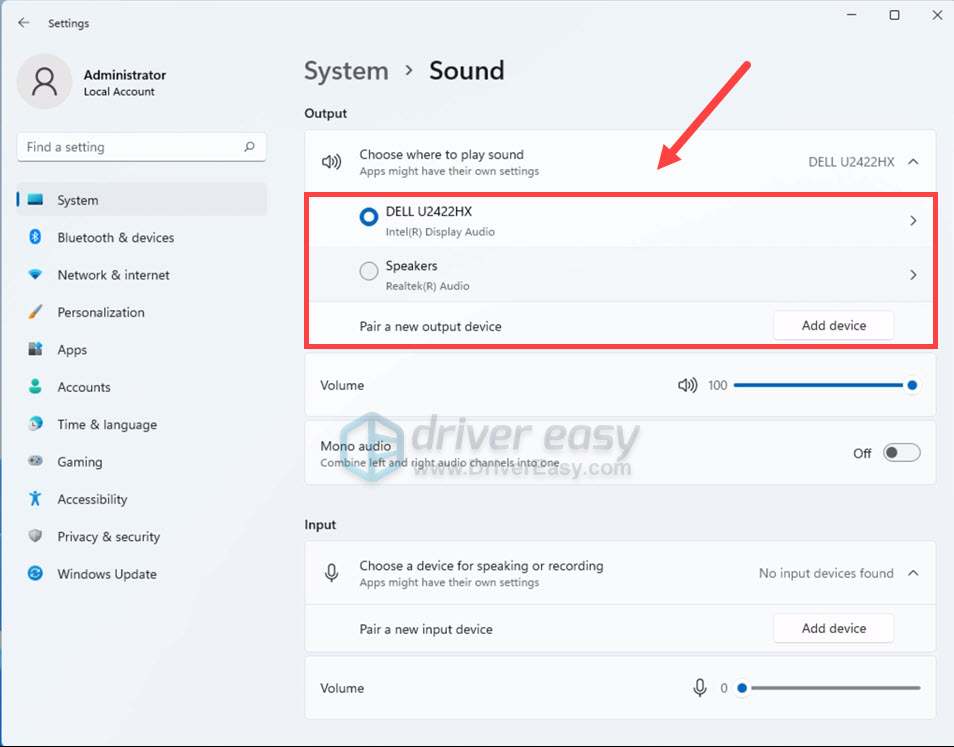
- Under Output, make sure to select your desired output device. Then click the device to view its property.
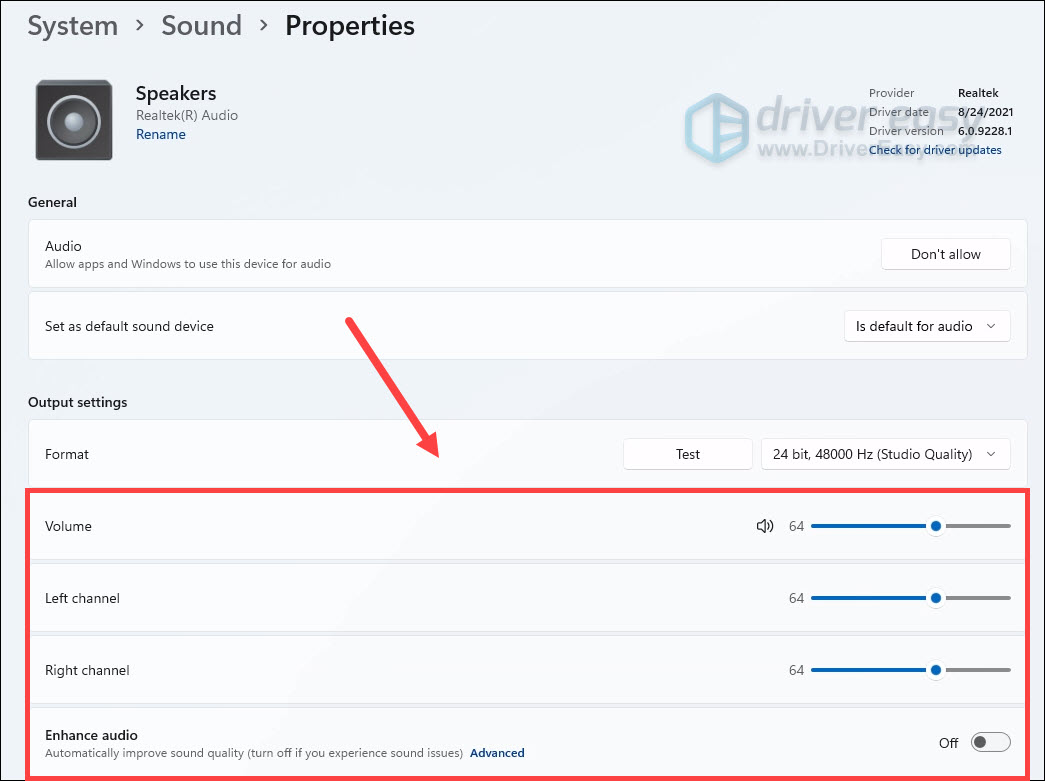
- Under Output settings, you can test different output formats. Make sure Volume is set to above 50. You can also turn Enhance audio on and off to see if that helps.
If the issue lingers on, check out the next fix below.
Fix 4: Update your audio driver
There’re multiple reports suggesting that the no sound issue is caused by an outdated or incompatible audio driver. Some drivers might not work properly if you upgrade from Windows 10. For Windows 11 to function properly, you need to make sure you have the latest correct audio driver.
You can update the audio driver manually, by visiting the motherboard manufacturer’s website, downloading the latest correct installer and installing step by step. But if you’re not comfortable playing with device drivers, you can use Driver Easy to scan, repair and update drivers automatically.
- Download and install Driver Easy.
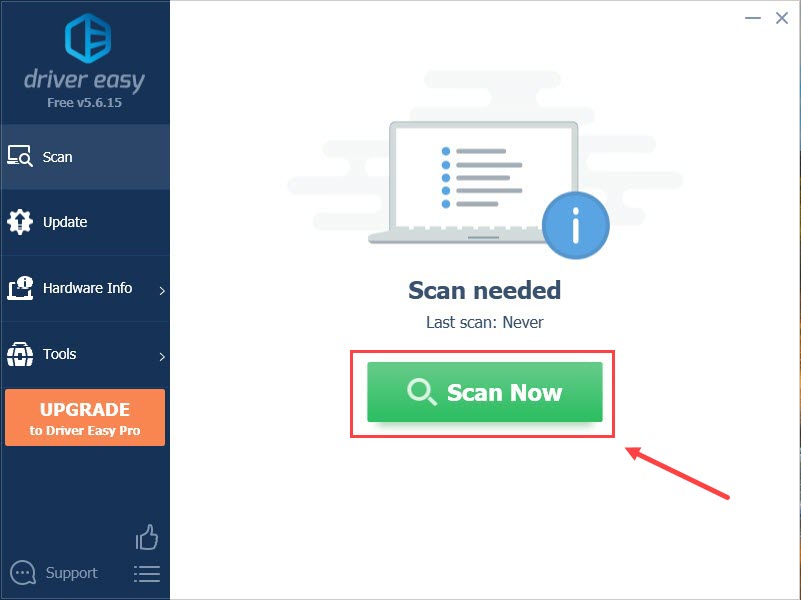
- Run Driver Easy and click the Scan Now button. Driver Easy will then scan your computer and detect any problem drivers.
- Click Update All to automatically download and install the correct version of all the drivers that are missing or out of date on your system.
(This requires the Pro version – you’ll be prompted to upgrade when you click Update All. If you don’t want to pay for the Pro version, you can still download and install all the drivers you need with the free version; you just have to download them one at a time, and manually install them, the normal Windows way.)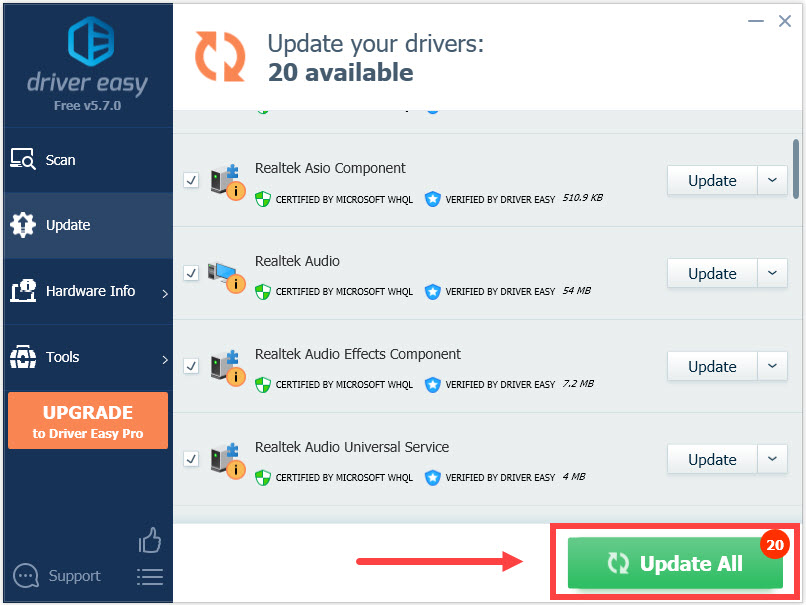
After updating all the drivers, restart your PC and check if the issue persists.
If the latest drivers can’t fix the problem, you can take a look at the next fix.
Fix 5: Check for the latest system updates
Windows 11 is new and is under active development. So it’s possible the cure to your problem lies in the latest patch. To get it, you can scan for updates manually and Windows will install them automatically.
- On your keyboard, press Win+R (the Windows logo key and the R key) to invoke the Run box. Type or paste control update and click OK.

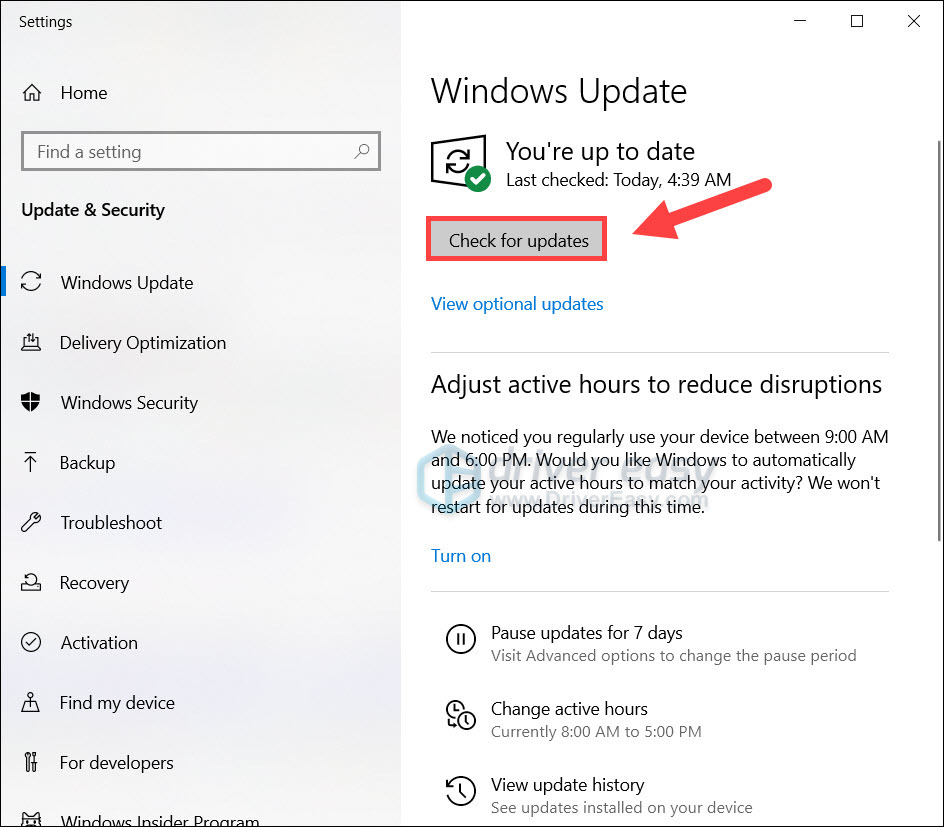
- Click Check for updates. Windows will then check for available updates. (Or click Restart now if it prompts “Restart required”)
Fix 6: Scan and pair Windows
In the worst case, you’re dealing with a system issue. It could mean that some critical files are corrupted or missing from your system, and it could also mean that some settings are misconfigured. Either way, if you don’t want a clean reinstall, you can run a scan and find out what went wrong.
Step 1. Scan corrupt files with System File Checker
1) On your keyboard, press the Windows logo key and R at the same time to open the Run box. Type cmd and press Ctrl+Shift+Enter to run Command Prompt as administrator.

Click Yes when prompted for permission to make changes to your device.
2) In the Command Prompt, type the following command and hit Enter.
sfc /scannow
3) System File Check will begin to scan all system files and repair any corrupted or missing ones it detected. This may take 3-5 minutes.

4) You may receive something like the following messages after the verification.
- no errors
- it fixed some errors
- could not fix all errors
- could not fix errors at all
- ……
No matter what message you receive, you can try running dism.exe (Deployment Image Servicing and Management) to further scan the health of your PC.
Step 2. Run dism.exe
1) Run Command Prompt as admin and enter the following commands.
- This command line will scan the health of your PC:
dism.exe /online /cleanup-image /scanhealth
- This command line will restore the health of your PC:
dism.exe /online /cleanup-image /restorehealth
2) After the restore health process finishes, you may get some error messages.
- If restore heath gave you errors, you can always try this command line. This will take up to 2 hours.
dism /online /cleanup-image /startcomponentcleanup
- If you get Error: 0x800F081F with the restore health scan, reboot your PC and run this command line.
Dism.exe /Online /Cleanup-Image /AnalyzeComponentStore
If the System File Check finds any files corrupted, follow the on-screen instructions to repair them, and then restart your computer for the changes to take full effect.
Fix 7: Reset Windows
If the sound issues only appear after upgrading from Windows 10, you might need to do a clean reinstall—we always recommend a clean reinstall instead of direct upgrade so as to avoid strange issues.
You can revert the system to factory default settings with the Windows built-in feature:
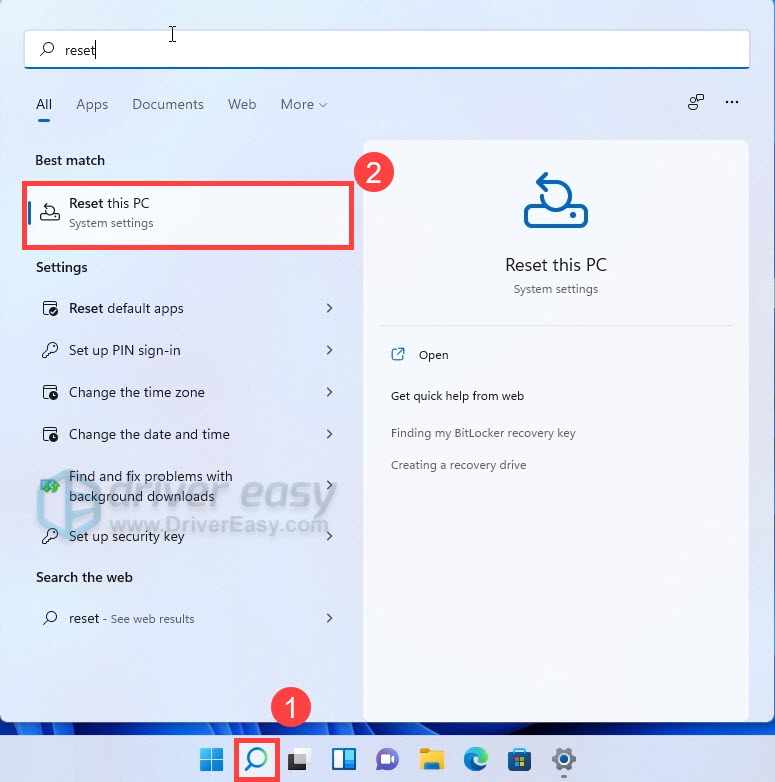
- On your taskbar, click the search icon and type reset. Click Reset this PC.
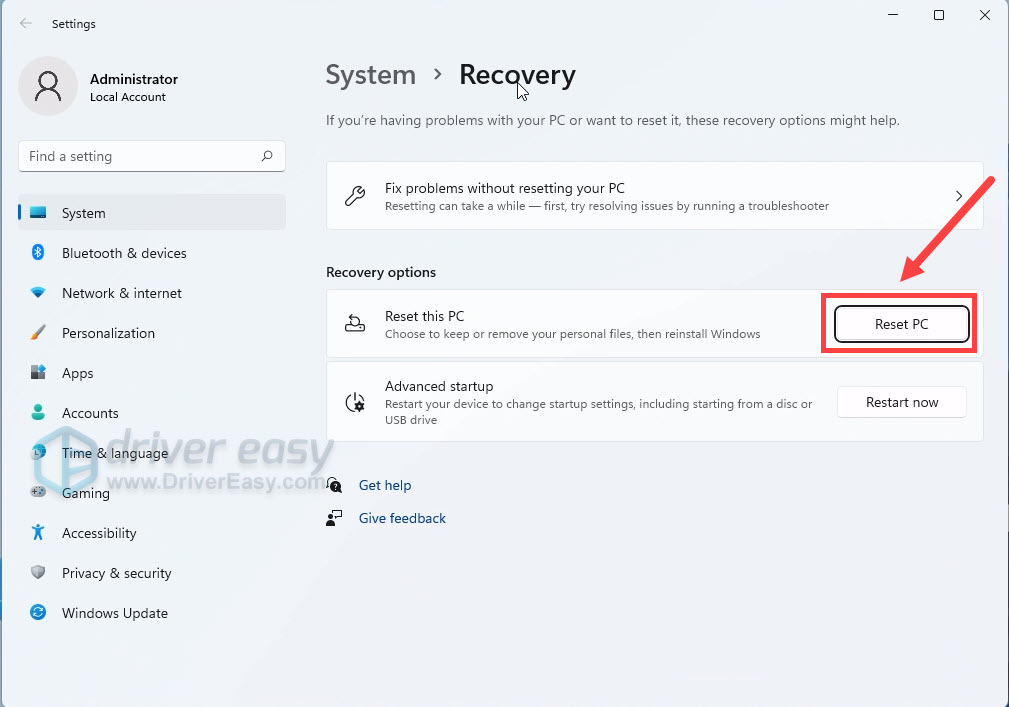
- Under Recovery options, click Reset PC.
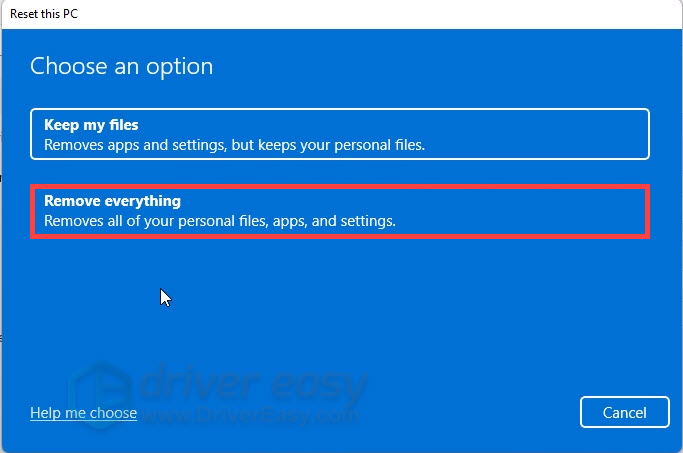
- In the pop-up window, select Remove everything.
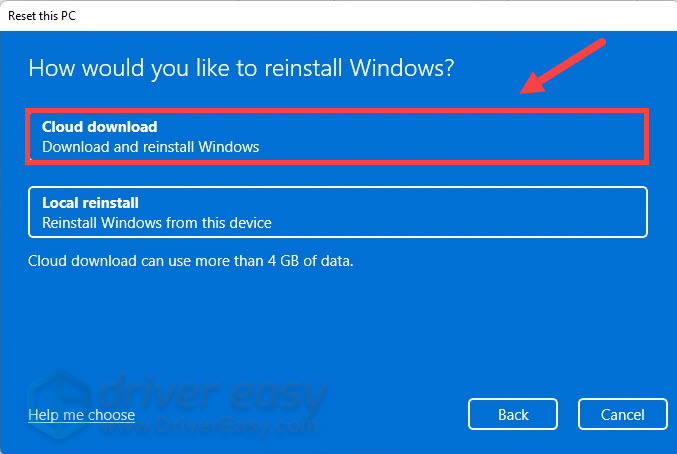
- Click Cloud download. This will get you the latest system files.
- Follow the on-screen instructions to reset your PC.
Hopefully this post helps you fix the no sound issue in Windows 11. If you have any questions or ideas, simply leave a comment and we’ll get back to you.


