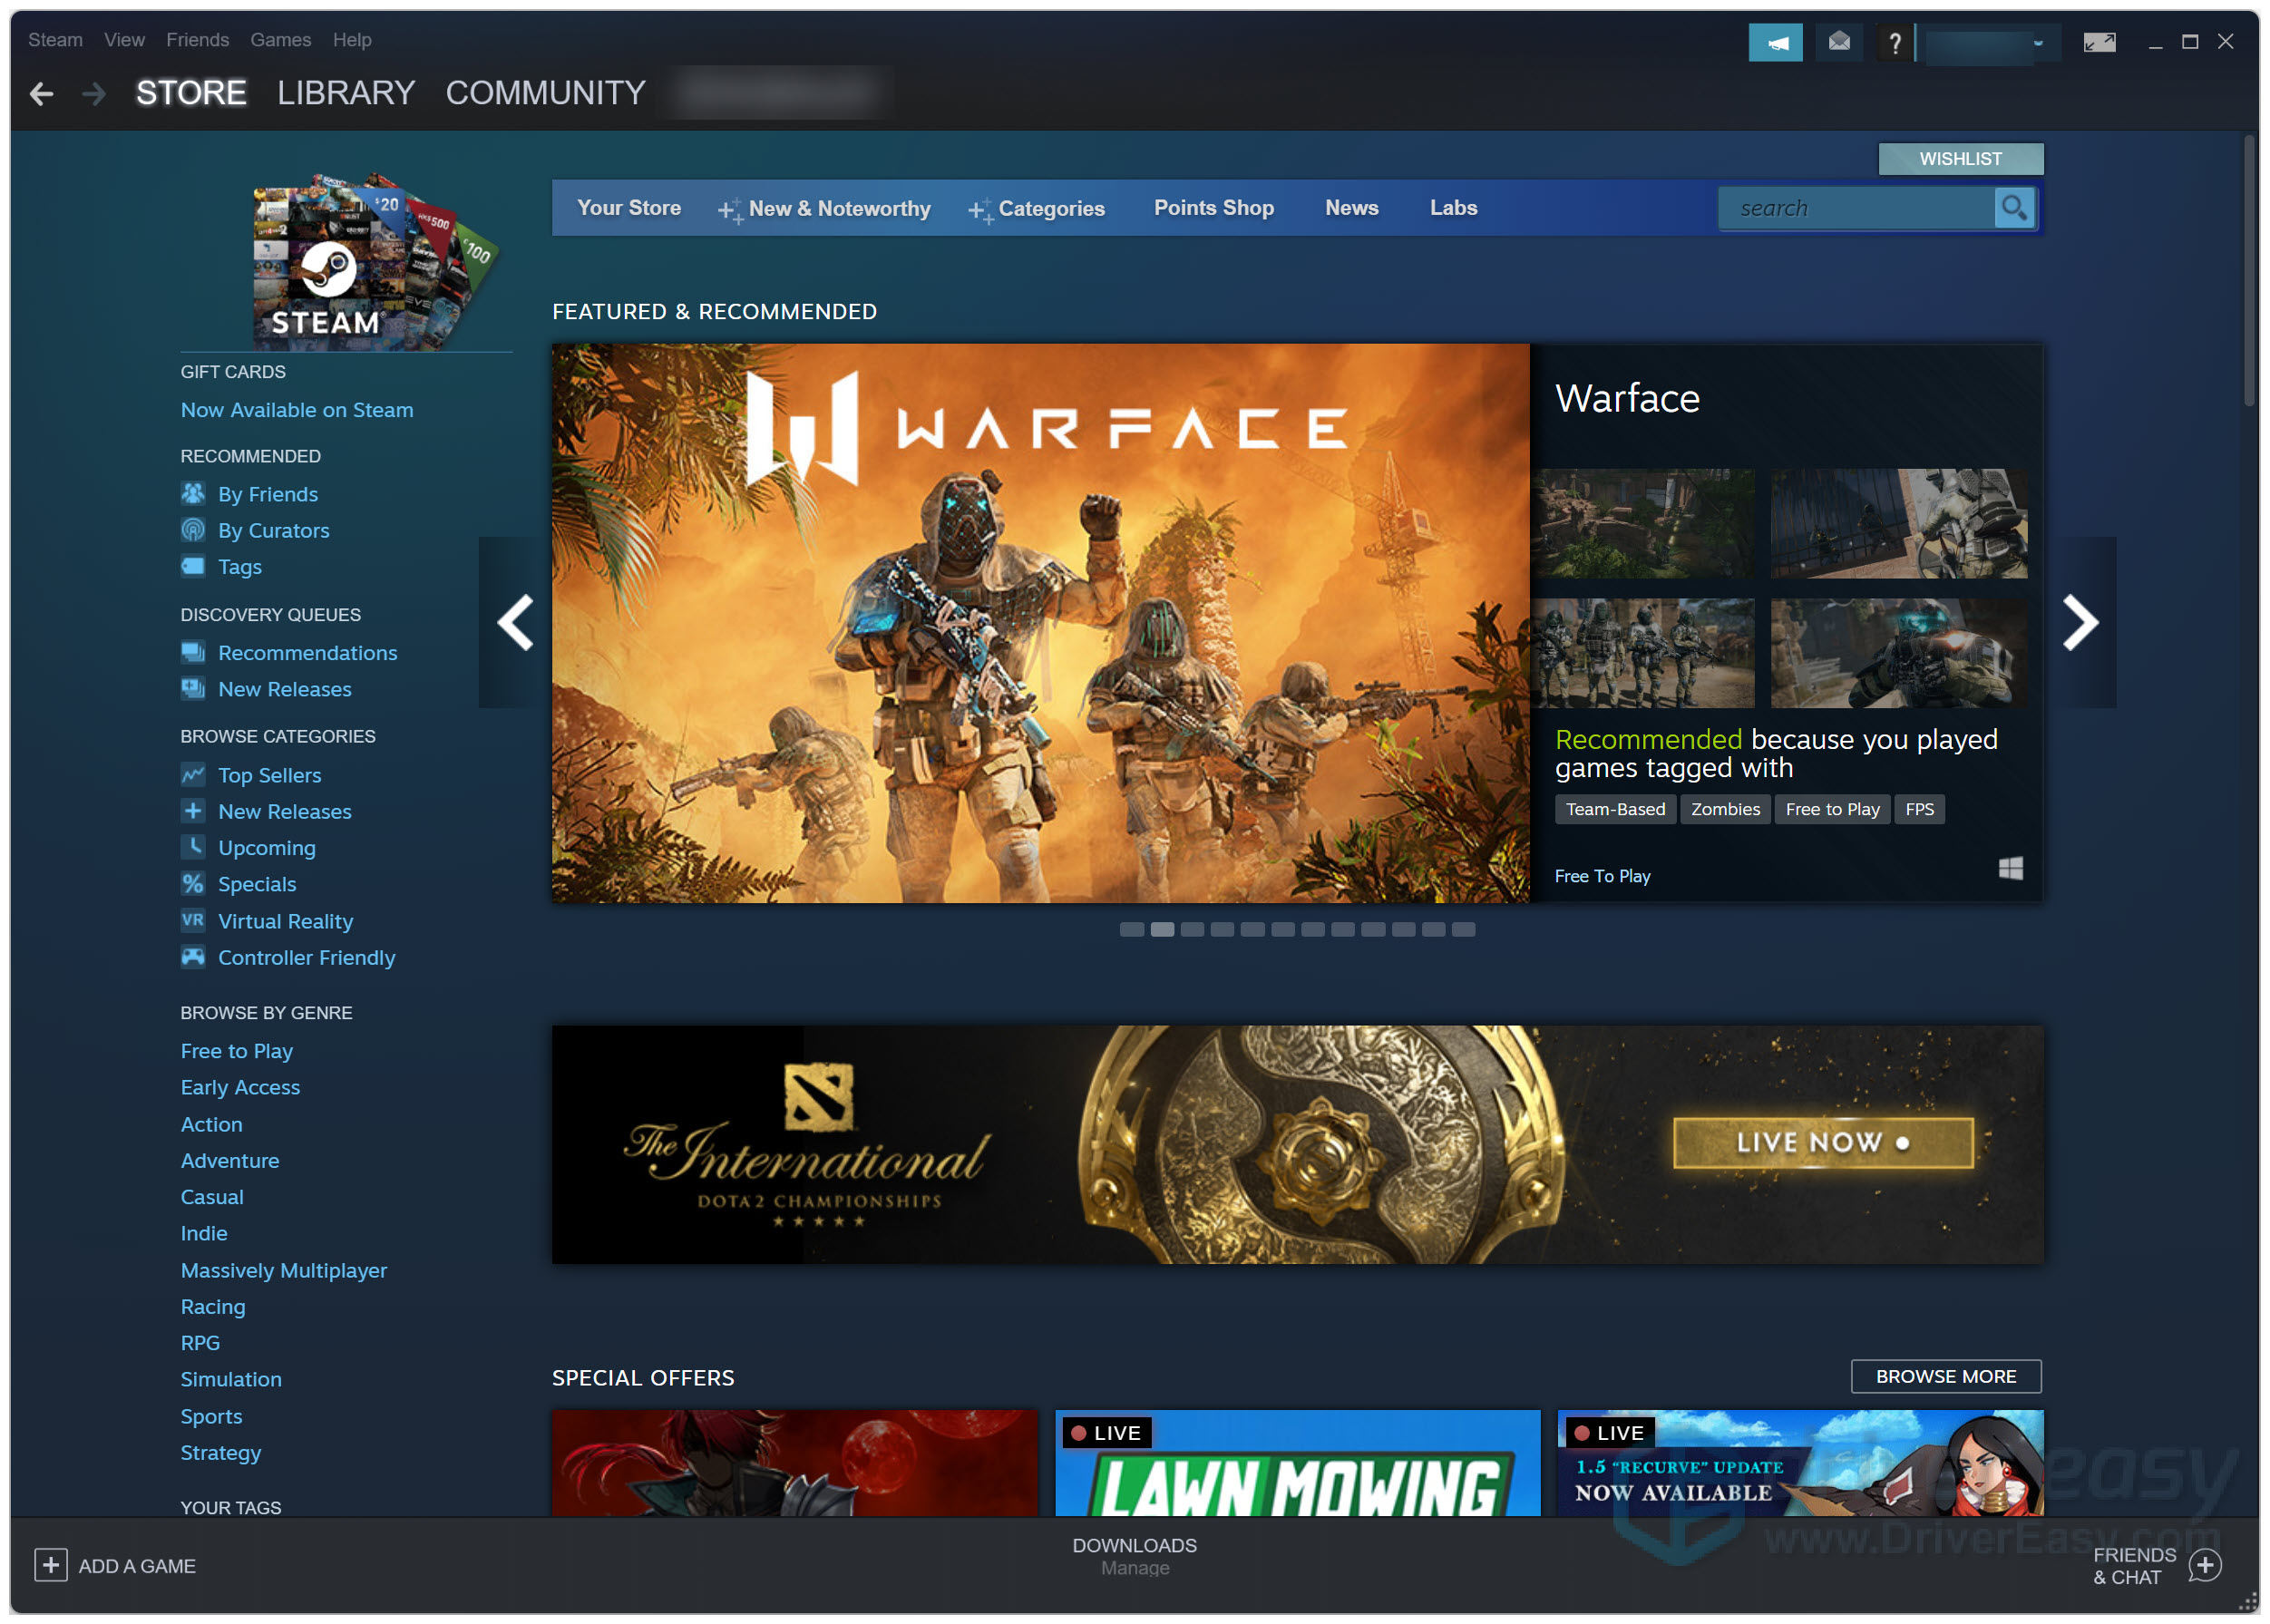
Recently many Steam users have reported that their Steam client keeps crashing when they launch the Steam client or when they are in the middle of the game.
This is a very annoying issue! And trying to fix it can be just as annoying because you’ll spend a lot of time reading suggestions on the Internet, and most won’t work.
But don’t worry! We’ve put together some methods to help you fix the problem. These methods have already helped many other Steam users. We believe one of these methods can also resolve this annoying issue for you!
Fixes to try when your Steam keeps crashing
The following are a few methods that have helped many Steam users resolve this issue. You don’t have to try them all; just work your way down the list until you find the one that works for you.
- Verify the integrity of your game cache
- Add your Steam client as an exception to your third-party antivirus application
- Run the Program Compatibility Troubleshooter
- Update your graphics driver to the latest version
- Perform a clean boot
- Update your Windows system to the latest version
- Uncheck Enable GPU accelerated
- Reinstall your Steam client
Fix 1: Verify the integrity of your game cache
If this issue occurs when you’re in the middle of the game, verify your game files on your Steam client may fix it. Here is how to do it:
- Run your Steam client.
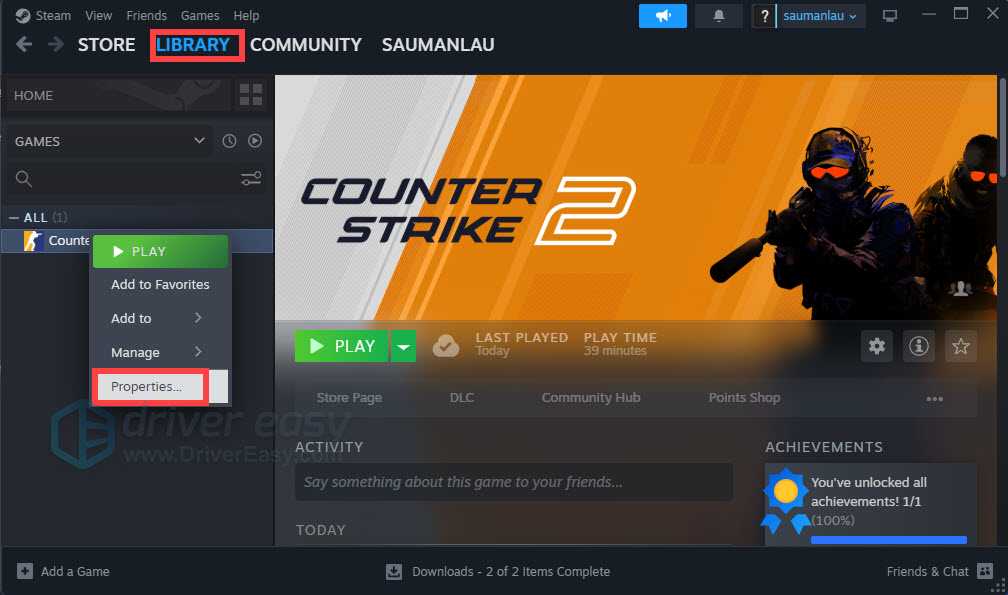
- Under LIBRARY, right-click your game that keeps crashing, then click Properties.
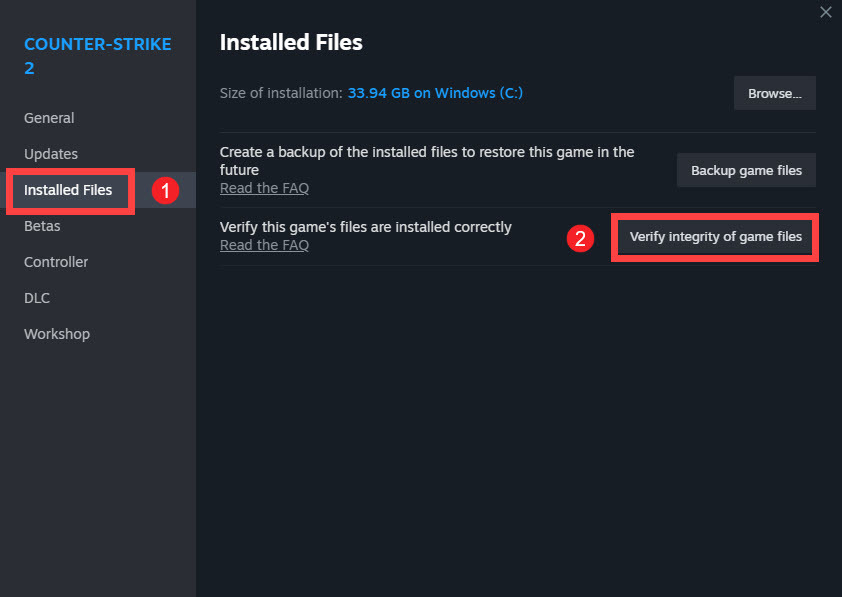
- Click the Installed Files tab, then click Verify integrity of game files. Wait for the process to be completed.
- Launch your game and see if this issue gets fixed. If not, try the next fix.
Fix 2: Add your Steam client as an exception to your third-party antivirus application
This annoying issue may also be caused by your third-party antivirus application. Since the third-party antivirus application hooks very deep into your system, it may interfere with your Steam client.
Since your Steam client consumes a lot of memory and CPU usage when you’re playing a game, many third-party antivirus applications may regard your Steam client as a potential threat and your Steam client may not run as expected. You can try to add your Steam client as an exception to your third-party antivirus application. Many Steam users have resolved this issue with this fix.
If this fix doesn’t work for you, you should try to run the Program Compatibility Troubleshooter.
Fix 3: Run the Program Compatibility Troubleshooter
The Program Compatibility Troubleshooter can check whether that program is compatible for your current Windows operating system or not. Just follow the steps below to run the Program Compatibility Troubleshooter:
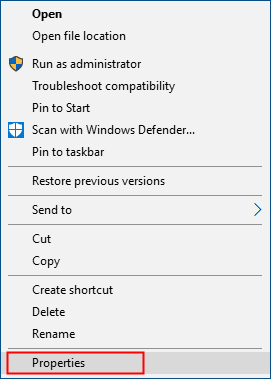
- Right-click the shortcut of your Steam client on your desktop and select Properties.
- Click the Compatibility tab and click Run compatibility troubleshooter.
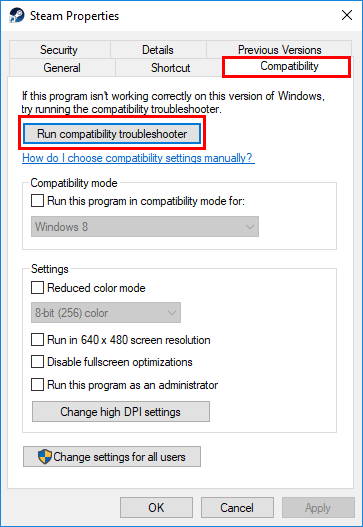
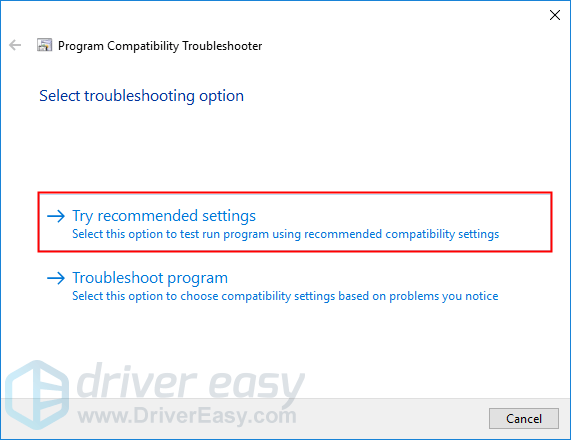
- Click Try recommended settings to test-run the program using recommended compatibility settings. Follow the on-screen instructions to see whether this troubleshooting option works or not.
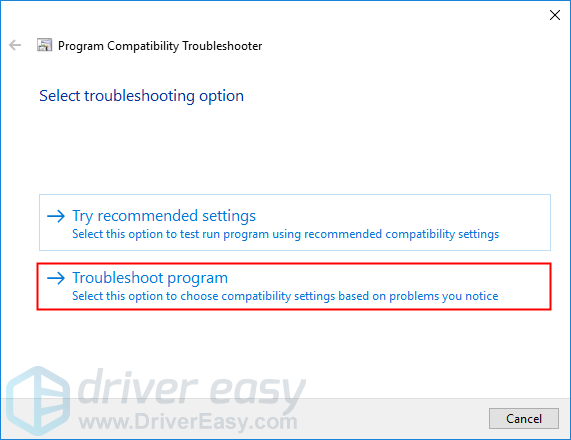
- If it still doesn’t work, then run the compatibility troubleshooter again and select the second option to choose compatibility settings based on problems you notice.
- If the problem persists, adjust the following settings manually and select OK when you’re done.
- Compatibility mode: If your Steam client keeps crashing on your current Windows system, click the drop-down list to select a previous version of Windows system to test-run it.
- Disable fullscreen optimizations: Some games on the Steam platform are particularly affected by the low FPS issue, and some of them even crash when the player enables fullscreen optimizations. Just disable it to see whether your Steam client will still keep crashing or not.
- Run this program as an administrator: If your Steam client is not given administrator privileges, it may not run properly and may even crash. Try this setting to give the program administrator privileges.
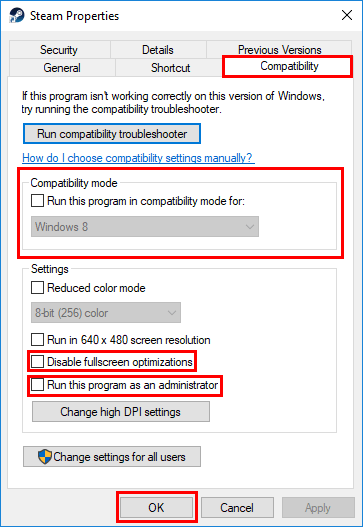
If this fix works, your Steam client won’t keep crashing again. If not, there are more fixes for you to try.
Fix 4: Update your graphics driver to the latest version
Updating your graphics driver to the latest version can make your game run smoother and prevent many issues or errors. If you don’t have the time, patience, or skills to update your driver manually, you can do it automatically with Driver Easy.
Driver Easy will automatically recognize your system and find the correct drivers for it. You don’t need to know exactly what system your computer is running, you don’t need to risk downloading and installing the wrong driver, and you don’t need to worry about making a mistake when installing.
- Download and install Driver Easy.
- Run Driver Easy and click the Scan Now button. Driver Easy will then scan your computer and detect any problem drivers.

- Click Update All to automatically download and install the correct version of all the drivers that are missing or out of date on your system.
(This requires the Pro version which comes with full support and a 30-day money-back guarantee. You’ll be prompted to upgrade when you click Update All. If you’re not ready to buy the Pro version, Driver Easy offers a 7-day free trial which includes access to all the Pro features such as high-speed download and one-click install. You won’t be charged anything until your 7-day trial has ended.)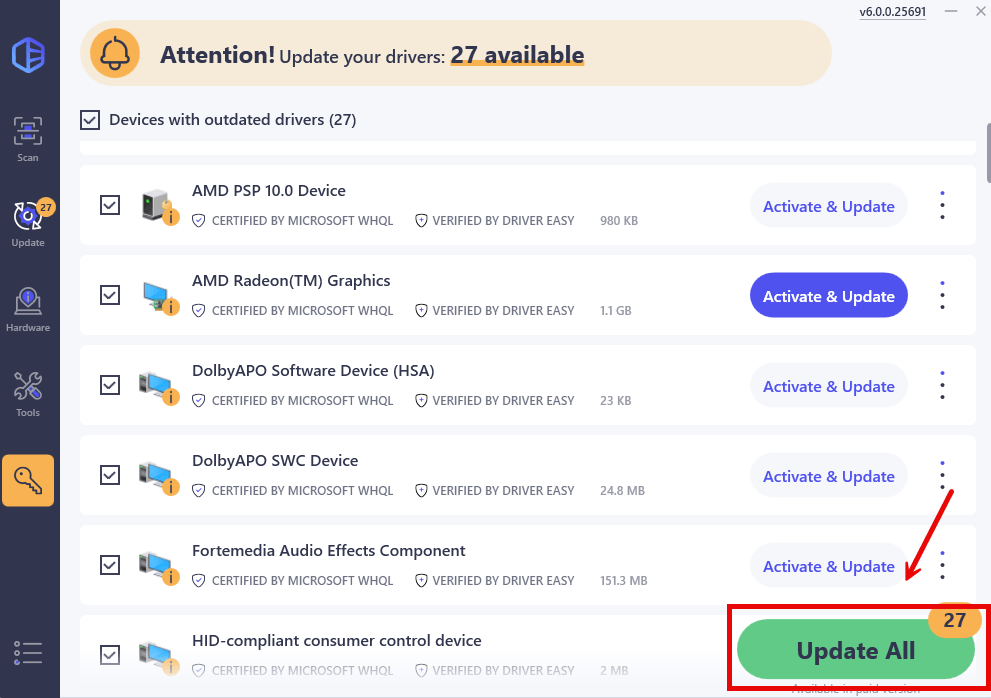
- Restart your computer for the changes to take effect.
Fix 5: Perform a clean boot
You may need to perform a clean boot if this issue persists. The clean boot is a troubleshooting technique that allows you to manually disable startups and services so that you can find the problematic software. Once you find it out, just uninstall it, and then this issue will be solved. Here’s how to do it:
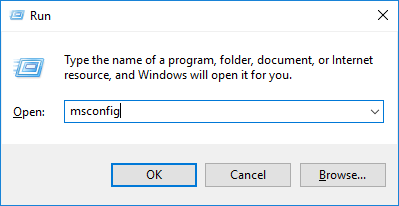
- On your keyboard, press the Windows logo key and R at the same time to open the Run Dialog. Type msconfig and press Enter to open the System Configuration window.
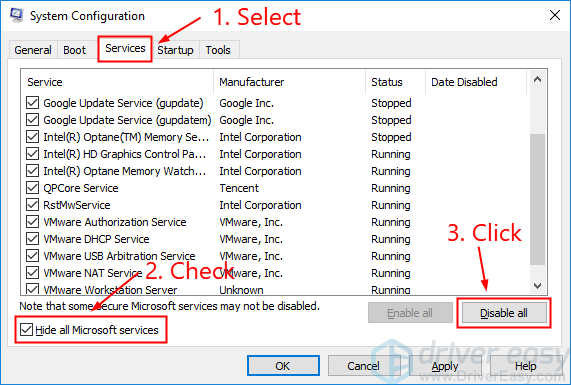
- Select the Services tab, check Hide all Microsoft services, and then click Disable all.
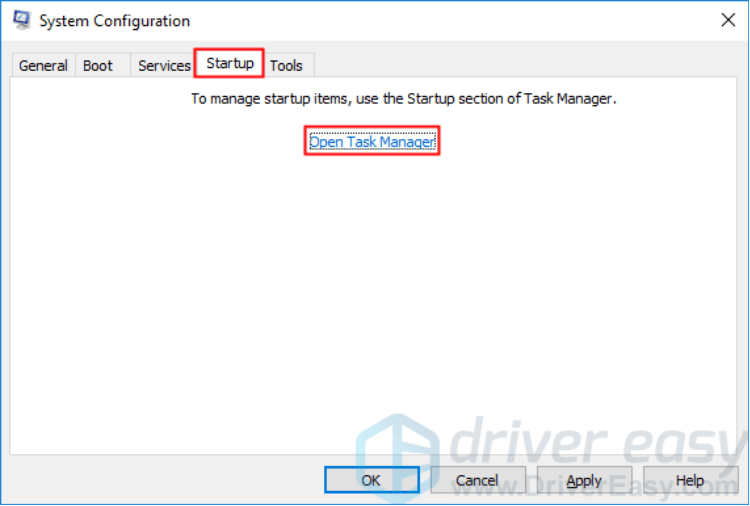
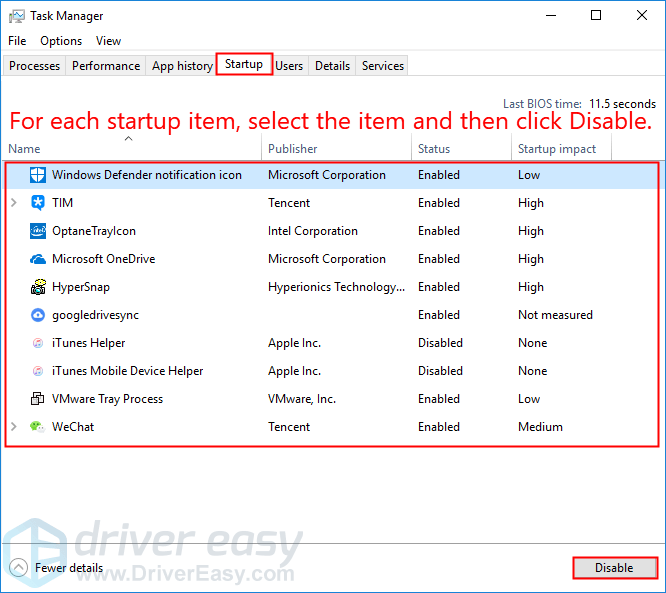
- Select the Startup tab and click Open Task Manager.
- On the Startup tab in Task Manager, for each startup item, select the item and then click Disabled.
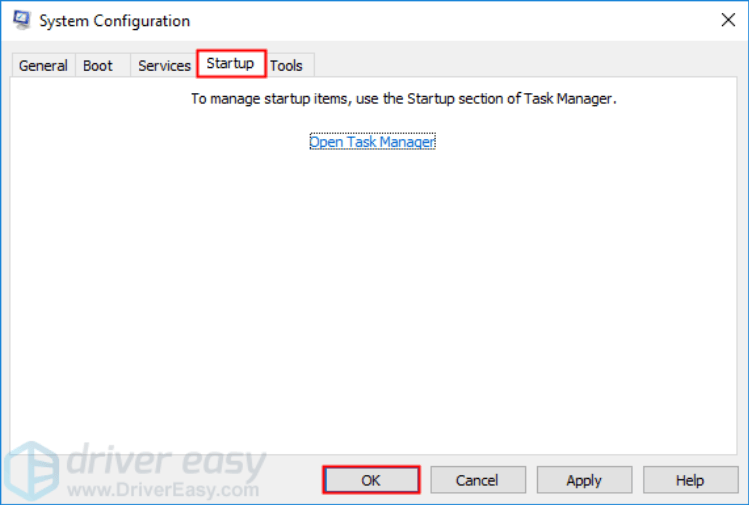
- Go back to the System Configuration window and click OK.
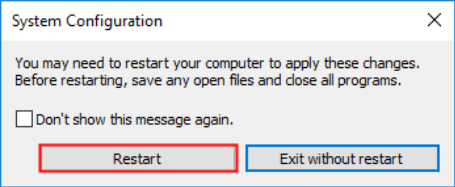
- Click Restart to restart your PC.
Run your Steam client and check whether the problem reappears when your PC restarts. If not, you need to open the System Configuration window again to enable services and applications one by one until you find the problematic software. After enabling each service, you need to restart your PC to apply the changes.
Once you find the problematic software, you need to uninstall it to resolve this issue.
Fix 6: Update your Windows system to the latest version
Sometimes the crash issue may occur if your Windows system is not the latest version. Try to update your Windows system and this issue may get resolved. Here is how to do it:
- On your keyboard, press the Windows logo key and type update. In the list of results, click Check for updates to open Windows Update window.
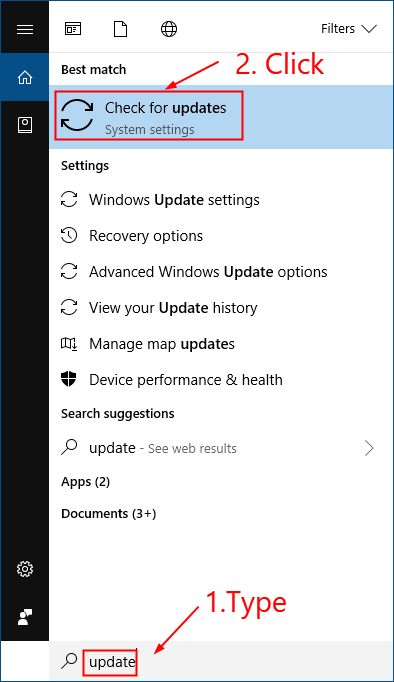
- Click the Check for updates button to update your Windows system.
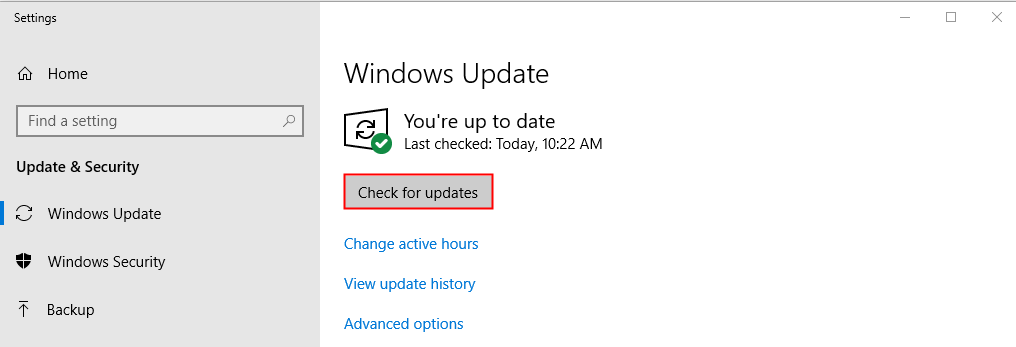
- Restart your PC when the Windows update process is completed. If this fix works, your Steam client won’t keep crashing again.
Fix 7: Uncheck Enable GPU accelerated
As proven by some Steam community users, disabling the GPU accelerated rendering in web views feature helps to stop Steam from crashing further. To see if this does wornders for you as well:
- Launch Steam. Click Steam on the top-left corner and select Settings.

- Select Interface, then uncheck the box for Enable GPU accelerated redering in web views (requires restart), then click OK.

- Restart your Steam client to see if it stops crashing now.
Fix 8: Reinstall your Steam client
If all the fixes above still don’t work, it’s time to uninstall your Steam client and reinstall it again.
- Uninstall your Steam client. This process will remove your Steam client and any installed game content from your machine.
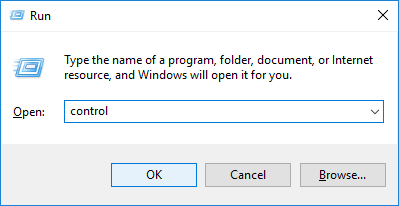
- On your keyboard, press the Windows logo key and R at the same time to open the Run dialog. Then type control and press Enter to open the Control Panel.
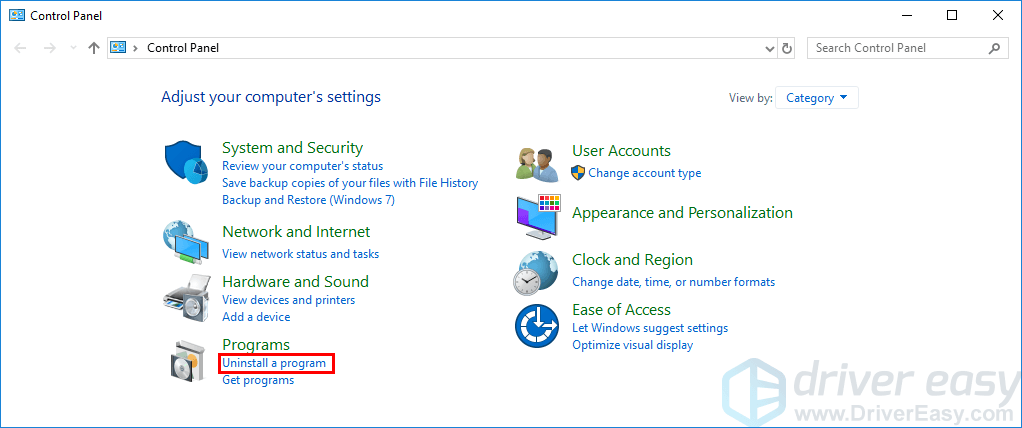
- View the Control Panel by Category, and then click Uninstall a program.
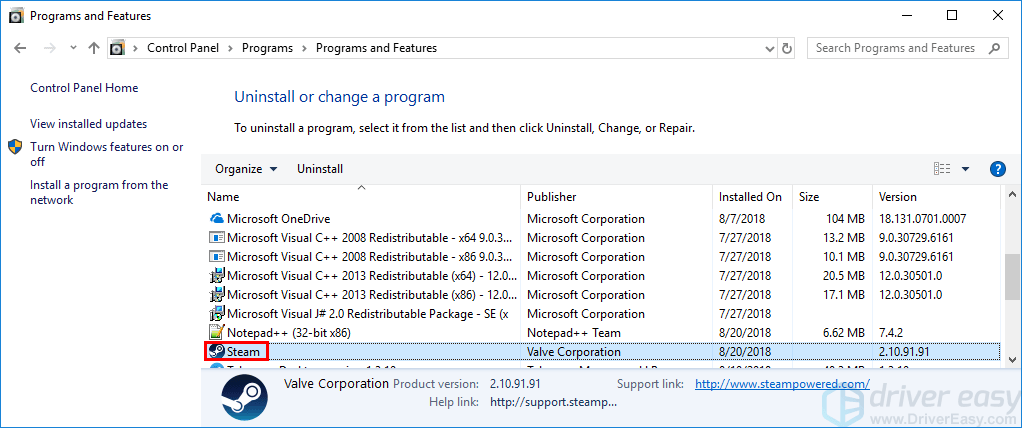
- Double-click Steam to uninstall your Steam client.
- Restart your Windows system when it is completed.
- On your keyboard, press the Windows logo key and R at the same time to open the Run dialog. Then type control and press Enter to open the Control Panel.
- Download the latest version of the Steam client and then double-click the file you downloaded to reinstall it.
Hopefully, you’ll be able to resolve this annoying issue using one of the fixes above. Please leave your comment below if you have any questions!


