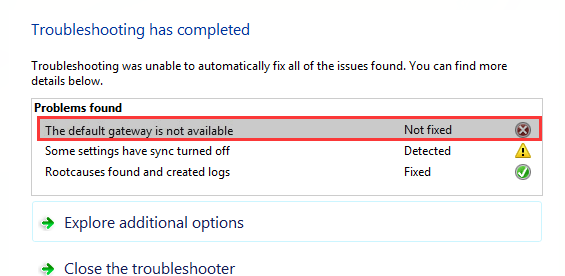
If you’re seeing a message saying The default gateway is not available, you’re not alone. Many Windows users are reporting about this problem. You’ll also see a red X on your network computer icon and not able to use your internet connection.

Irritating as it may be, it’s possible to fix. Here are 4 solutions for you to try. You may not have to try them all; just work your way down until you find the one works for you.
Note: The screen shots are shown on Windows 10, but all fixes apply to Windows 7 and Windows 8 as well.
1: Remove Antivirus Programs
2: Reinstall Network adapters driver
3: Change Network adapters driver
4: Update Network adapters driver
1: Remove Antivirus Programs
In many cases, the The default gateway is not available problem is caused by McAfee security program. If you have McAfee security programs installed, you should uninstall them:
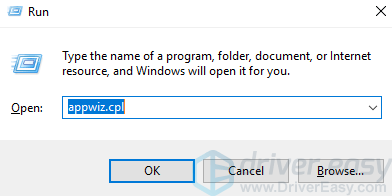
1) On your keyboard, press the Windows logo key  and R at the same time. Type appwiz.cpl and press Enter.
2) Click your McAfee program and click Uninstall.
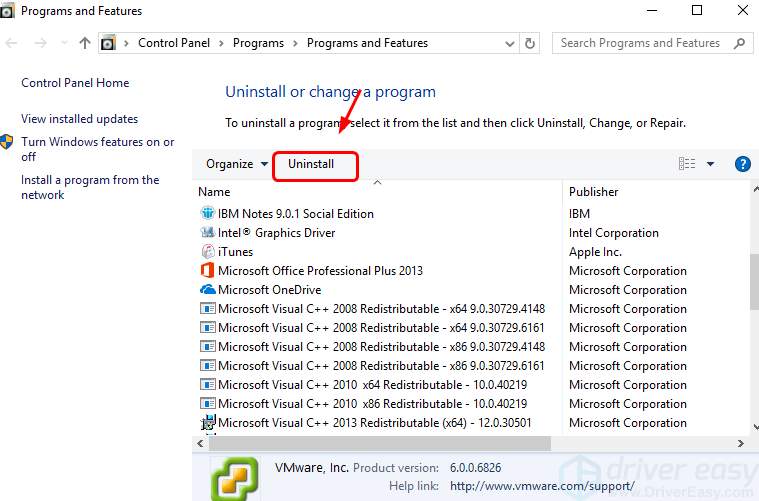
3) You might need to restart your computer after the uninstall.
IMPORTANT: You should always leave Windows Defender on, especially when you don’t have any third-party virus applications installed.
2: Reinstall Network adapters driver
If you have a faulty network adapter driver, your network connection is not likely to function well. You can
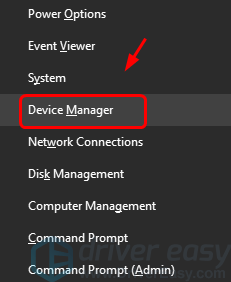
1) On your keyboard, press the Windows logo key and X at the same time. Click Device Manager.
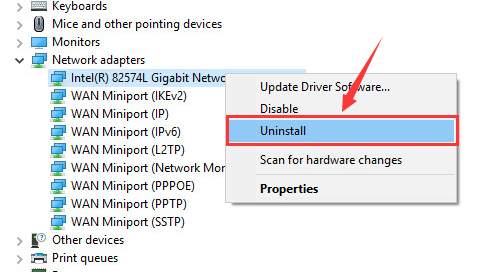
2) Expand Network adapters. Right-click your network adapter and click Uninstall.
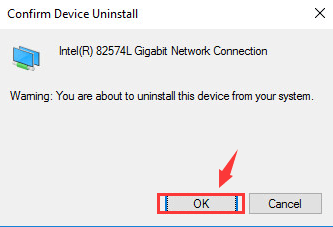
3) When prompted at the uninstall confirmation, press OK to continue.
4) Restart your computer after the uninstall. Windows will help you reinstall the network adapter device driver automatically.
3: Change Network adapters driver
If you haven’t installed the correct driver, you’re likely to have problems with your network connection too. To fix it:
1) On your keyboard, press the Windows logo key and X at the same time. Click Device Manager.

2) Expand Network adapters. Right-click your network adapter and click Update Driver Software….
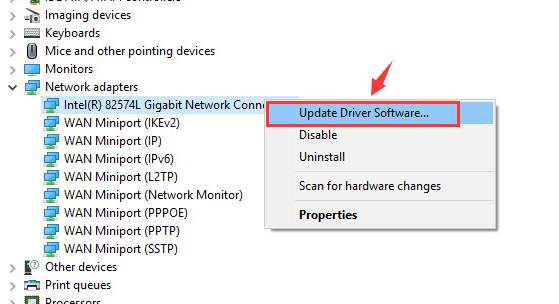
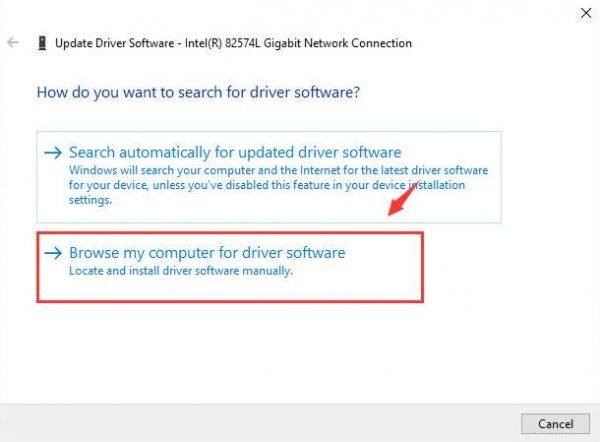
3) Click Browse my computer for driver software.
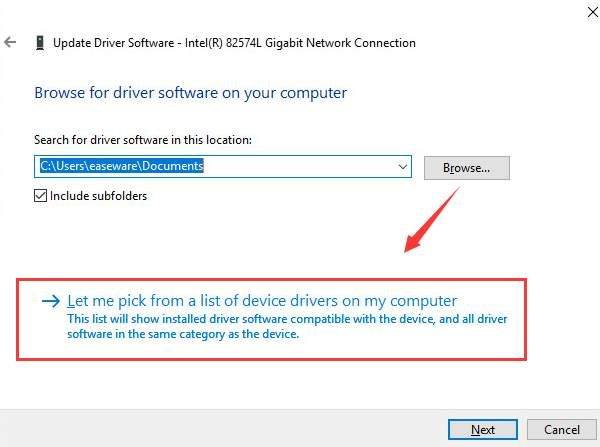
4) Click Let me pick form a list of device drivers on my computer.
5) Un-tick Show compatible hardware. Click Intel Corporation. Click a network adapter driver different from what you have now. Click Next.
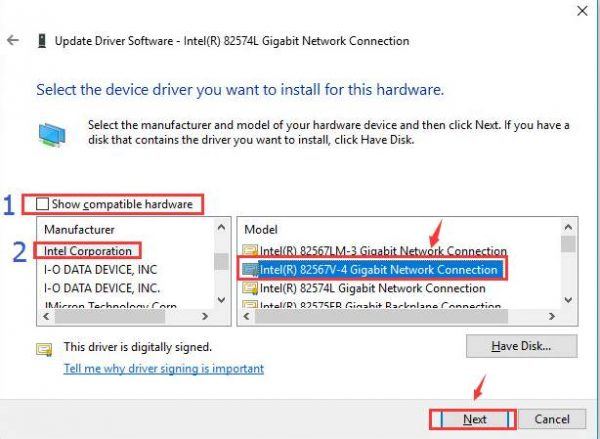
If it doesn’t work, try to change your network adapter driver to a different one from the list until you find one that works.
4: Update Network adapters driver
The methods above should help you solve the problem. If they don’t, you need to update your network adapter driver. You can do so via Device Manager or Windows Update.
If you don’t have the time, patience or computer skills to update the network driver manually, you can do it automatically with Driver Easy.
Driver Easy will automatically recognize your system and find the correct drivers for it. You don’t need to know exactly what system your computer is running, you don’t need to risk downloading and installing the wrong driver, and you don’t need to worry about making a mistake when installing.
You can update your drivers automatically with either the FREE or the Pro version of Driver Easy. But with the Pro version it takes just 2 clicks:
1) Download and install Driver Easy.
2) Run Driver Easy and click the Scan Now button. Driver Easy will then scan your computer and detect any problem drivers.
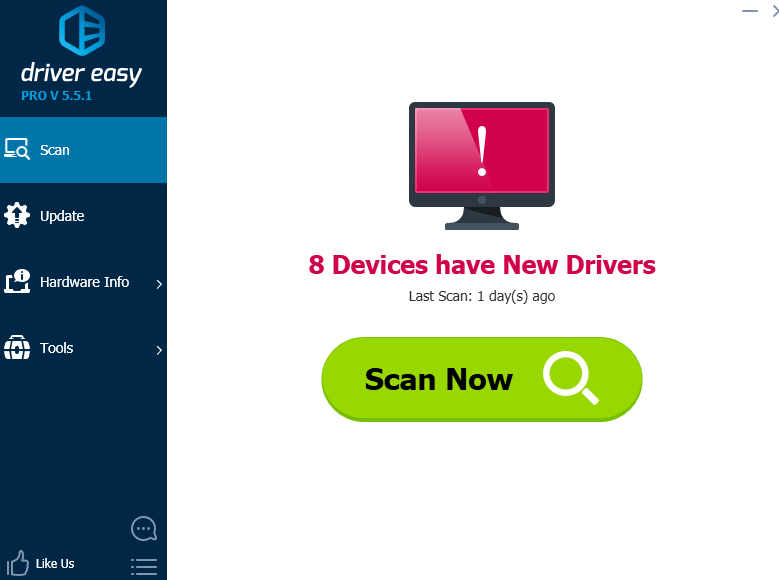
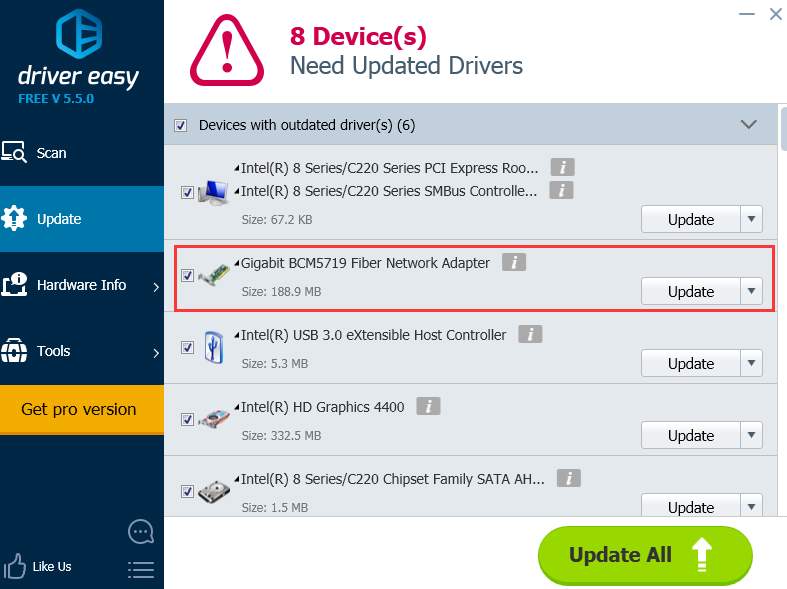
3) Click the Update button next to your network adapter device to automatically download and install the correct version of this driver (you can do this with the FREE version).
Or click Update All to automatically download and install the correct version of all the drivers that are missing or out of date on your system (this requires the Pro version – you’ll have full tech support and a 30-day money back guarantee).
