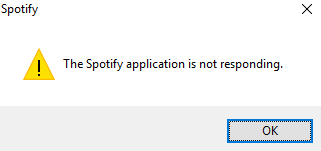
If you’re on Windows and you see the error message saying The Spotify application is not responding, you’re not alone. Many Windows users are reporting this problem as well. Don’t worry, it’s possible and quite easy to fix.
Here are 4 solutions for you to try. You may not have to try them all; just work your way down until you find the one that works for you.
Try theses:
- Force Quit Spotify in Task Manager
- Disable Internet Connections
- Allow Spotify Running Under the Firewall
- Clean Reinstall Spotify
1. Force Quit Spotify in Task Manager
In some cases, your system will interfere with applications using too much PC resources. You can shut down Spotify and other unnecessary apps with Task Manager to get your Spotify running again.
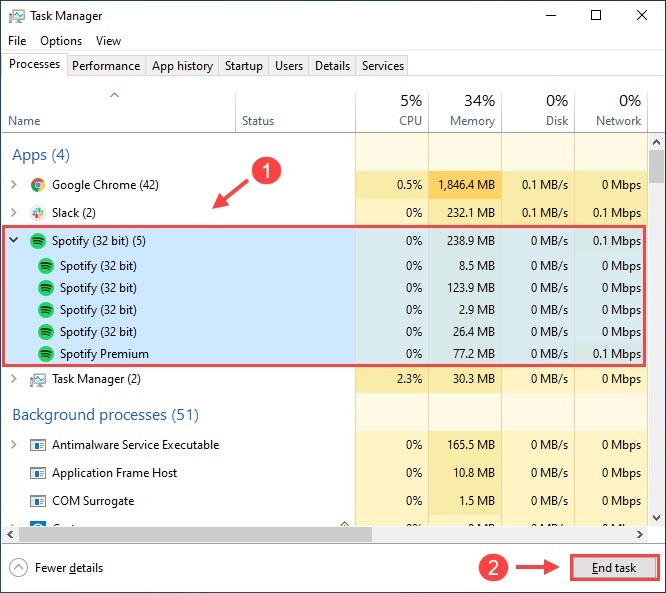
1) On your keyboard, press Ctrl + Shift + Esc at the same time to open Task Manager.
2) Click Spotify and click End task. If you have more than one entry, please make sure you click all the tasks listed.
Open your Spotify again to see if the problem is resolved. If so, then great! If not, don’t worry, there are a few fixes you can try.
2. Disable Internet Connections
In some cases, disabling WiFi, plugging off the Ethernet cable, before you launch Spotify may also work and prevent the problem from occurring again.
Simply disable the Internet and try running the app. When Spotify starts, re-enable the connection and check if the error appears!
If the issue still persists, you can move on to the next fix.
3. Allow Spotify Running Under the Firewall
Sometimes, your firewalls and antivirus software are a bit too protective with our systems. In this particular case, it might be your firewall or antivirus software that’s causing your Spotify application not responding issue. To fix it, here is how to do it.
1) Type security in the search box and select Windows Security.

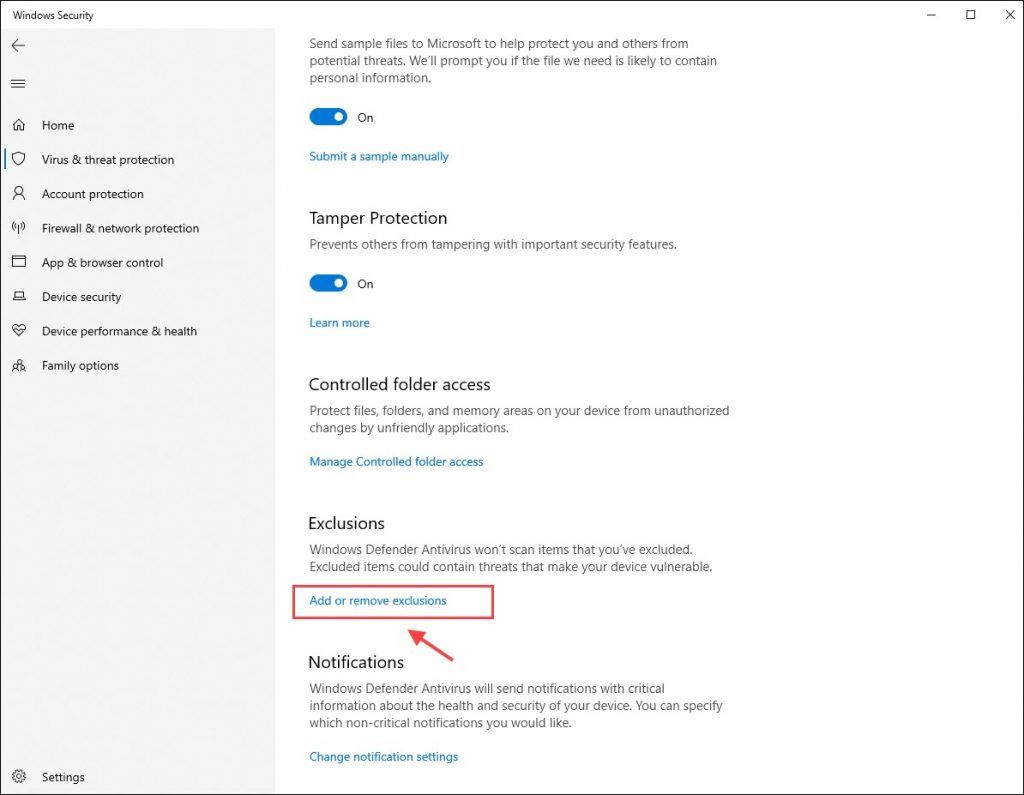
2) Click Virus & threat protection tab, and click Manage Settings.
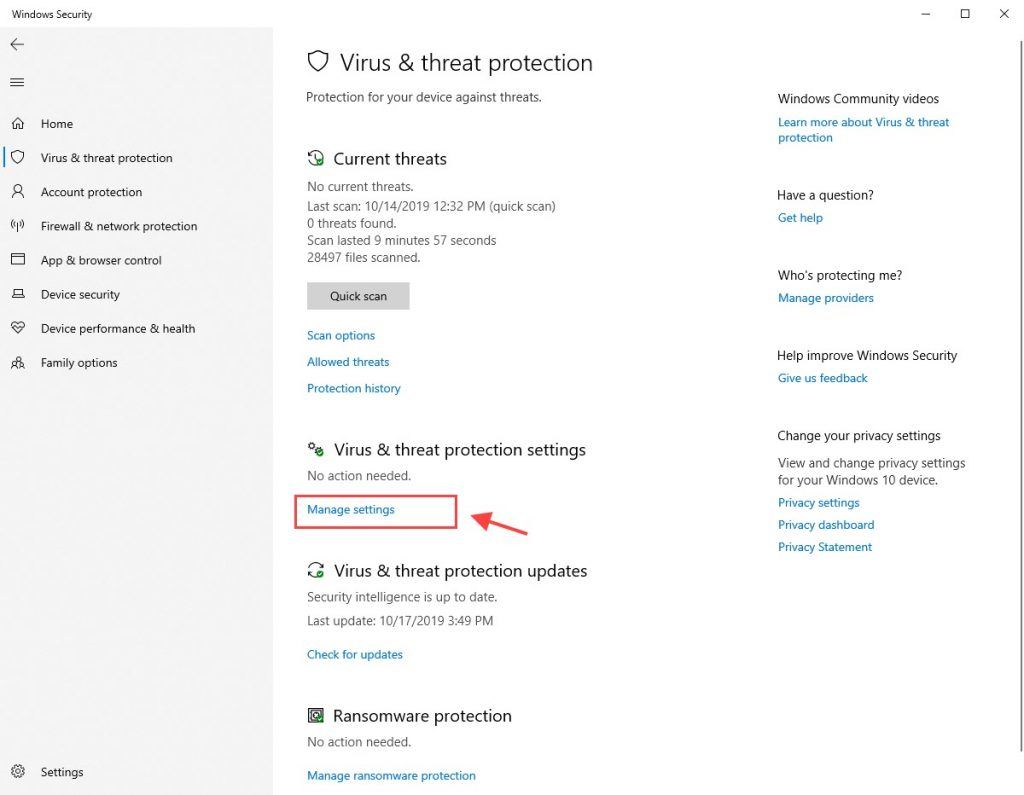
3) Scroll down the page to find Exclusions, and click Add or remove exclusions.
4) Click Add an exclusion and select Folder. Then add the Spotify folder as an exclusion.
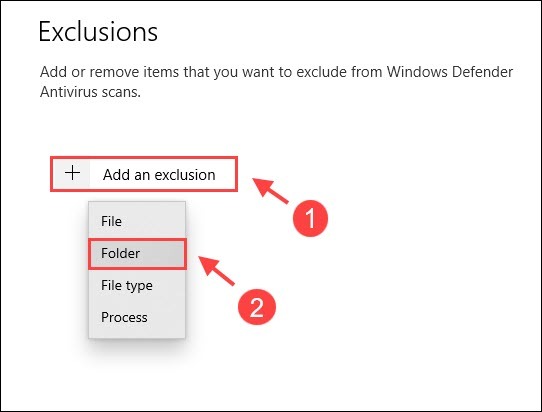
After following the steps above, you’ve added Spotify to the whitelist of Microsoft Windows Defender. See if your Spotify works again.
If this solves your problem, congrats! If not, you need to do a clean reinstall of your Spotify then.
4. Clean Reinstall Spotify
One of the causes of the Spotify not responding problem can be faulty Spotify files. You should do a clean reinstall of Spotify to see if the problem is resolved:
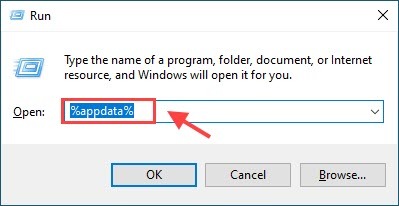
1) On your keyboard, press the Windows logo key and R at the same time, then type %appdata% and press Enter.
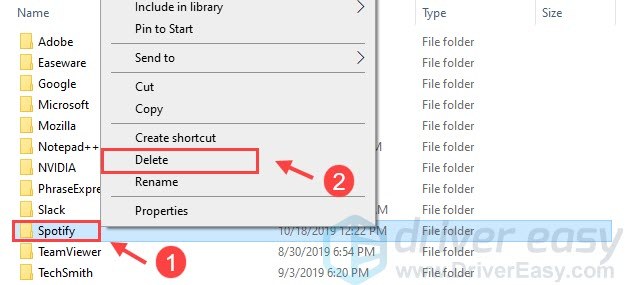
2) Right click the Spotify folder and click Delete.
3) Go to Spotify website to download the latest version of Spotify and install it again.
Your Spotify should be working properly again after a clean reinstall.
Bonus Tips
If you also run into other application crashes randomly, one thing you should always look into is whether you have the correct drivers installed. Updating your drivers to the latest version can also make your system run smoother and prevents other possible errors.
You may either download the most up-to-date drivers online and install them manually, or simply do it automatically with Driver Easy.
Driver Easy will automatically recognize your system and find the correct drivers for it. You don’t need to know exactly what system your computer is running, you don’t need to risk downloading and installing the wrong driver, and you don’t need to worry about making a mistake when installing.
You can update your drivers automatically with either the FREE or the Pro version of Driver Easy. But with the Pro version it takes just 2 clicks (and you get full support and a 30-day money back guarantee):
1) Download and install Driver Easy.
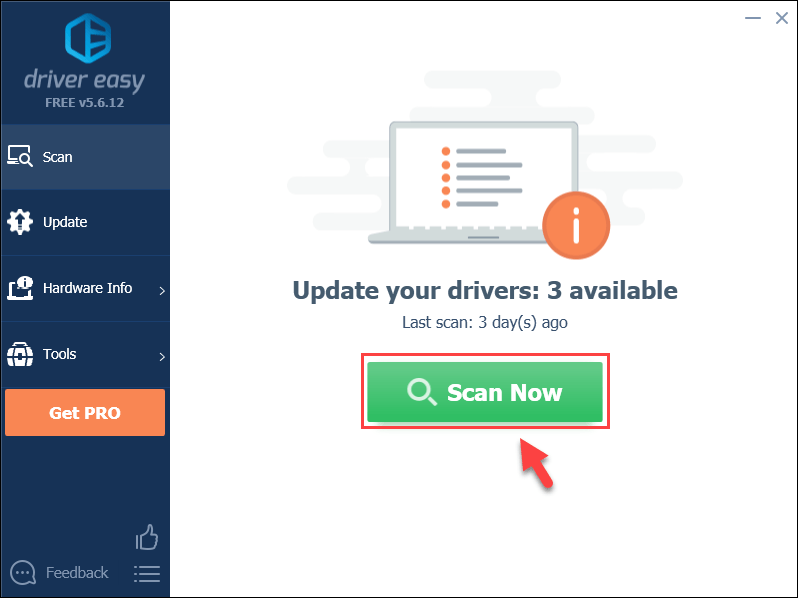
2) Run Driver Easy and click the Scan Now button. Driver Easy will then scan your computer and detect any problem drivers.
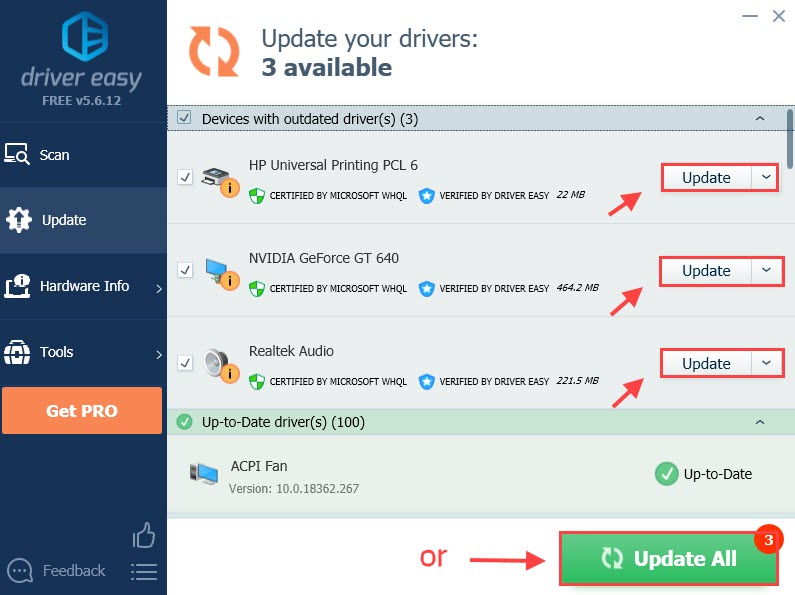
3) Click the Update button next to all flagged devices to automatically download and install the correct version of their drivers (you can do this with the FREE version).
Or
Click Update All to automatically download and install the correct version of all the drivers that are missing or out of date on your system (this requires the Pro version, you’ll be prompted to upgrade when you click Update All).
Hopefully, you may find this article helpful. Please feel free to leave a comment below or share your experience with other users.


