


Intel Extreme Tuning Utility (XTU) is a Windows-based performance-tuning tool designed to help users overclock, monitor, and stress-test their systems. However, many users are greeted with the following error when trying to open the utility:
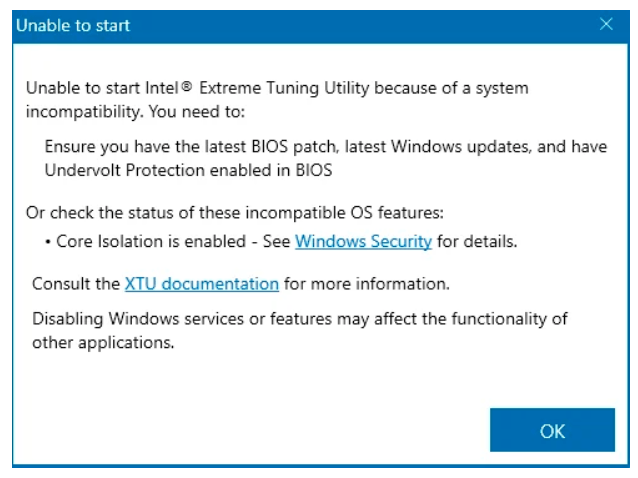
“Unable to start Intel(R) Extreme Tuning Utility because of a system incompatibility.”
This error typically points to a conflict between XTU and certain system features — especially Virtualization-Based Security (VBS). Here’s how you can identify the cause and fix the issue.
Why XTU Might Not Open
One of the most common causes of the XTU incompatibility error is VBS, a Windows security feature that uses hardware virtualization to protect critical system components. While VBS enhances security, it also restricts low-level hardware access required by tools like XTU.
Besides, Intel Extreme Tuning Utility (XTU) is incompatible with Windows Virtualization-Based Security (VBS) unless Undervolt Protection (UVP) is enabled in the BIOS. UVP is a feature introduced in 12th Generation Intel® Core™ processors and newer. If UVP is not enabled, XTU may not function properly due to restrictions imposed by VBS.
Step 1: Check Your Intel Processor Generation
First, you should identify the generation of your Intel® Core™ processor to know if your processor has Undervolt Protection. Follow the steps below:
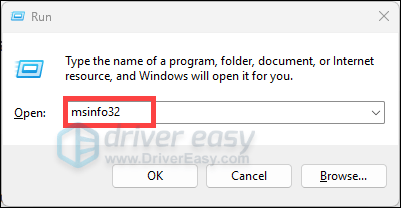
- On your keyboard, press the Windows logo key + R at the same time to invoke the Run box.
- Type msinfo32 and hit Enter. This will open the System Information window.
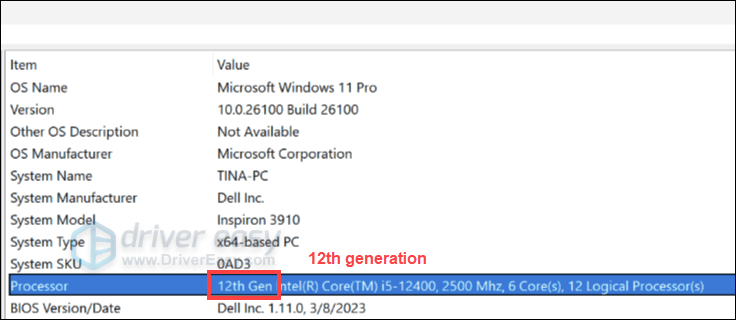
- In the System Summary section, find the information on Processor. For newer processors, it will show you the generation in a straightforward way, just like what it shows in the screenshot below.
However, for processors with earlier generations or certain models, you’ll need to check the number (or two numbers) after the i9, i7, i5, or i3. As shown in the example below, Intel® Core™ processor i9-14900K is 14th Gen because number 14 is listed after i9.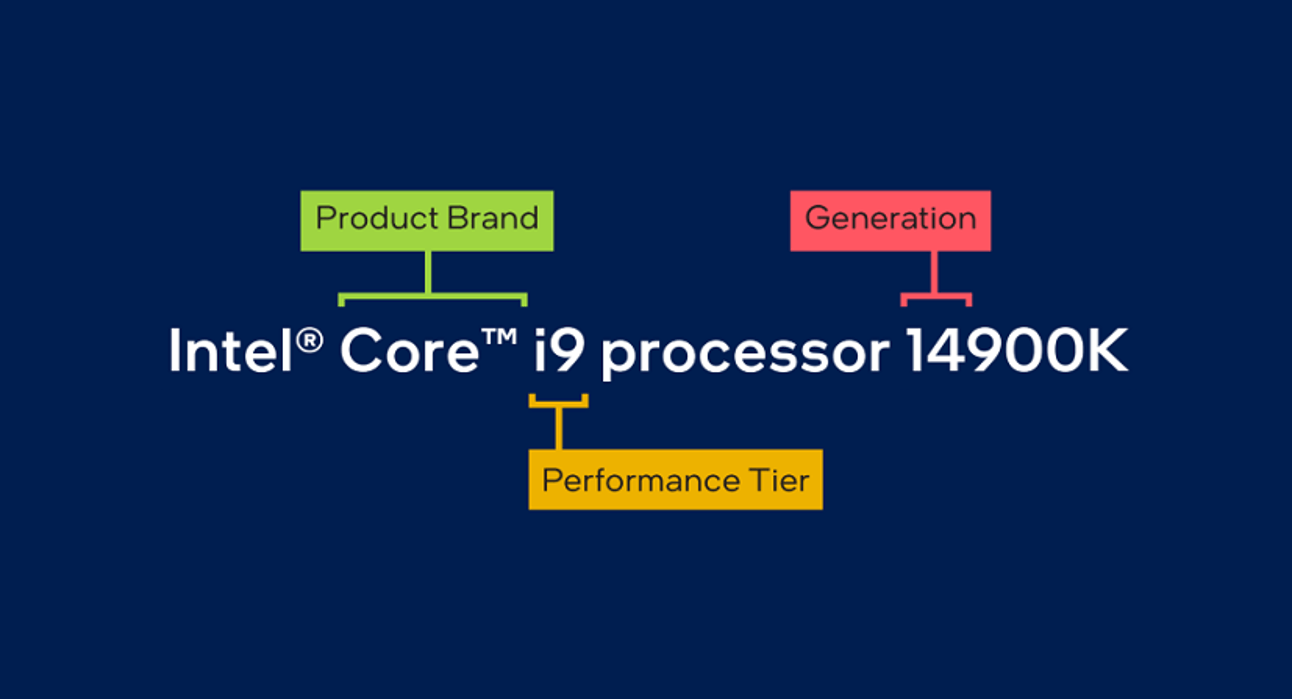
Depending on your configurations, you can follow the instructions below to fix your issue:
For 12th Gen Intel Core Processors and newer with Undervolt Protection
For 11th Gen Intel Core Processors and older generation without Undervolt Protection
If You Have 12th Gen Processors or Newer
You may receive one of the following messages.
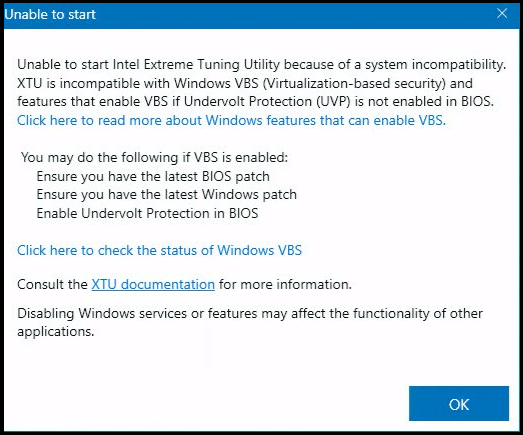
Typically, it indicates that your system has Undervolt Protection, but it’s not enabled for certain reasons. So the very first thing you should do is enable the Undervolt Protection.
1. Ensure Undervolt Protection is Enabled in BIOS
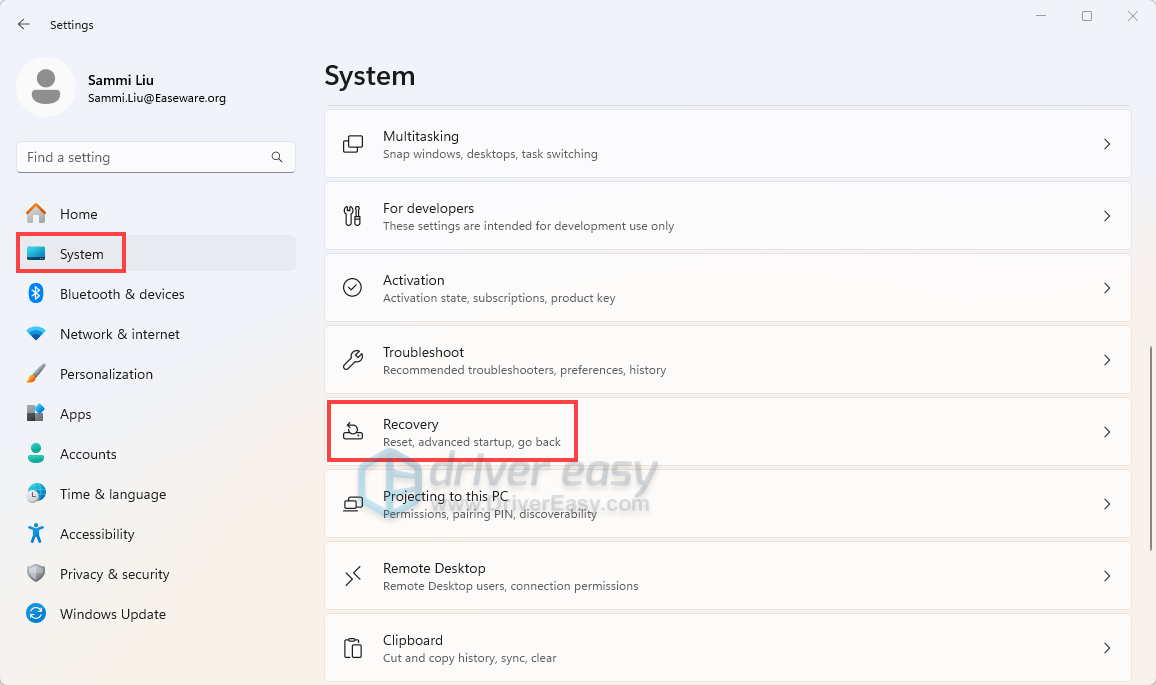
- press the Windows logo key + I to open Settings. Then go to System > Recovery.
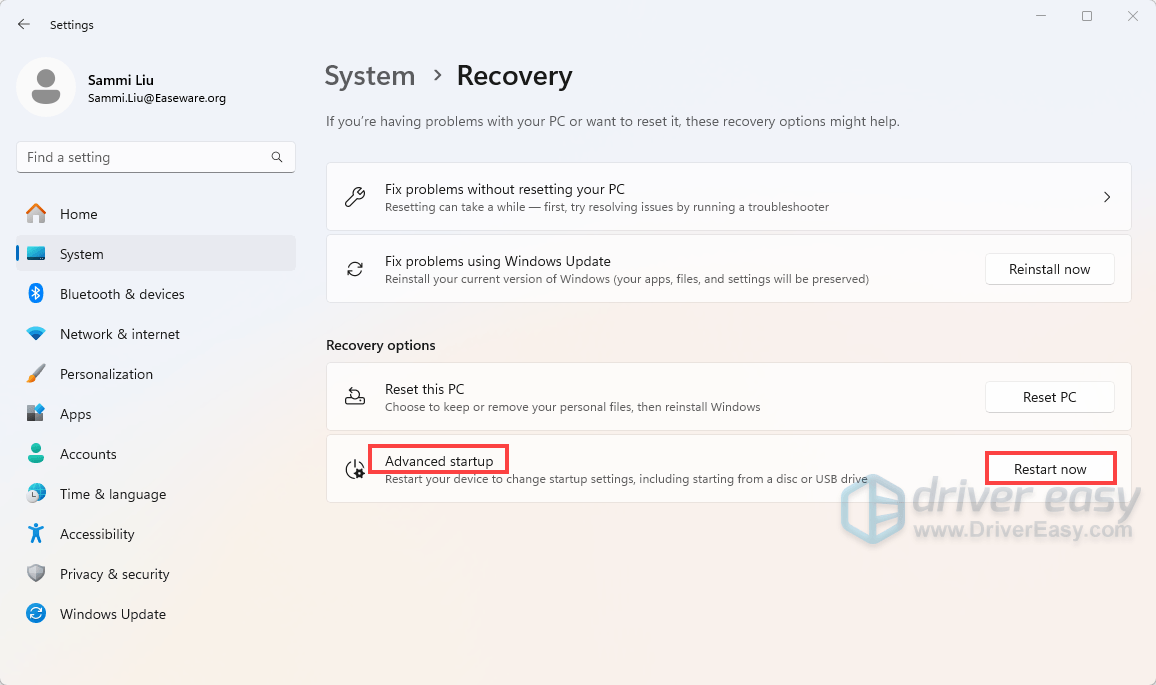
- Find Advanced startup, then click on the Restart now button.
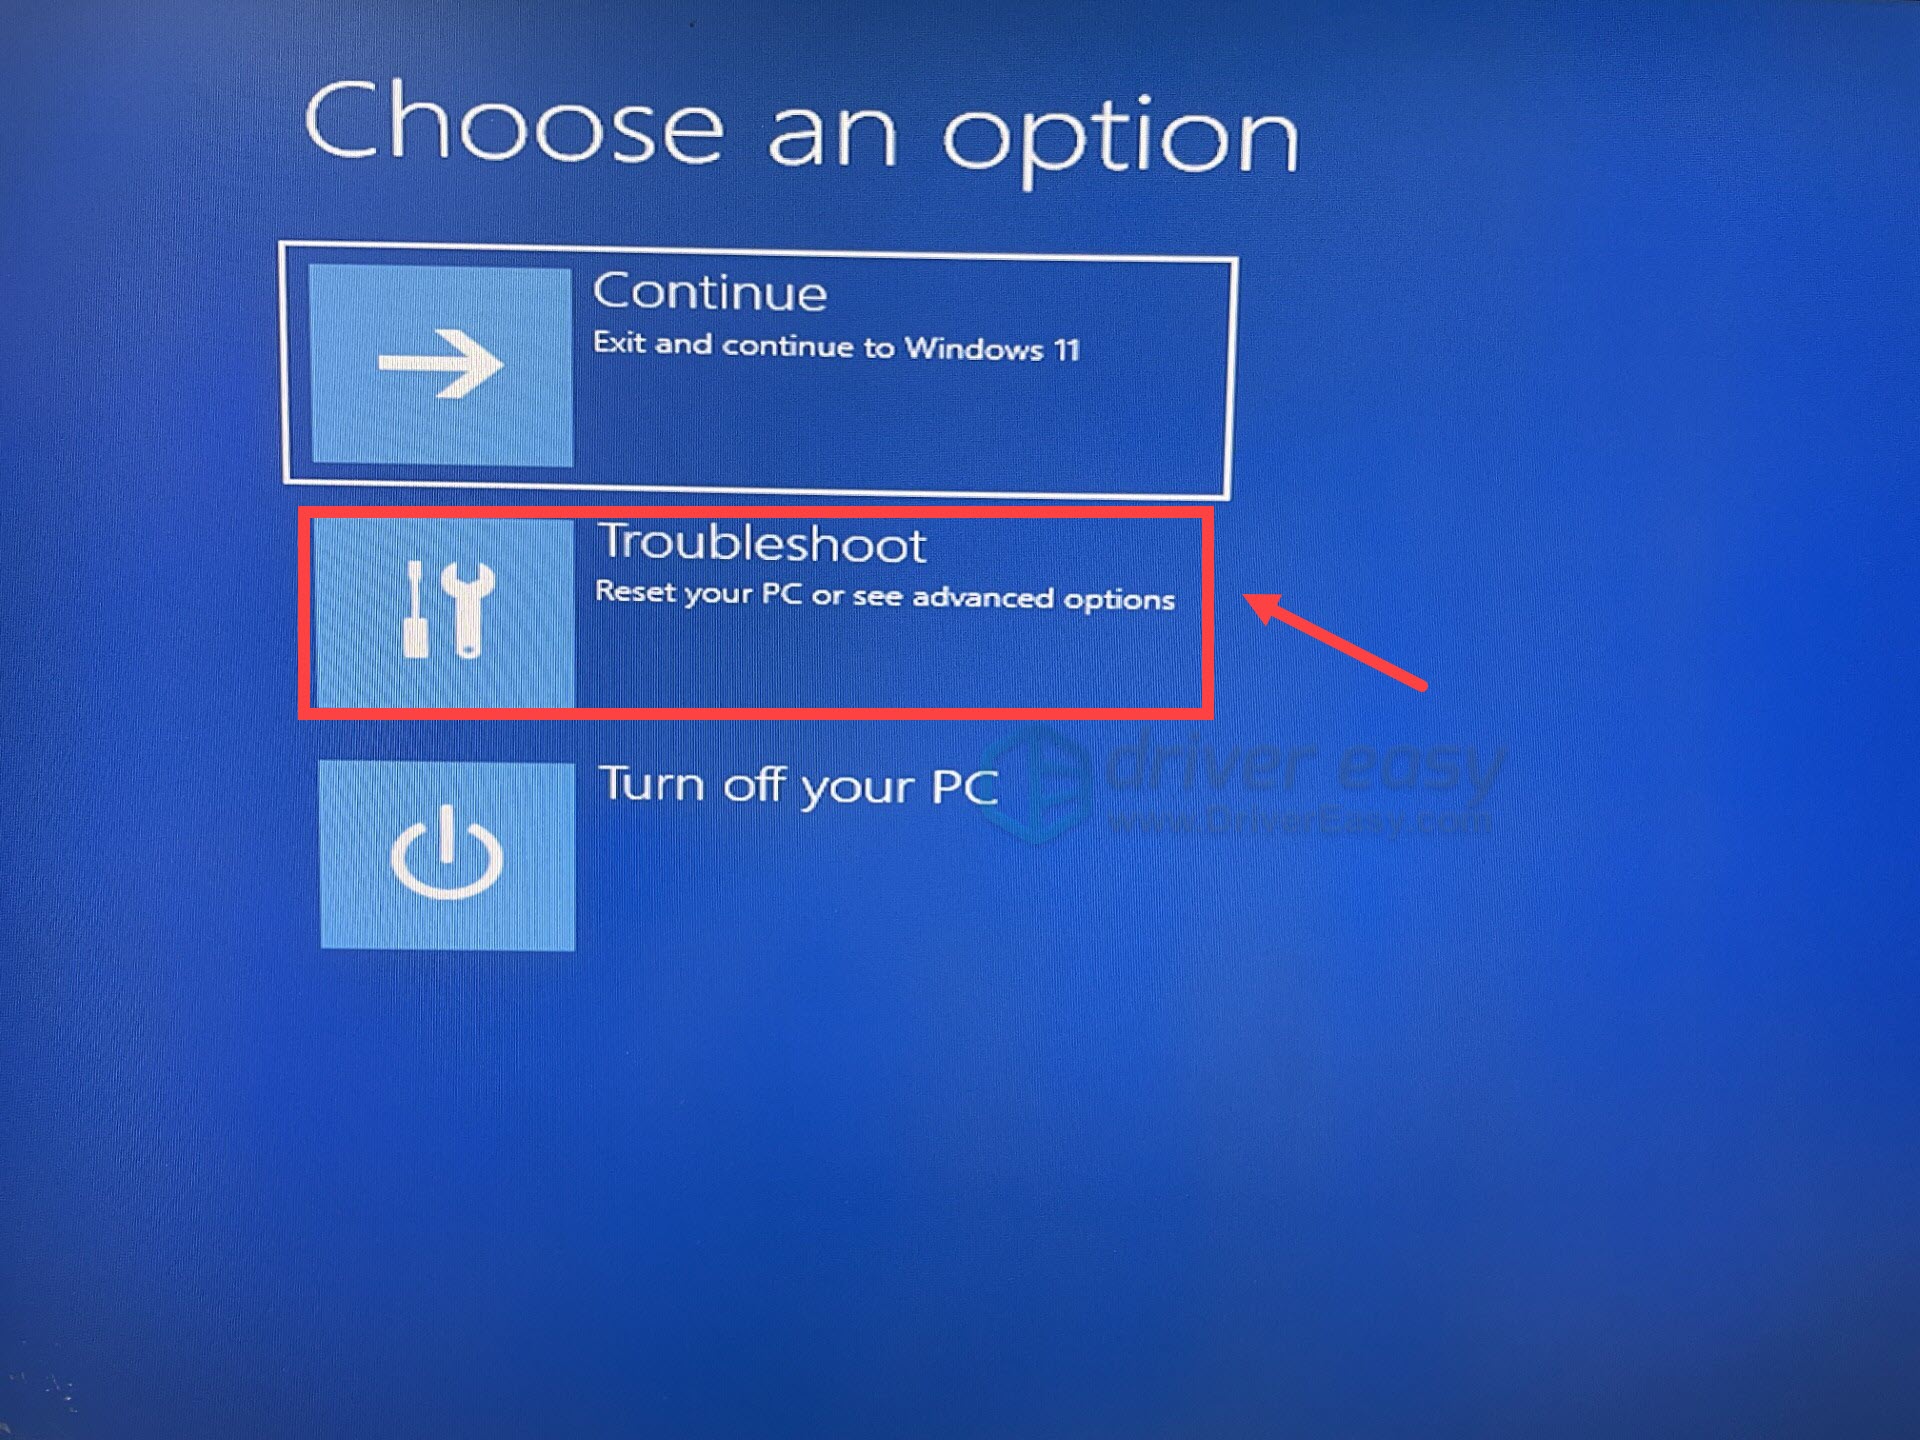
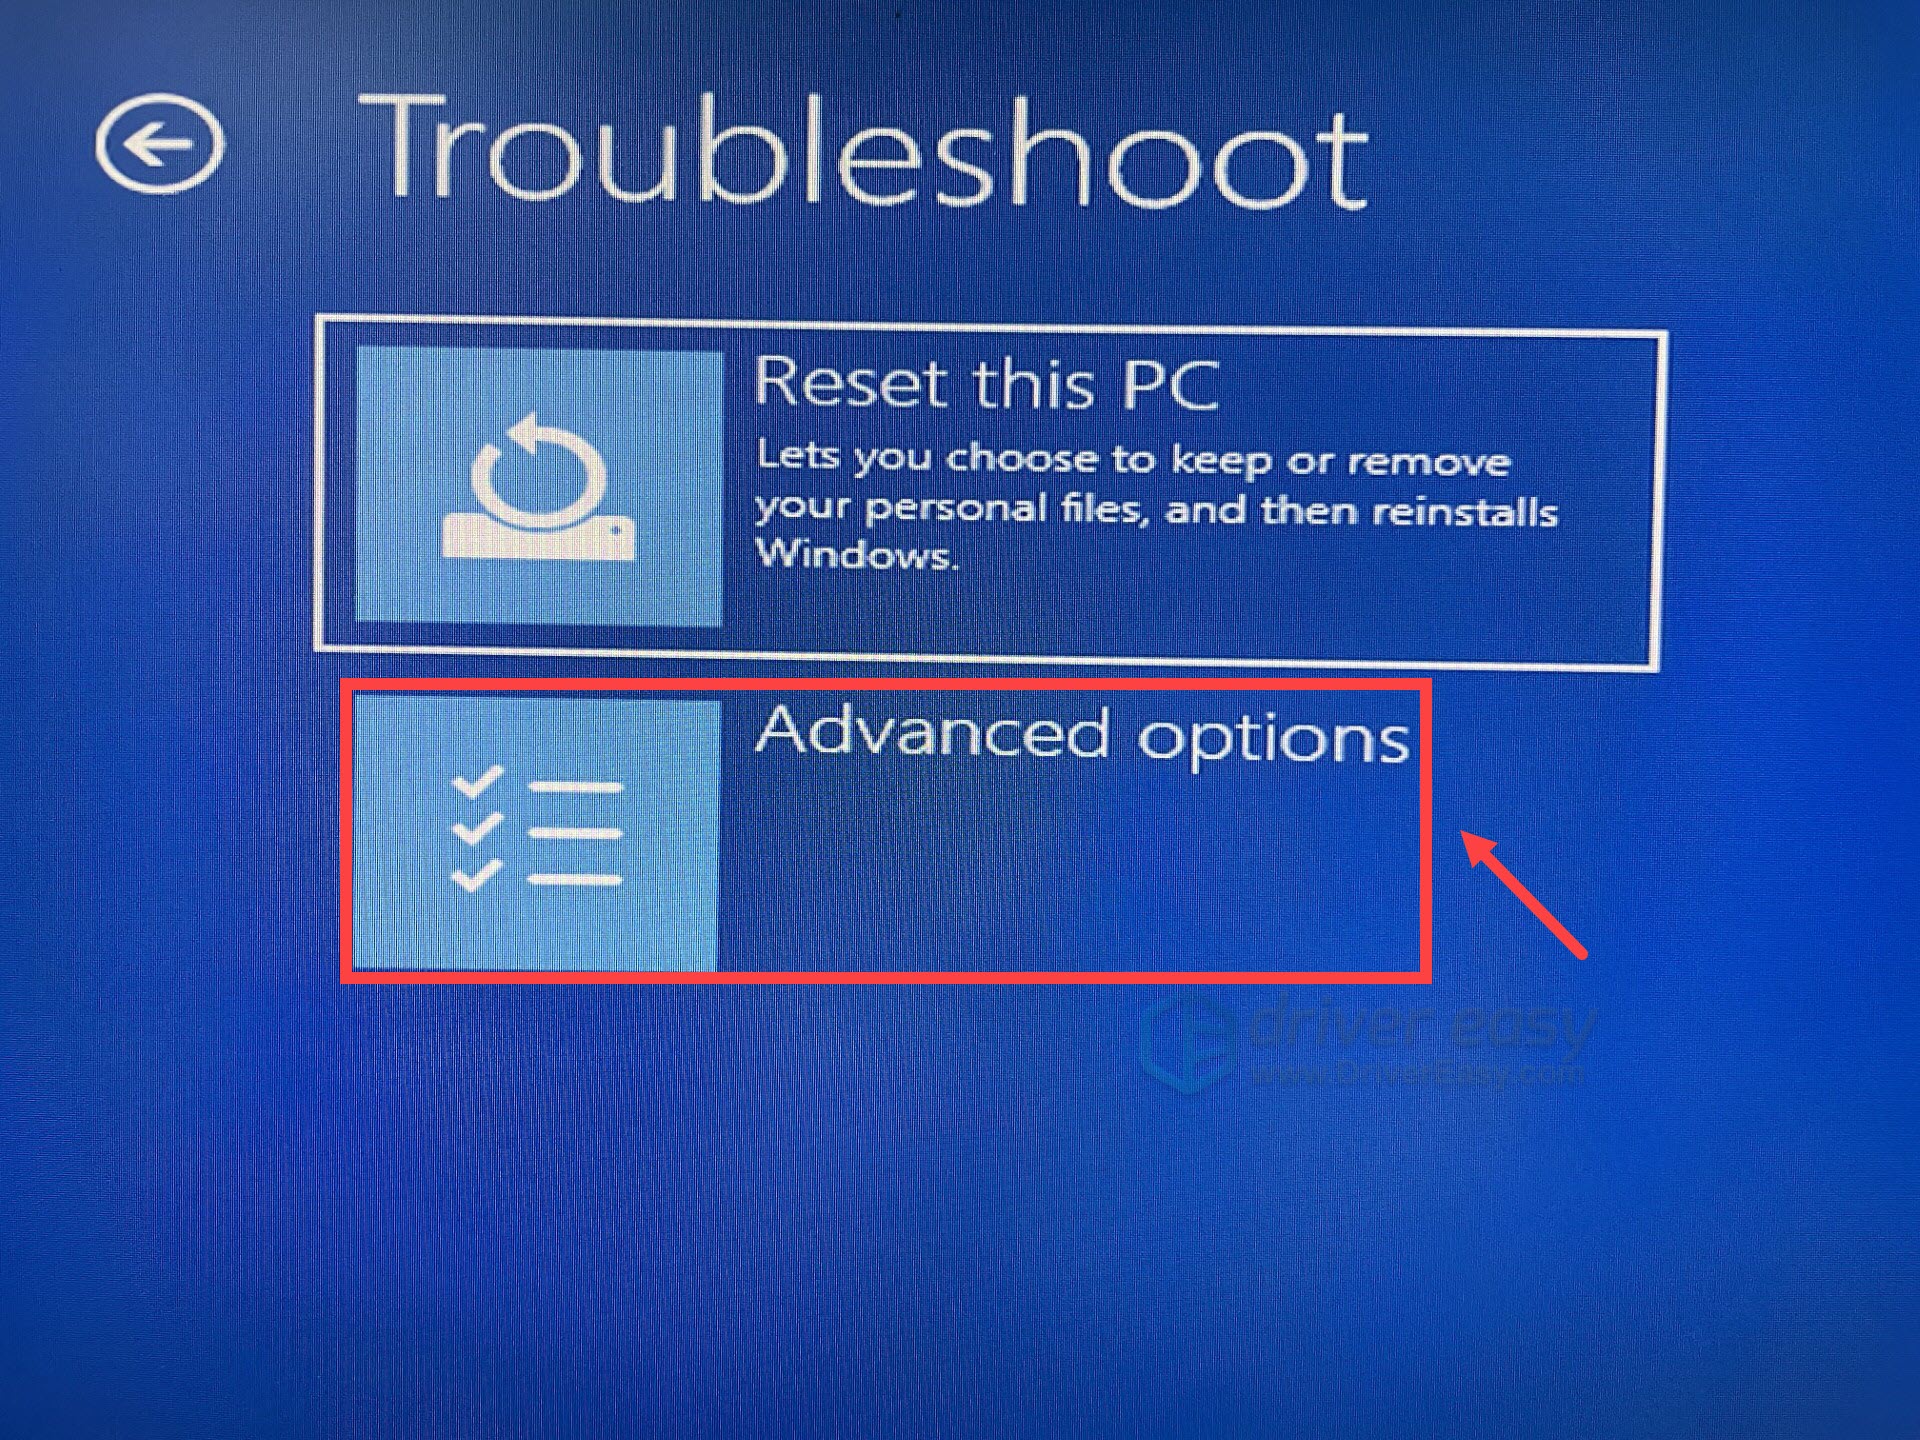
- After your PC restarts, you’ll see a blue screen with several options. Choose Troubleshoot.
- Then select Advanced options.
- Click on UEFI Firmware Settings.
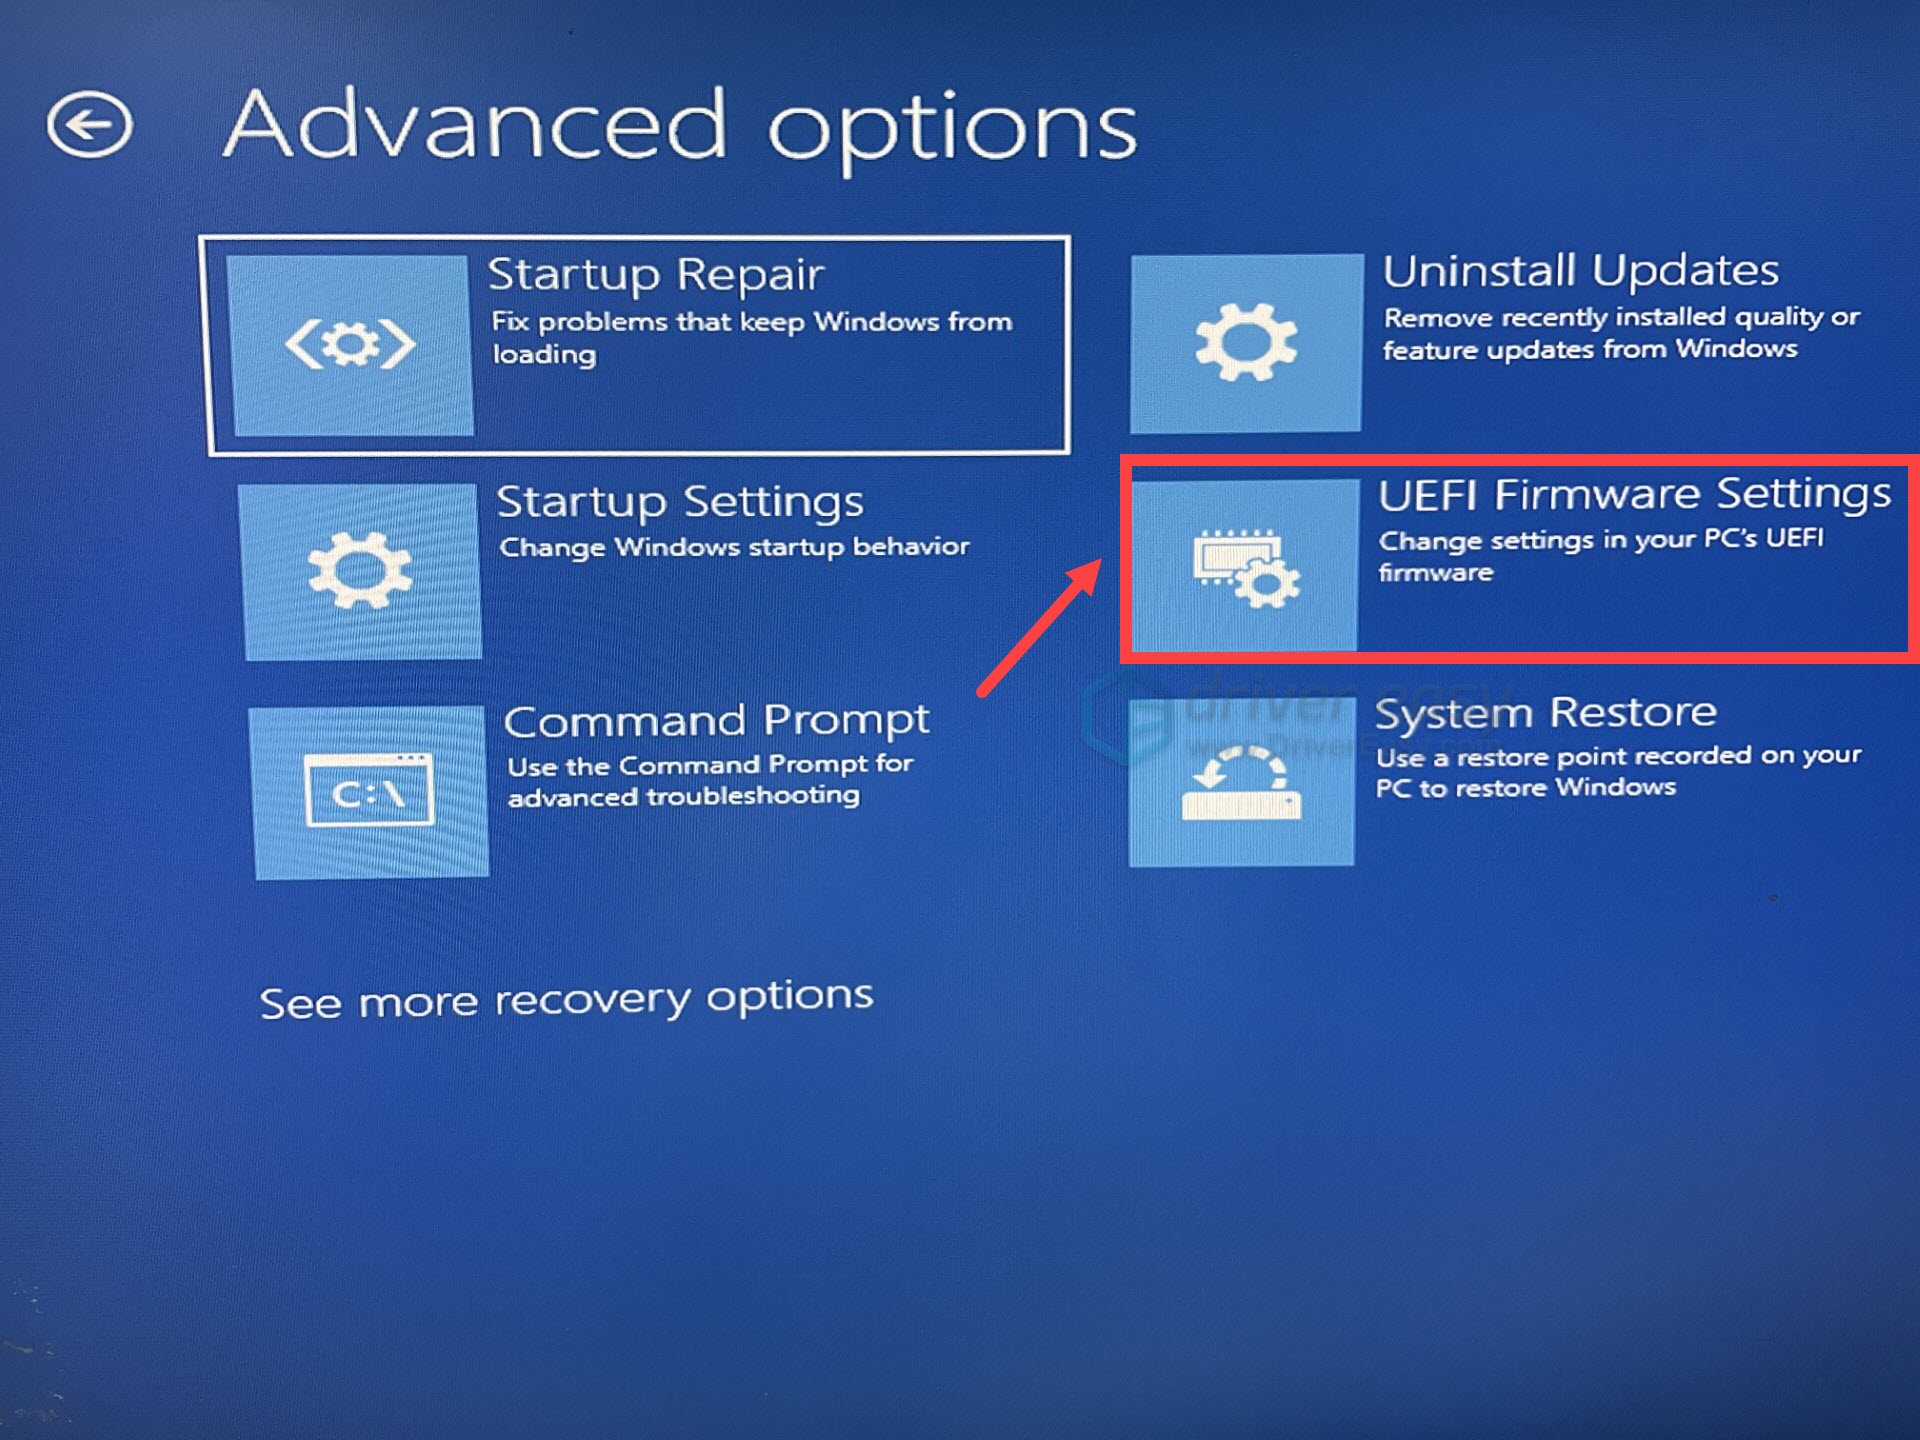
- Click Restart and your computer will boot into the BIOS setup screen.

- Find the Undervolt Protection feature and confirm that it is Enabled.

Once done, exit BIOS and launch XTU to see if your problem is solved. If the error persists, try the next fix below.
2. Run XTU as Administrator
The lack of administrative privileges may prevent you from launching the tool successfully. To check if this is what’s happening to you, try to open it as an administrator. What you have to do is right-click it and select Run as administrator. This is a one-step solution.
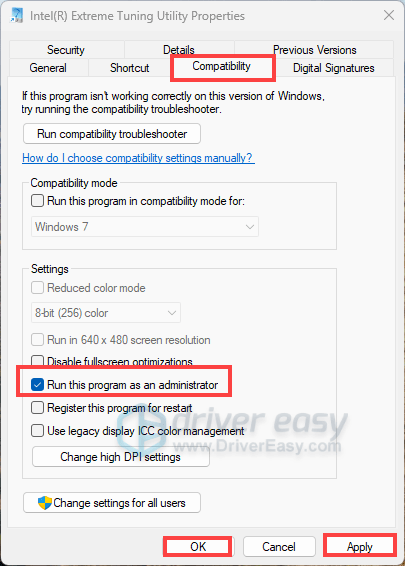
If it works for you, you can make the app always open as administrator. Simply right-click it and select Properties. Then from the Compatibility tab, check the box next to , then click Apply > OK.
3. Update Your BIOS and Drivers
Outdated drivers or BIOS firmware can cause compatibility issues. So it’s suggested that you update your drivers to the latest versions. You can update your drivers by navigating to your device manufacturer’s website, usually the support page. However, if you don’t have the time or patience to search for, download, and install the drivers corresponding with your system, you can do this automatically with Driver Easy. It’s a handy tool designed to simplify the process of updating drivers.
To update drivers with Driver Easy, you can take these steps:
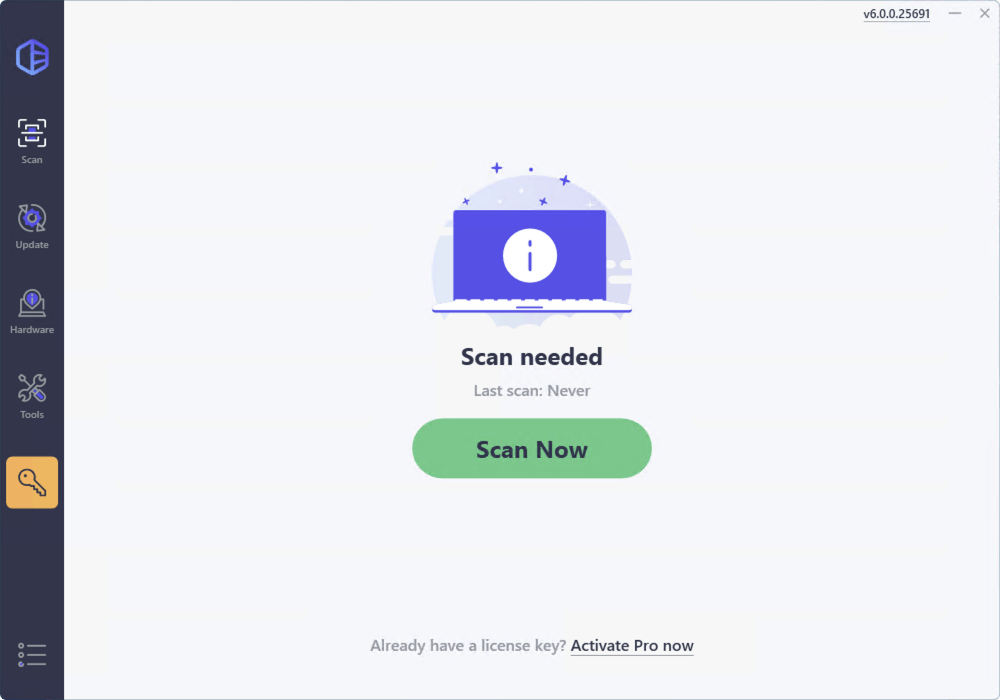
- Download and install Driver Easy, then run it and click Scan Now. Driver Easy will scan your computer and list any hardware with missing, outdated or mismatched drivers.
- Click Update All to download and install new drivers automatically, or click Activate & Update next to your device for which you think a driver update is necessary, e.g., your graphics card.

By clicking on these buttons, you’ll need to upgrade to the Pro version. If you’re not ready for it, sign up for the free trial to update drivers with no upfront cost.
To update your BIOS:
- Press the Windows logo key + R to open the Run box. Type msinfo32 and hit Enter.
- When the System Information window opens, locate the lines labeled BaseBoard Manufacturer, which indicates the motherboard’s manufacturer (e.g., ASUS), and BaseBoard Product, which displays the specific model number of your motherboard. Make a note of these details.

- Now visit the official website of our motherboard manufacturer. Navigate to the support or download section, and search for your motherboard model.
- Locate the BIOS section, and compare the latest BIOS version available with your current version (also found in the System Information window under BaseBoard Version.
- If an update is available, download the appropriate BIOS update file.
- Once downloaded, follow the instructions to install the BIOS update. You may need to:
- Extract them using a utility like WinRAR.
- Transfer them onto a properly-formatted USB drive.
- Restart the PC.
Note that the tools used or specific update methods may vary by manufacturer, but step-by-step instructions should be found either in the manual or the manufacturer’s website.
4. Ensure All Windows Updates are Installed
Sometimes outdated Windows versions might be incompatible with certain new Windows features. And the latest Windows updates usually come with bug fixes. So it’s essential that you’re up to date:
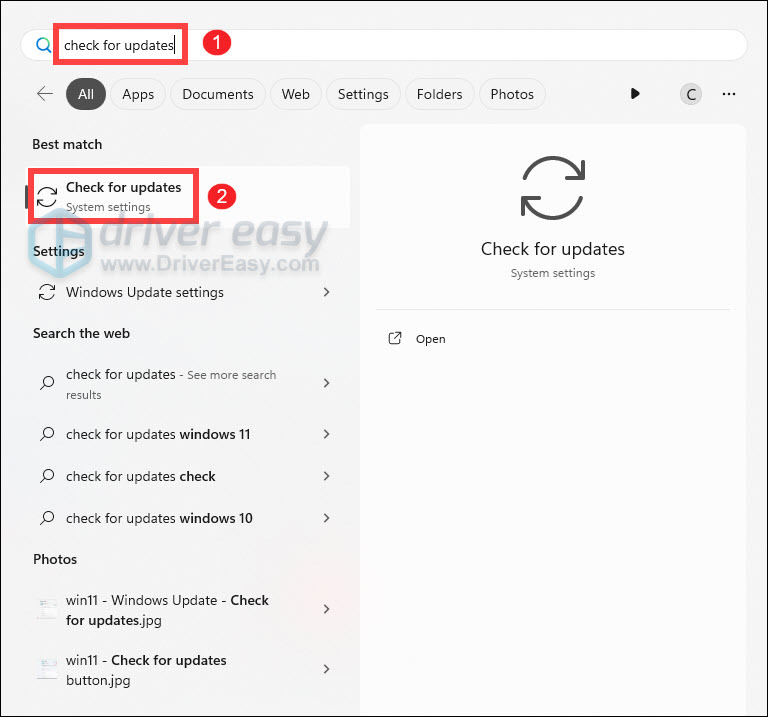
- Press the Windows logo key to invoke the Search. Type check for updates, then click Check for updates from the list of results.
- If you’re told that “Updates available to install”, simply click on the Install all button.
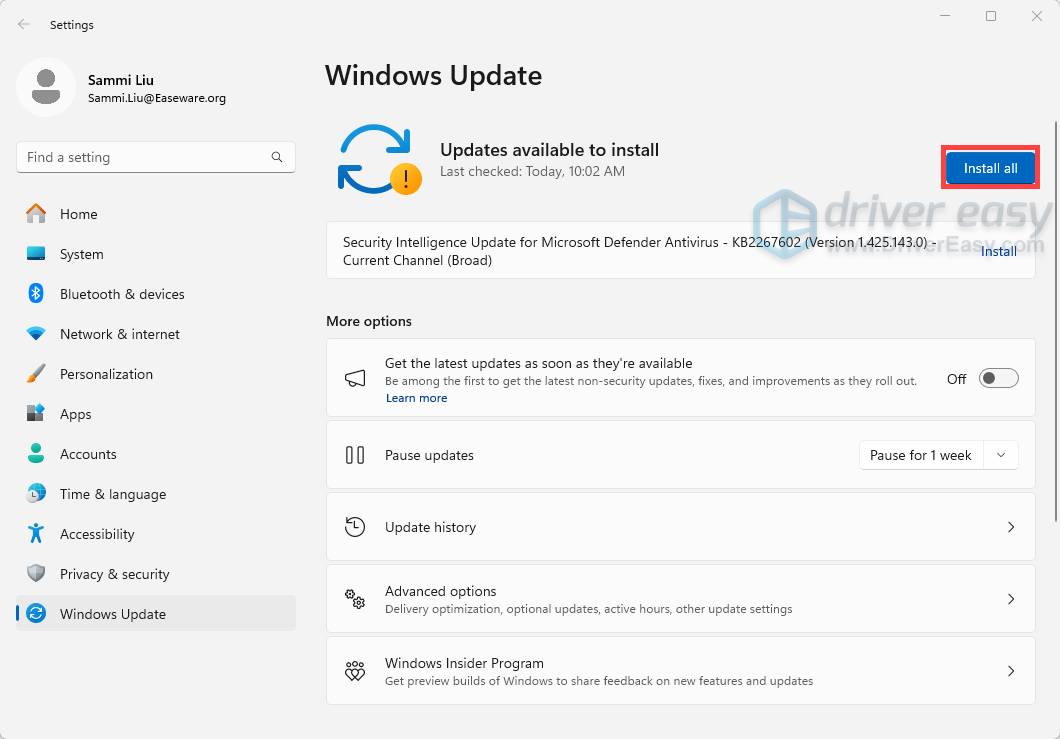
Or you can click on the button Check for updates to see if there are updates available and then follow the on-screen instructions to download and install them.
If you’re up to date but the tuning utility still won’t open properly, try other fixes below.
5. Consider Alternative Tools
If your problem still arises, alternative tools like ThrottleStop can offer similar tuning capabilities.
If You Have 11th Gen Processors or Older
When you receive the System Incompatibility error message, you might have Virtualization Based Security (VBS) and Windows features that cause VBS to run, which are not compatible with XTU.

In this case, you can disable them and check if it works. Follow the steps below to do this.
Disable Virtualization-Based Security (VBS)
First, disable Memory integrity:
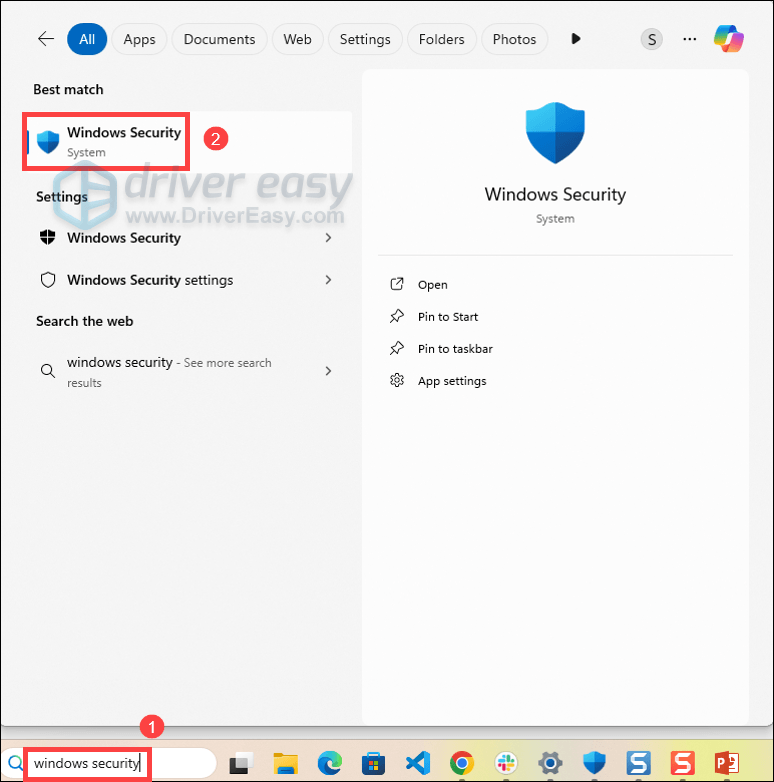
- Press the Windows logo key to invoke the Search bar. Type windows security, select Windows Security from the list of results.
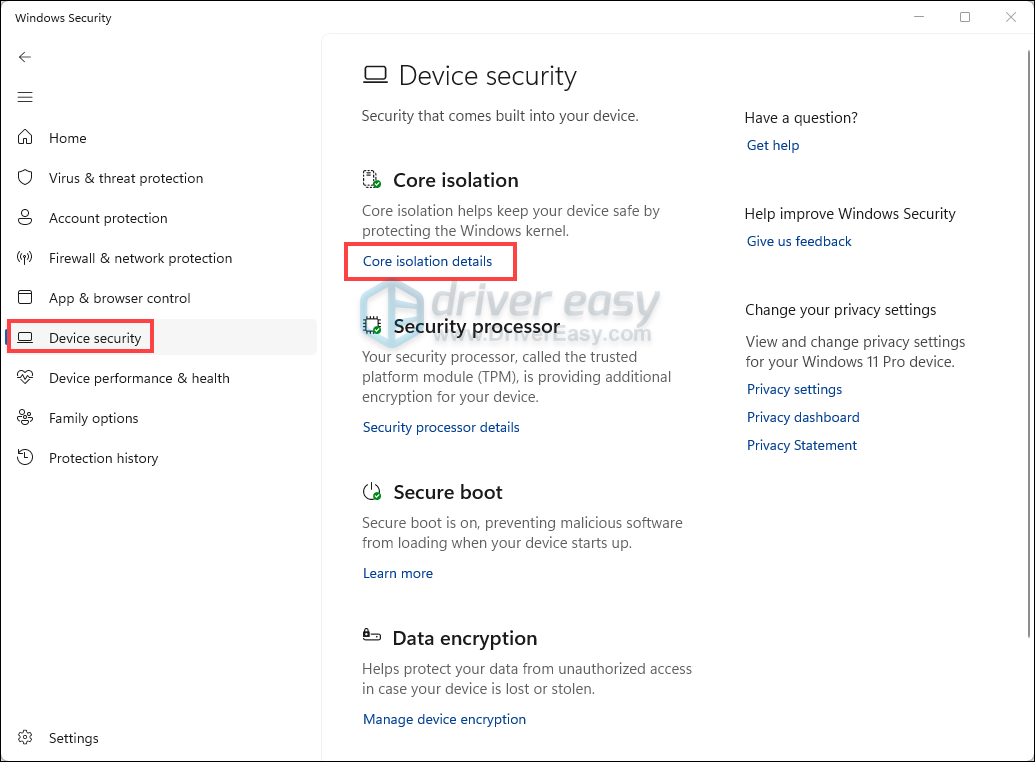
- Navigate to Device security > Core isolation details.
- Toggle Off Memory integrity.
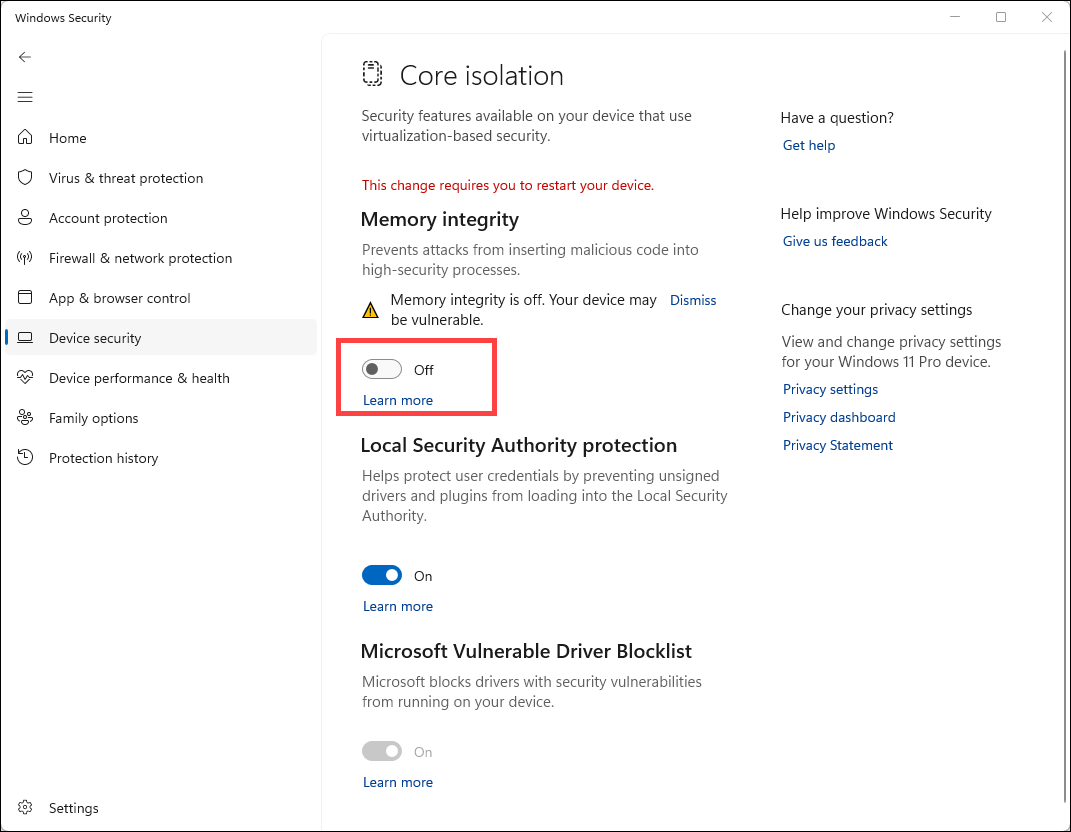
- Restart your computer and let the changes take effect.
Next, you’ll need to disable Hyper-V and related features:
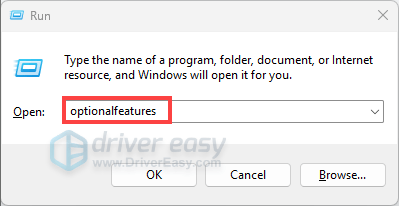
- Press the Windows logo key + R to open the Run box. Type optionalfeatures and hit Enter. This will open the Windows Features window.
- Locate Hyper-V, Virtual Machine Platform, Windows Hypervisor Platform, which are listed alphabetically. Make sure they’re unchecked.
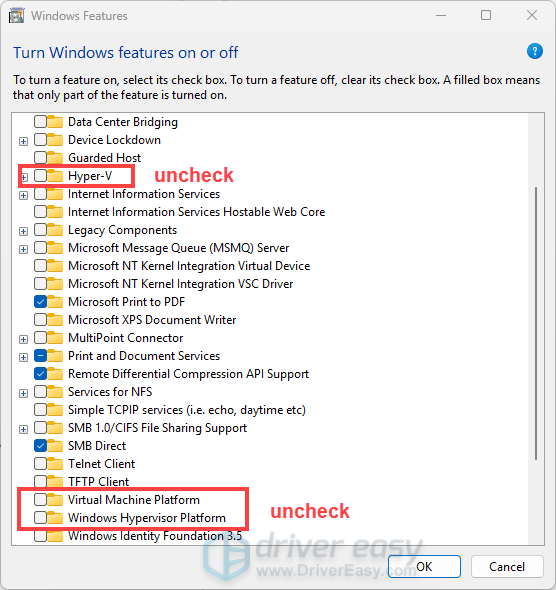
Then click OK and restart your computer.
Note: Disabling these features may affect other applications that rely on virtualization.
If you’ve disabled these features but the XTU is still not opening, you may consider alternative tools like ThrottleStop. Or you can use BIOS overclocking features, though they’re not universally available to all users.
And this wraps up our guide on how to fix Intel XTU (Extreme Tuning Utility) not opening issue. Happy TUNING! If you have other questions or need further assistance, feel free to write them down in the comment section below.
To help us assist you more effectively, it would be a great idea that you include this information in your comment: system specifications, troubleshooting steps already taken. Providing these details will enable us and the community to offer more accurate and tailored support.