Have you played those awesome video games, like Grand Theft Auto V, PUBG, Assassin’s Creed, etc? You may have been yearning to play them for some time. But you can’t, because your laptop isn’t powerful enough to run games requiring a huge number of graphics resources.
It is likely that the problem is on your graphics card. Your laptop has only an integrated graphics processing unit (GPU) or a slightly better “dedicated” graphics card on your laptop that can’t handle intensive graphics tasks. In either case, you need to upgrade your GPU to increase your laptop performance. However, you can’t easily replace the graphics card as you do on a desktop computer, no matter it is “dedicated” or not.
And you also don’t want to build or buy a gaming desktop computer. Switching between systems is troublesome. Besides, a desktop is too large and heavy. It’s not convenient to move around with a desktop. In short, you’d rather stick to your laptop. And you’re wondering if there is any other way to upgrade your laptop graphics card.
In fact, it IS possible to upgrade the graphics card on a laptop. One way is to install an external graphics card or eGPU on your laptop. It is one of the most effective methods to remarkably increase your laptop graphics power.
This guide shows you three steps to install eGPU. They will explain to you what you need to know and do before, during and after the installation. Give them a try!
Three steps to install an external graphics card for a laptop:
Step 1: Prepare for installation
There are certain things you need to know and prepare before you can go on to install an external graphics card.
First, you should know that the method we are using is to install a desktop graphics card to a card dock connected to your laptop. And the interface we’re going to use for connection is Thunderbolt 3. Your laptop needs to have a Thunderbolt 3 port before you can use an external graphics card.
So, the second thing you need to do is to check whether there’s a Thunderbolt 3 port on your laptop. Thunderbolt 3 ports look as the image below shows.

If you don’t have any Thunderbolt 3 dock on your laptop, it is suggested that you — well, this may sound discouraging — buy a new laptop with a better graphics card. You can also try connecting an external graphics card to the ports like USB or Mini PCI-E and products like EXP GDC. But this is not a recommended option. You will need a great amount of time, energy and patience to install a graphics card this way (sometimes you need to remove your base enclosure from your laptop and take out some components from inside.) And it is possible that your external card can’t run or run with issues on your laptop. The most important thing is that, even if you succeed in installation, you can’t get the most out of your graphics card due to the low bandwidth of those interface standards.
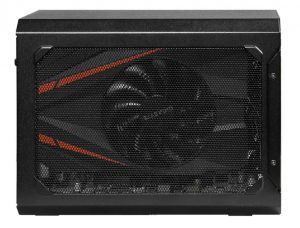
You also need to prepare an eGPU dock and a desktop graphics card. Note that the graphics card is not necessary since some eGPU docks come with their own card. Manufacturers like Razor, Gigabyte, and ASUS has released this kind of products. Do some research on their official site and pick the one that looks good for you.
Step 2: Install eGPU on your laptop
With your graphics card and eGPU dock ready, you can go on to install them on your laptop.
1) Install your graphics card into your eGPU dock.
2) Connect the power cord to your eGPU dock and your power supply.
3) Connect a Thunderbolt 3 cable to your eGPU dock and your laptop.
Now you have installed your external graphics card on your laptop. You also need to install all related software to fully start up your hardware.
Step 3: Install all related software
In order for your external graphics card to work, you’ll have to install and update all the latest software on your laptop and sometimes on your eGPU dock. These include the up-to-date drivers and firmware. This step is important in that it can fix compatibility issues that can stop you from using your external graphics card.
1) Download and install the latest firmware for your eGPU dock. (You may need to consult the manual of your product for instructions and download the firmware from its official website.)
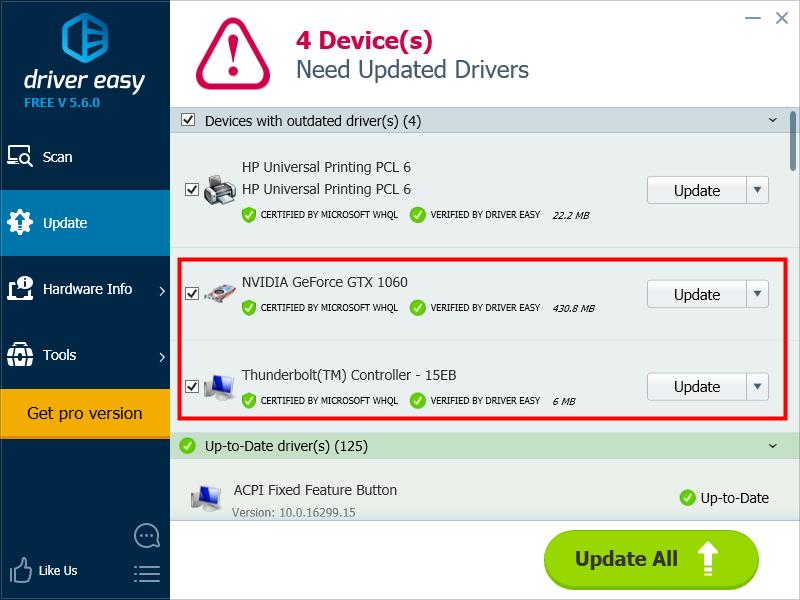
2) Download and install the latest drivers for your eGPU dock, Thunderbolt 3 controller, graphics card, and (perhaps) other hardware components of your laptop.
You have two options to do this:
Option 1: Update the drivers manually. You can update your drivers manually by going to all official websites of your devices, and search for the most recent correct driver for each. Be sure to choose only drivers that are compatible with your variant of Windows.
Option 2: Update the drivers automatically. If you don’t have the time, patience or computer skills to update your drivers manually, you can, instead, do it automatically with Driver Easy. Driver Easy will automatically recognize your system and find the correct drivers for your exact video card and chipset, and your variant of Windows, and it will download and install them correctly:
I. Download and install Driver Easy.
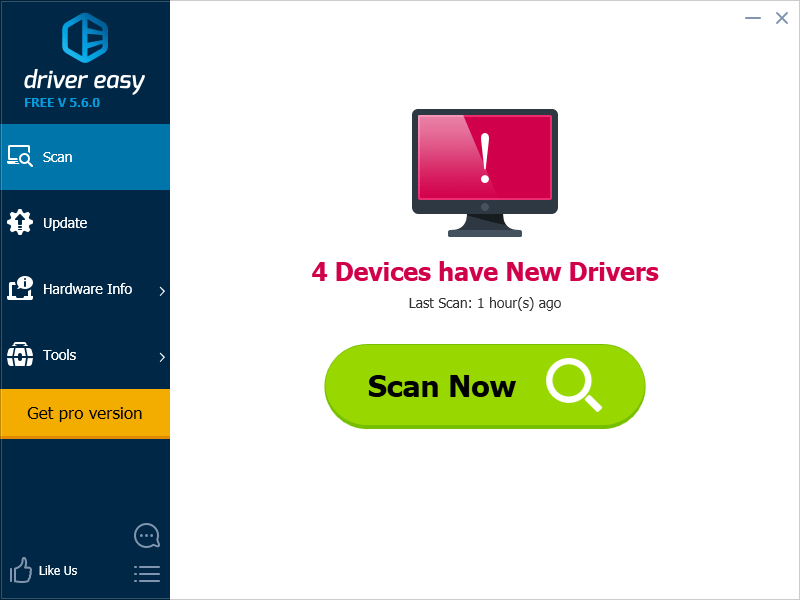
II. Run Driver Easy and click the Scan Now button. Driver Easy will then scan your computer and detect any problem drivers.

III. Click the Update button next to each driver to automatically download the correct version of this driver (you can do this with the FREE version). Or click Update All to automatically download and install the correct version of all the drivers that are missing or out of date on your system (this requires the Pro version – you’ll be prompted to upgrade when you click Update All).

IV. Restart your computer.
All the software you need has already been installed. You can now enjoy the amazing graphics power of your desktop graphics card on your laptop.


