Want to play Xbox One games fast and safely? Concerned about the security of your activities on Xbox One? You’ll need to set up a VPN for your Xbox One console. This guide is going to tell you why you should set up a VPN on Xbox One and walk you through how to do it. Read on to find how…
About Xbox One VPN:
Why should I set up a VPN on Xbox One?
We recommend using a VPN(Virtual private network) on Xbox One based on following benefits. You’ll find it worth having an Xbox One VPN.
1) A VPN keeps your privacy and other data on Xbox One safe.
While you’re playing Xbox One games, there exist the same security risks as your any other online activity.
Your IP address, email address, passwords, credit card information and other private information would be collected and stored through Xbox One console. Hackers or the government may locate them from the saved logs.
But with a VPN service, your identity and all your other data will be encrypted so that you can play games or stream media freely.
2) A VPN helps you win a better Xbox One gaming experience.
The VPN is able to switch virtual locations, which means it’ll connect your device to gaming servers located in different countries.
In this case, a VPN shorten the connection routes between you and gaming servers to reduce the ping times and overall lag. Then you can play games much faster.
3) A VPN helps you gain access to extra Xbox One games.
A VPN can connect your device to gaming servers located in different countries.
That is to say, you’ll have access to play games those are restricted or not yet released in your country. Or you can still play games not available when traveling.
Sounds appealing? Isn’t it? Move on to the next part to see how to set up an Xbox One VPN.
How can I set up a VPN on Xbox One?
There are two methods to set up a VPN for Xbox One: through either your Wi-Fi router or your computer. The step-by-step guides for both ways will be shown below.
You can just pick the way you prefer.
Option 1: Set up an Xbox One VPN through my Wi-Fi router
You can easily set up an Xbox One VPN through a Wi-Fi router by configuring a VPN subscription into a VPN-compatible router.
Here’s how you can do it:
1) Make sure you have a VPN-compatible Wi-Fi router.
On a VPN-compatible Wi-Fi router’s control panel, there’s a place for you to set up a VPN connection. If your router isn’t enabled for VPN, easily get a new one through Amazon.
2) Buy a VPN subscription.
There are many VPN services you can find online, but keep in mind that choose a reputable one.
1. Read the provider’s terms of service as much carefully as you can.
2. Find out what its policy says about sharing the information with third-parties .
3. Importantly, please ignore any free VPN services as they might make money in other ways, like: they may show ads which absolutely disrupt your gaming experience or sell your information to marketers.
We recommend NordVPN as your best pick for its military-grade encryption. If you decide to choose NordVPN, here’s a NordVPN coupon code for you!
3) Access your Wi-Fi router’s setting.
You can do this by typing your router’s IP address into a web browser. If you don’t know your router’s IP address, you can
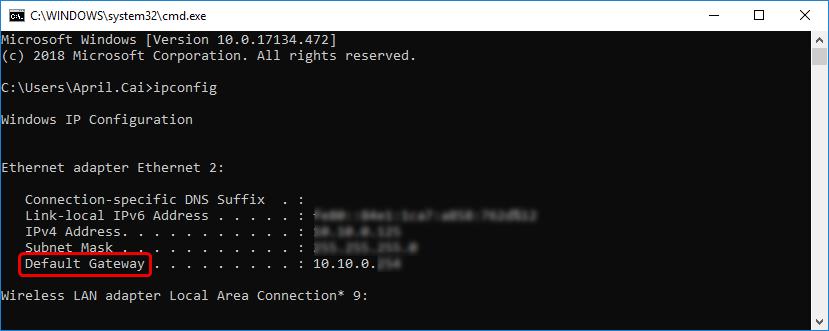
a) get it through your Windows computer:
Open a command prompt window, then type ipconfig and press Enter. Default Gateway from the result shows your router’s IP address.
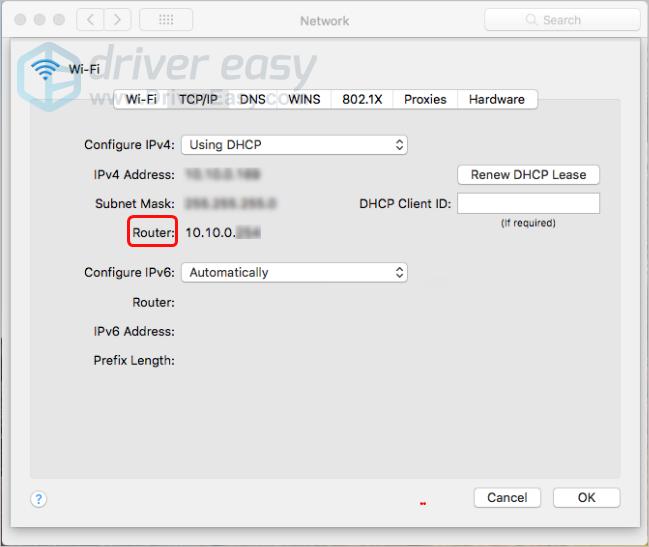
b) get it through your Mac computer:Open Network in System Preferences, you’ll see your router’s IP there.
4) Configure your Wi-Fi router’s setting.
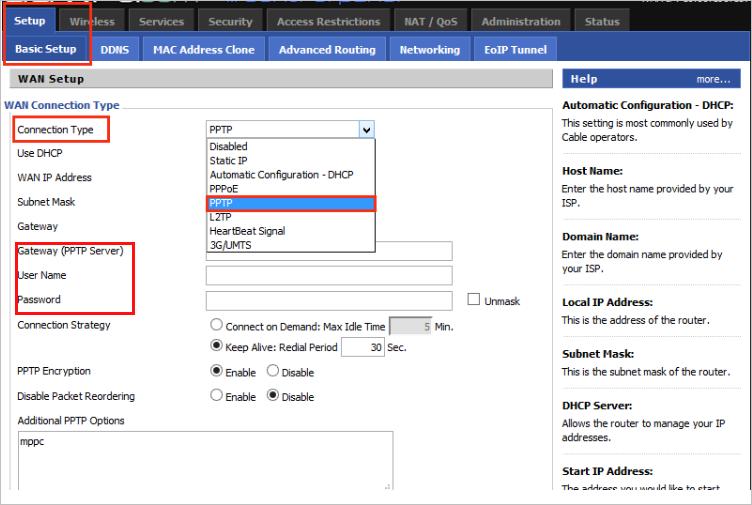
Enter the details of your VPN subscription(IP, Subnet Mask, username and password, etc) into your Wi-Fi router’s setting.
Usually it’s located in the tab called ‘Basic‘, ‘Network‘, or ‘WAN Setup‘. It varies from different router models.
You may access the window that looks like this one:
5) Connect your Xbox One to the configured Wi-Fi router .(Skip this step if your Xbox One has been already connected to the router.)
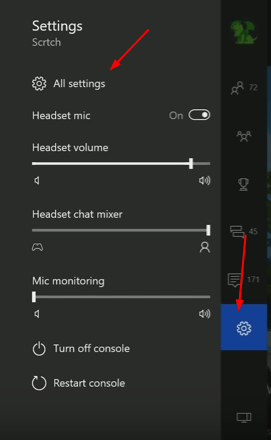
5-1) Click the Settings icon if your Xbox Live. Then select All settings.
5-2) Click Network, then click Network settings on the right pane.
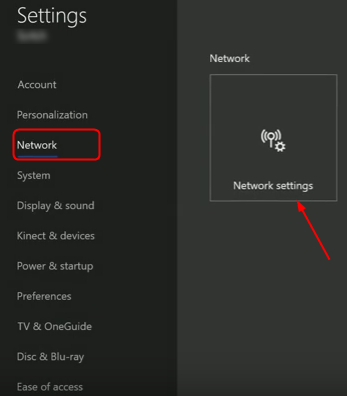
5-3) Click Set up wireless network. Then proceed to follow the on-screen instructions to configure your Xbox One to connect to use the router.
All set! Now you’re free to stream media and play games on your Xbox One.
Option 2: Set up an Xbox One VPN through my computer
Either you’re using a Windows computer or a Mac computer, you can follow these steps to set up an Xbox One VPN:
1) Plug an Ethernet cable into the back of your Xbox One and into your Windows(Mac) computer.
2) Enable the sharing of your internet connection between your computer and Xbox One.
a) If you’re on a Windows computer, follow these steps:
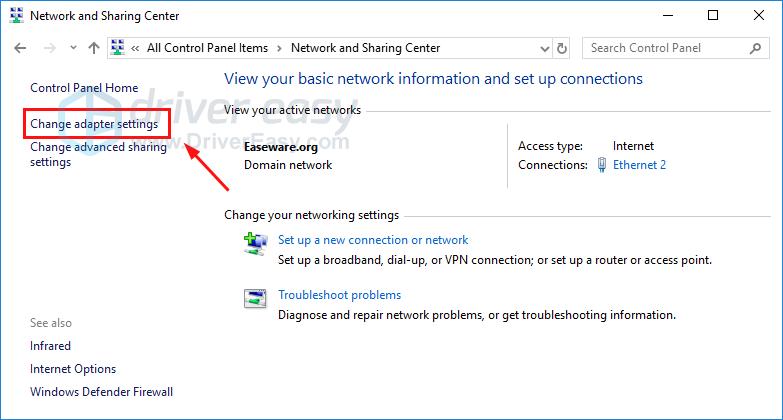
a-1) Open Control Panel > Network and Sharing Center, then click Change adapter settings.
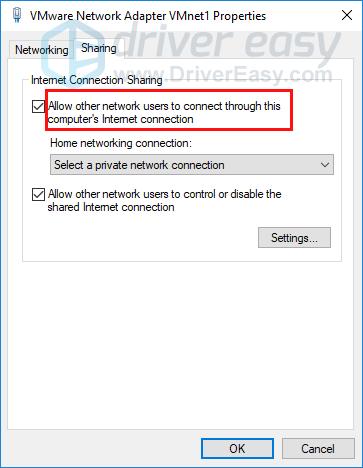
a-2) Right-click on your VPN to select Properties. Under the ‘Sharing’ tab, make sure ‘Allow other network users to connect through this computer’s internet connection’ is selected.
b) If you’re using a Mac computer, go with the followings:
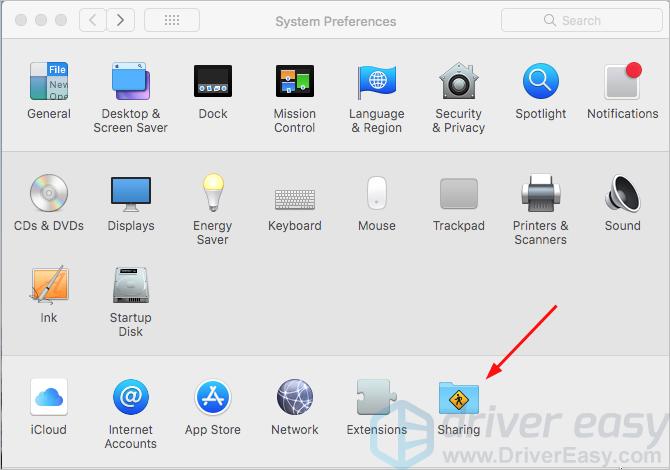
b-1) Go to System Preferences > Sharing. Then Select Internet Sharing.
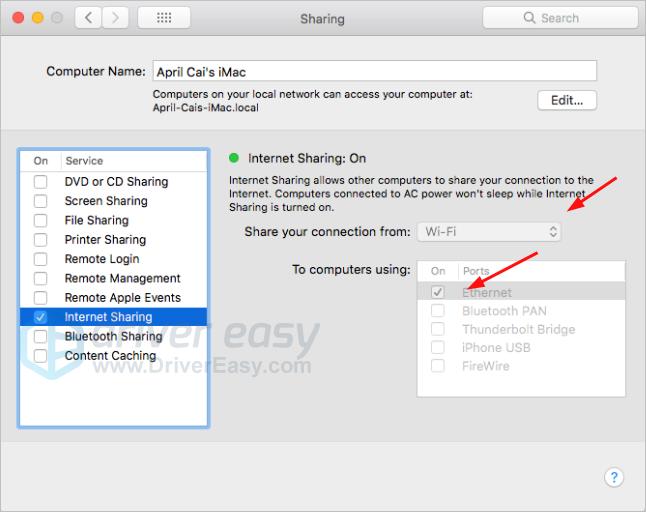
b-2) Select Wi-Fi from the drop-down menu of ‘Share your connection from’ and make sure Ethernet is ticked on from the ‘To computers using’ list. Then check the box to the left of Internet Sharing.
3) Buy a VPN subscription and install its software to configure it on your computer. You can review how to choose a VPN service through the method above.
We recommend NordVPN as your best pick. And here’s how you can use it on your computer:
3-1) Download and install NordVPN on your computer.
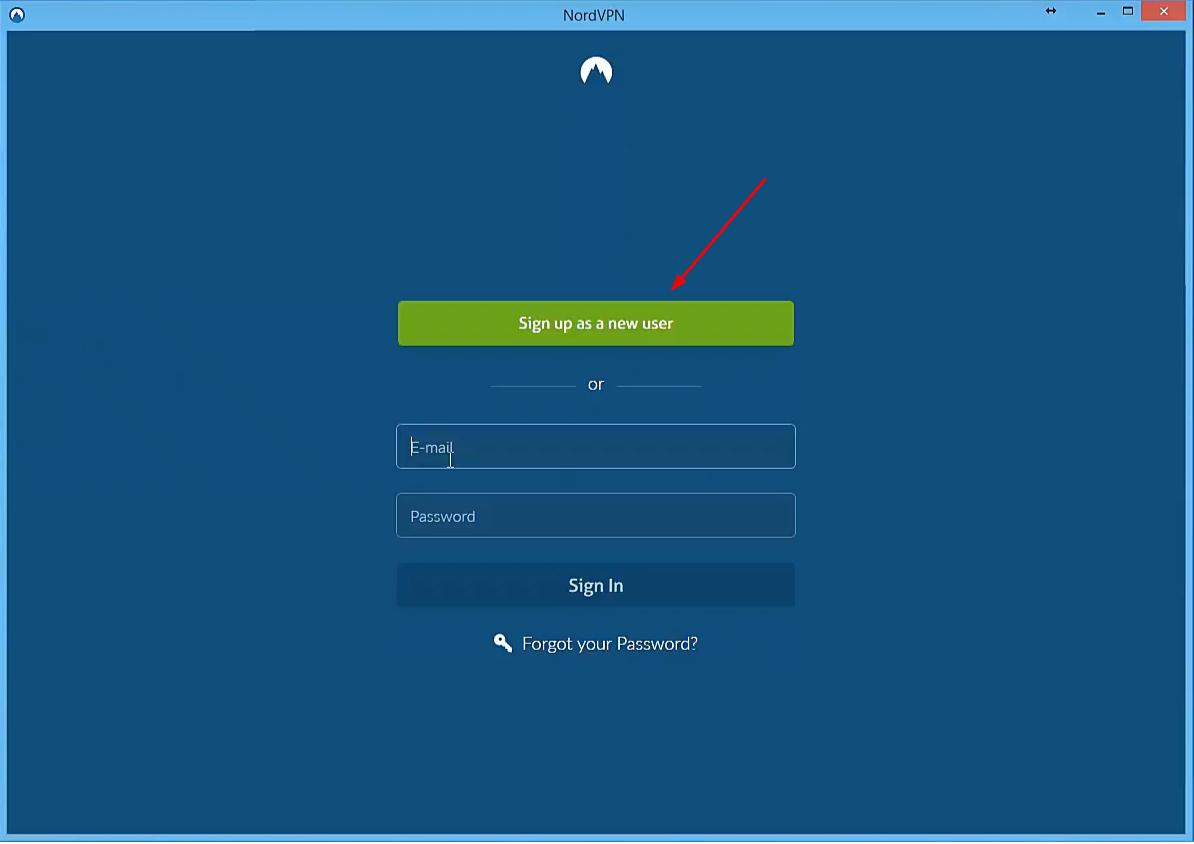
3-2) Click Sign up as a new user and follow the on-screen instructions to sign up and log in.
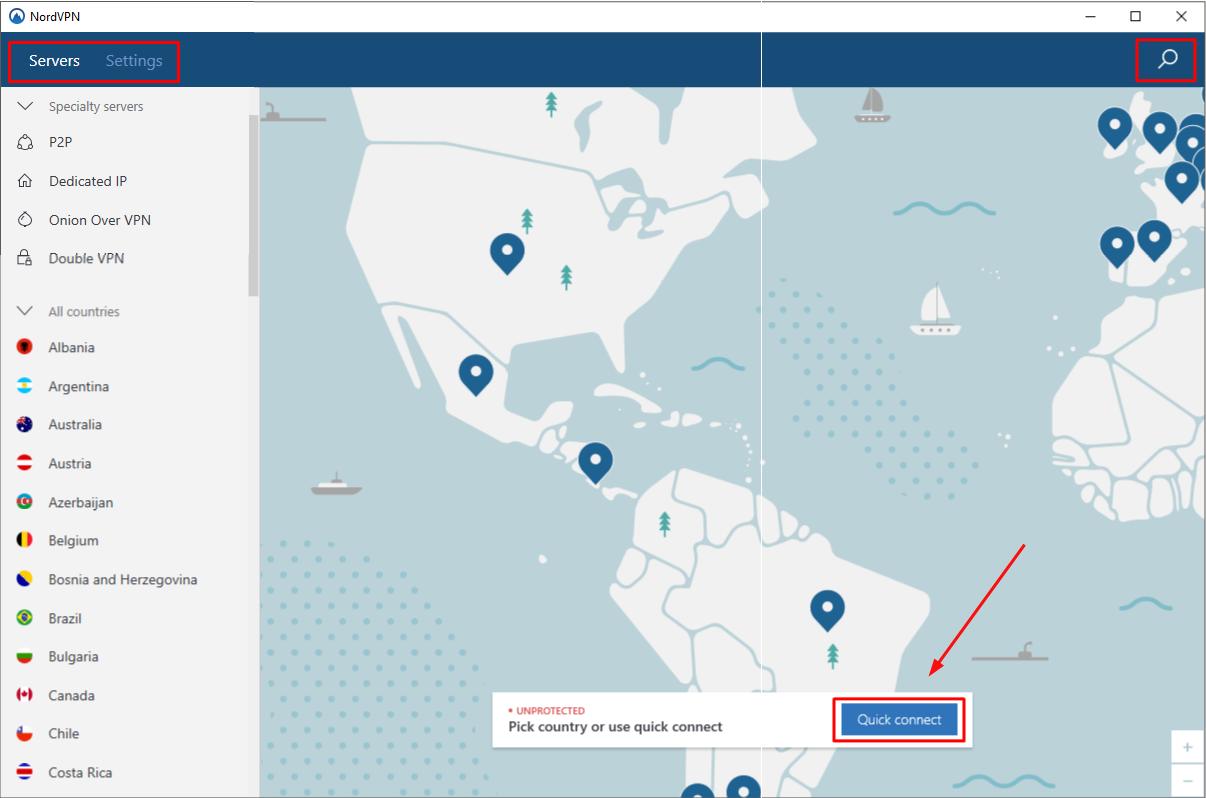
3-3) Click Quick connect to automatically connect to the server recommended for you. Or you can also connect to a server in a specific country by clicking on the country pin on the map.
You should now be able to using the VPN on your Xbox One.
Tada! You may have set up a VPN on your Xbox One. Feel free to comment below with your own experience or leave your any questions.
Enjoy playing Xbox One games!


