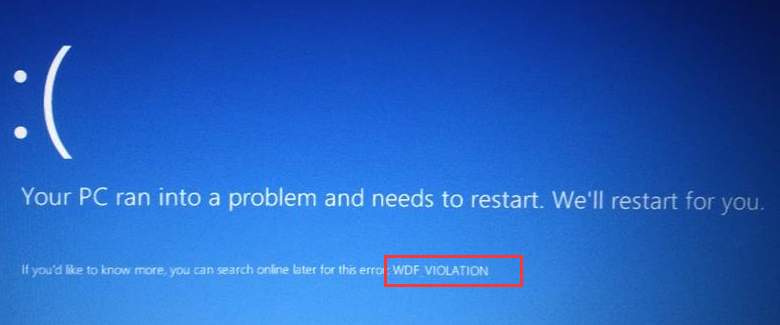
WDF_VIOLATION ( with WDF standing for Windows Driver Framework) in Windows 10 usually indicates that Windows found an error in a framework-based driver. It’s less likely that this error is caused by your hardware. As such, the resolutions to this problem are not that difficult to find.
In this post, we will be showing you some of the effective methods to tackle the WDF_VIOLATION blue screen of death problem on your Windows 10. You may not have to try them all; just work your way down until you find the one that works for you.
Method 1: Update Device Drivers
Method 2: Use Driver Verifier
Method 3: Repair system files
IMPORTANT: You’ll need to be logged into Windows on the problem computer to try any of these solutions. If you can’t log into Windows, power on and off your PC 3 times to perform a hard reboot and restart it in Safe Mode, then try these solutions.
Note that the screenshots in this post are captured from a Windows 11 operating system. If you are using Windows 10 or older versions, please be aware that the visual appearance of your screen may vary slightly, but the steps to perform the task remain consistent.
1: Update Device Drivers
As mentioned, the WDF_VIOLATION is usually caused by certain drivers, display or video drivers in most cases. Therefore, the easiest way is to update device drivers for your PC.
There are two ways for you to get the right drivers for your devices: manually or automatically.
Manual driver update – You can update your drivers manually by going to the manufacturer’s website and searching for the most recent correct driver. Note that you should always go to the PC manufacturer if you’re a laptop user.
Automatic driver update – If you don’t have the time, patience or computer skills to update your drivers manually, you can, instead, do it automatically with Driver Easy. Driver Easy will automatically recognize your system and find the correct drivers for your system, and your variant of Windows 10, and it will download and install them correctly:
- Download and install Driver Easy.
- Run Driver Easy and click the Scan Now button. Driver Easy will then scan your computer and detect any problem drivers.

- Click Update All to automatically download and install the correct version of all the drivers that are missing or out of date on your system.
(This requires the Pro version which comes with full support and a 30-day money-back guarantee. You’ll be prompted to upgrade when you click Update All. If you’re not ready to buy the Pro version, Driver Easy offers a 7-day free trial which includes access to all the Pro features such as high-speed download and one-click install. You won’t be charged anything until your 7-day trial has ended.)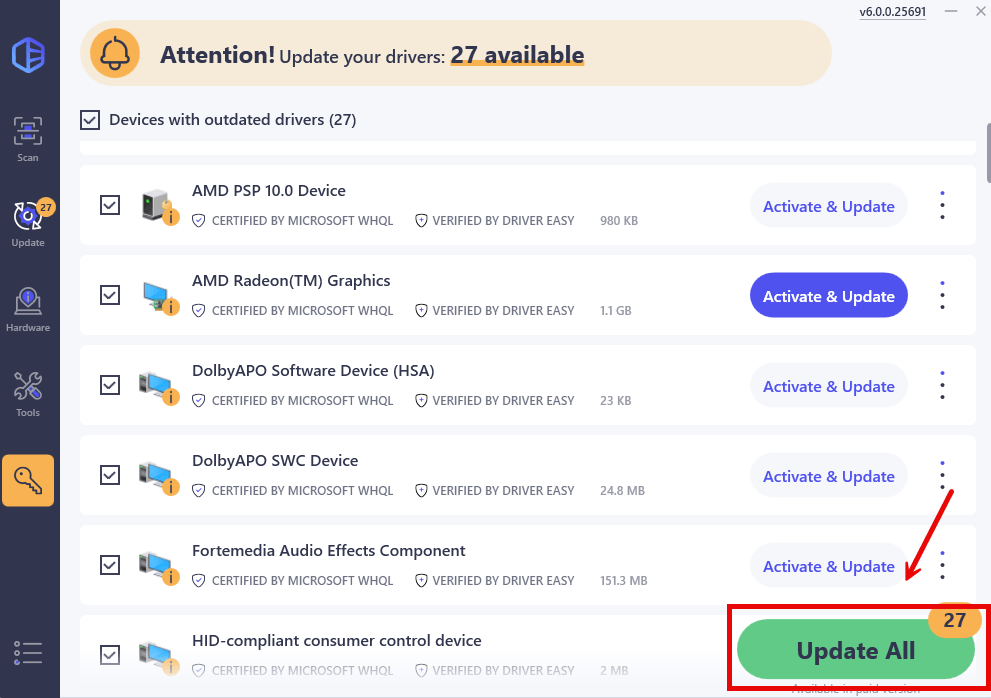
- Restart your computer for the changes to take effect.
2: Use Driver Verifier
Warning: You must be in the Administrators group on the computer to use Driver Verifier. In the middle of the session, your PC could crash. So, it must be used when you have backed up all your important data and files.
Driver Verifier is a tool provided by Microsoft to monitor Windows kernel-mode drivers and graphics drivers to detect illegal function actions that might be harmful to the system. To activate it:
1) On your keyboard, press the Windows Logo key, type in command prompt, and click Run as administrator.
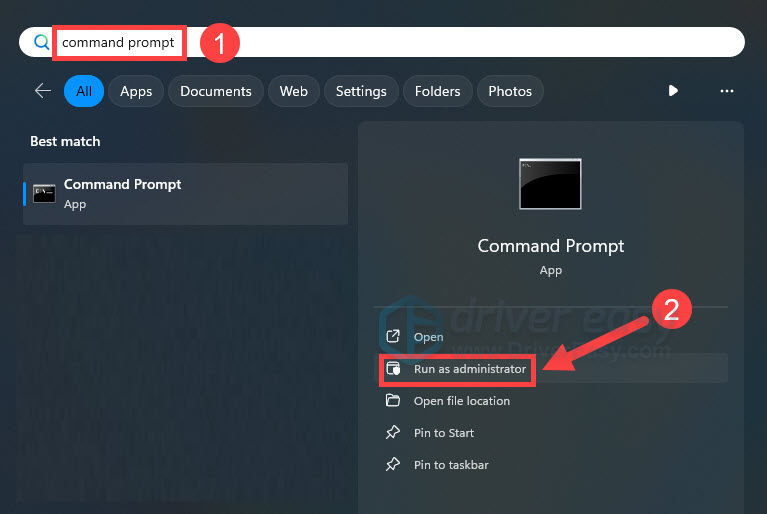
When prompted to provide administrator permission, click Yes.
2) Type verifier in the command prompt window. Then hit Enter.

3) Choose Create standard settings and then click Next to continue.
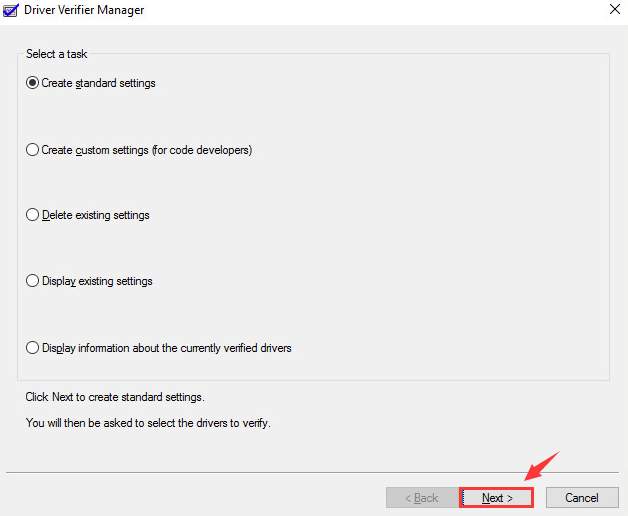
4) Choose Automatically select all drivers installed on this computer. Then click the Finish button to start the verification.
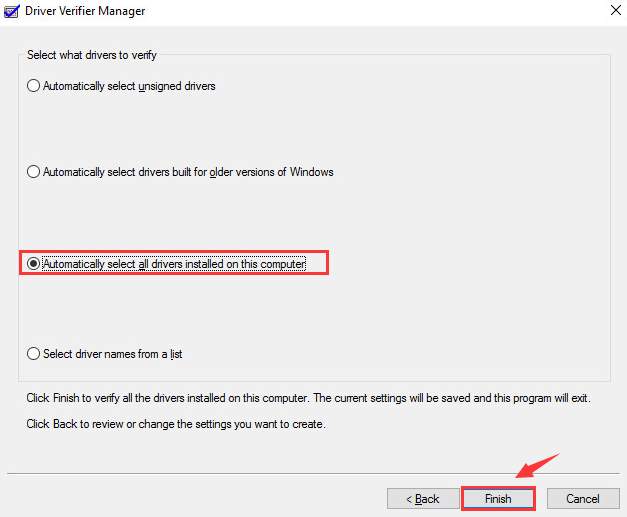
When the detect process finishes, just follow the instructions to get rid of the WDF_VIOLATION blue screen error fixed.
3: Run a Windows repair
The WDF_Violation blue screen error could be caused by missing, corrupt or damaged system files on your computer. To see if this is the case, you should run a Windows repair.
System File Checker (SFC) is a handy feature in Windows that helps scan your system files and repair missing or corrupted system files (including those related to BSOD). To run the SFC scan:
- On your keyboard, press the Windows Logo key
 , type in command prompt, and select Run as administrator. (If Windows prompts for permission, click OK to continue.)
- Type in SFC /Scannow, and then press Enter.
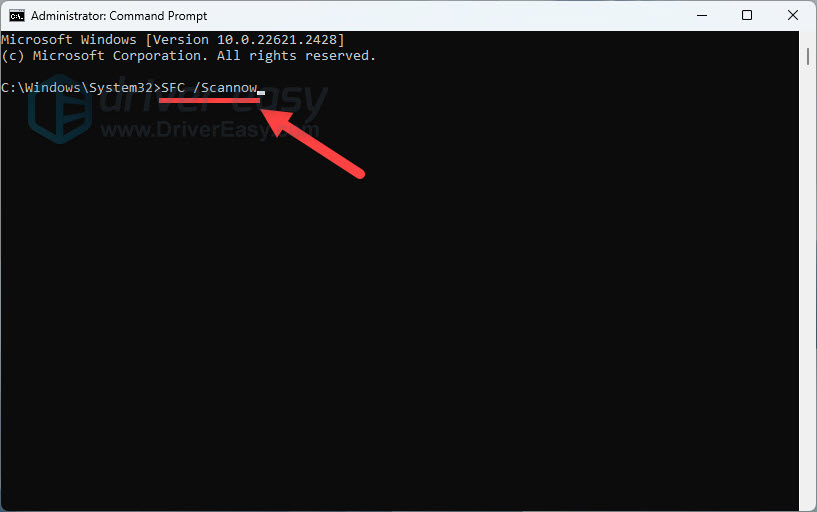
- It’ll take some time for the SFC to repair the corrupted system files if it detects any.
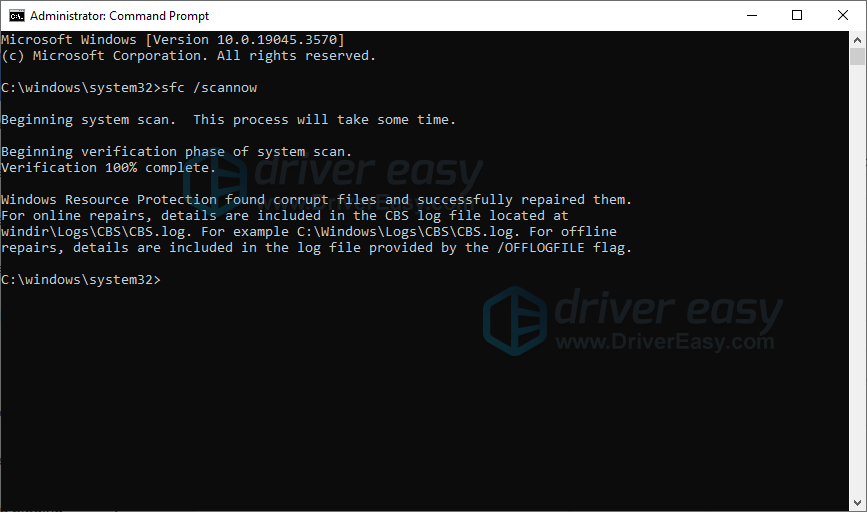
- It’ll take some time for the SFC to replace the corrupted system files with new ones if it detects any. When the process is completed, reboot your computer and test if the issue still exists.


