
If you encounter the Wdf01000.sys blue screen error during program installation, while a specific program is running, while a Microsoft driver is being loaded, or during Windows startup or shutdown, don’t worry. It’s fixable. And in most cases, the fix is pretty fast and simple…
Try these fixes
You don’t have to try them all; just work your way down the list until you find the one that works for you.
- Update your system
- Update your drivers
- Run System File Checker
- Run Check Disk
- Check for viruses and malware
- Reinstall the app that’s causing the problem
- Run the blue screen troubleshooter
- Perform a system restore
Fix 1: Update your system
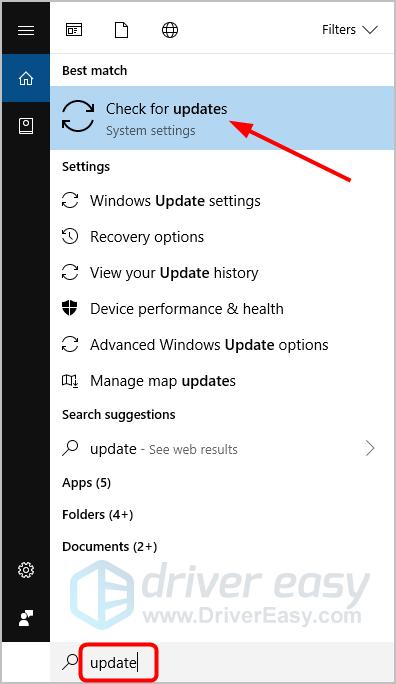
As Wdf01000.sys is a system driver, you can try updating your system to fix the issue. To check for Windows updates, you can:
- Type update in the Windows search box, and select Check for updates or Windows update.
- Click Check for updates in the pop-up window.
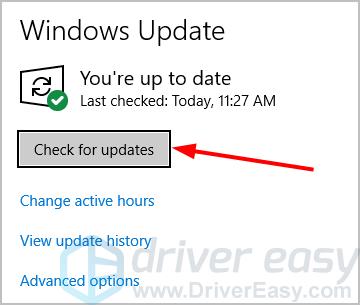
- Install all identified updates to troubleshoot the Wdf01000.sys blue screen problem. Or you can try Fix 2, below.
Fix 2: Update your drivers
Driver problems may also cause the Wdf01000.sys blue screen error. You should update all your drivers to better troubleshoot your blue screen problem.
There are two ways to update your drivers — manually and automatically.
Update your drivers manually — You can update your driver manually by going to the hardware manufacturer’s website and searching for the latest driver. But if you take this approach, be sure to choose the driver that’s compatible with the exact model number of your hardware, and your version of Windows.
OR
Update your drivers automatically — If you don’t have the time, patience or computer skills to update your drivers manually, you can, instead, do it automatically with Driver Easy. You don’t need to know exactly what system your computer is running, you don’t need to risk downloading and installing the wrong driver, and you don’t need to worry about making a mistake when installing. Driver Easy handles it all.
- Download and install Driver Easy.
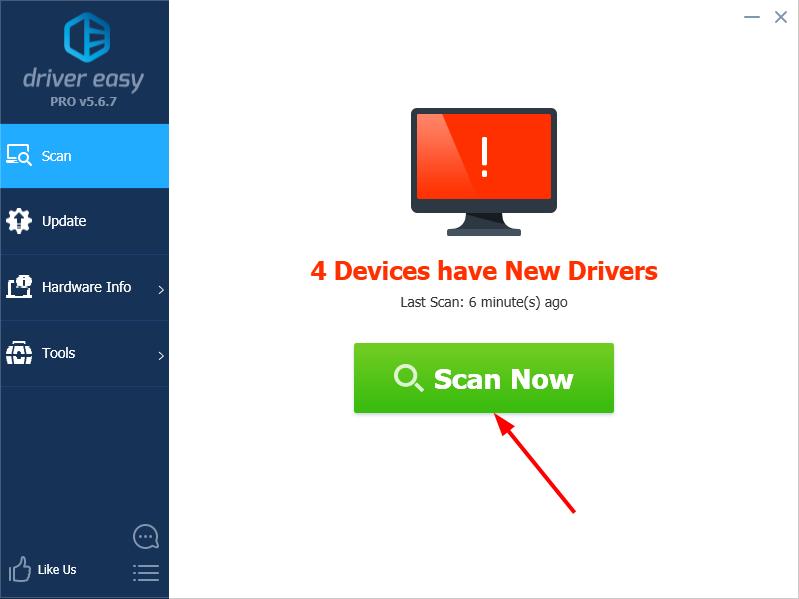
- Run Driver Easy and click Scan Now. Driver Easy will then scan your computer and detect any problem drivers.
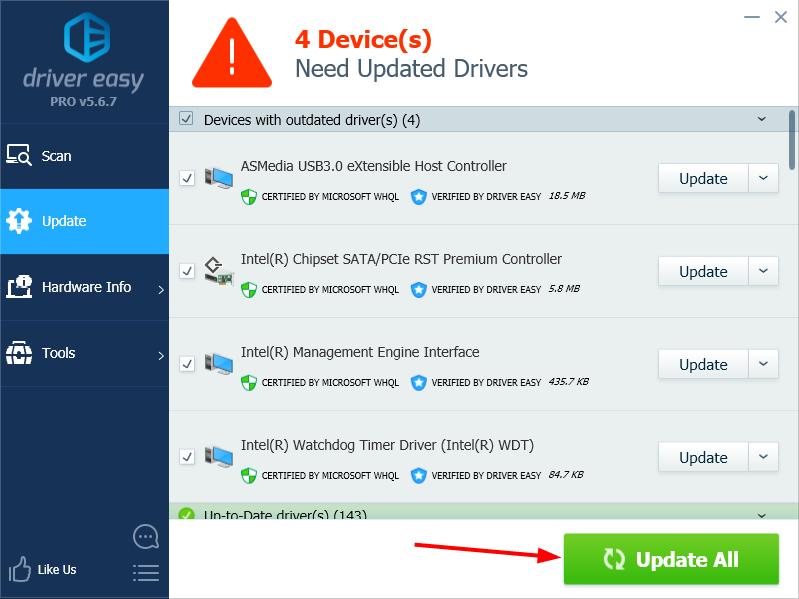
- Click Update next to any flagged devices to automatically download the correct version of their drivers, then you can install them manually. Or click Update All to automatically download and install them all automatically. (This requires the Pro version – you’ll be prompted to upgrade when you click Update All. You get full support and a 30-day money back guarantee.)
- Restart your computer and see if your problem is resolved. If not, contact Driver Easy’s support team at support@drivereasy.com for further assistance. They’d be happy to help you. Or you can move on to Fix 3, below.
Fix 3: Run System File Checker
If the Wdf01000.sys error is being caused by system file corruption, You can run the sfc /scannow command (System File Checker) to help repair them.
- Type cmd in the Windows search box.

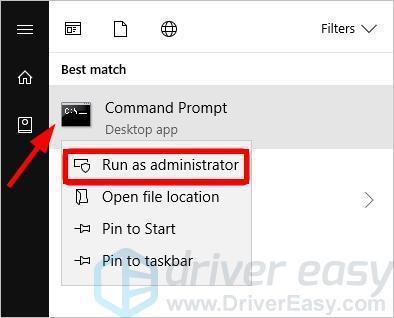
- Right-click Command Prompt, and select Run as administrator.
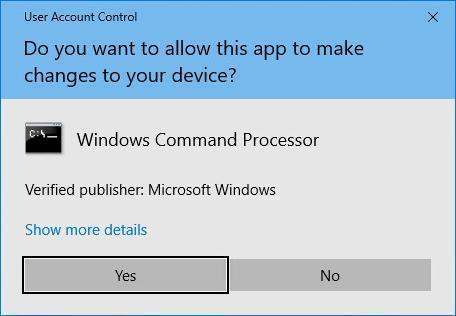
- Click Yes at the User Account Control prompt.
- At Command Prompt, type sfc /scannow and press Enter.
Note: There’s a space between sfc and /scannow.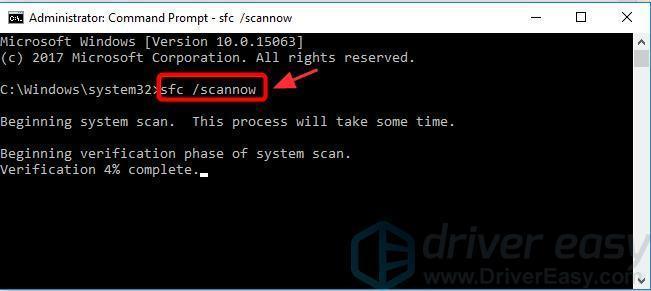
- It should begin running a system scan, and will take some time. When it finishes, restart your computer and check for your Wdf01000.sys problem. Or you can try Fix 4, below.
Fix 4: Run Check Disk
If your Wdf01000.sys blue screen error is caused by hard drive corruption, you can run a Check Disk scan to help resolve the problem:
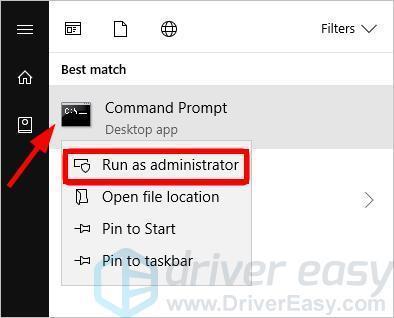
- Run Command Prompt as administrator.
- Type or copy-paste chkdsk /f /r, then press Enter.
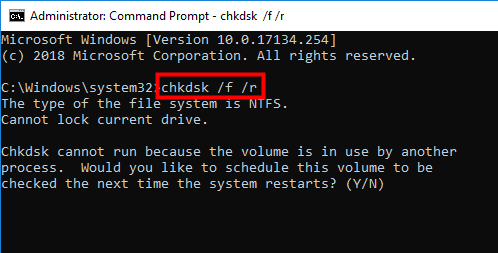
- When asked “Would you like to schedule this volume to be checked next time the system restarts?”, enter Y.
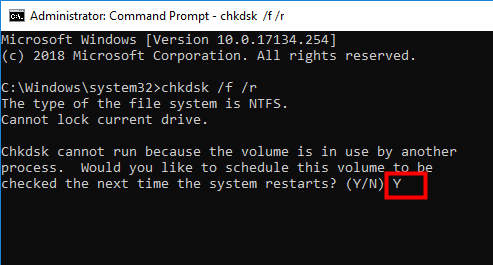
- Close the Command Prompt window and restart your computer.
Fix 5: Check for viruses and malware
It may be that a virus or other malware is causing your Wdf01000.sys blue screen error. To see if this is the cause of your problem, you should run a virus scan with your antivirus program.
We’ve explained, below, how to do this with Windows Defender. If you use a different antivirus product, obviously the process will be different.
To check for viruses with Windows Defender:
- Click the Start button in the lower left corner of your screen, then click the Settings icon.
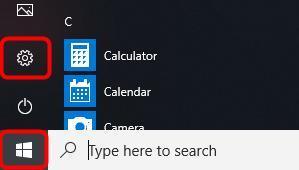
- Select Update & Security > Windows Security.
- Click Virus & threat protection.
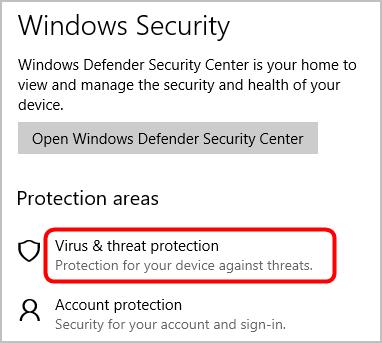
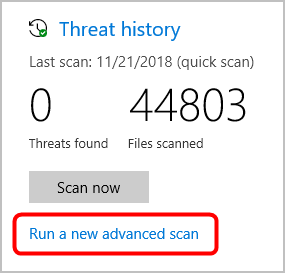
- In the Threat history area, click Run a new advanced scan.
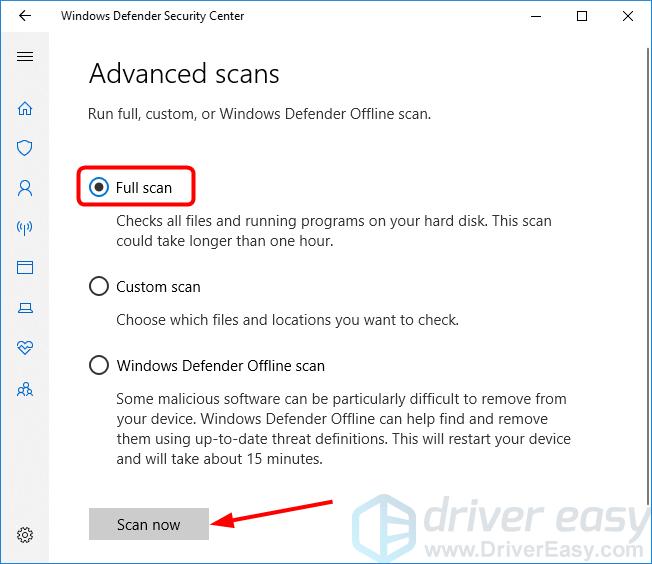
- Select Full scan, then click the Scan now button.
- Save any open files and close all programs, then click Scan, and your PC will restart to run a scan.
- When the scan is finished, your computer will restart. Then you can run Windows Defender again to see the results of the scan.
Fix 6: Reinstall the app that’s causing the problem
If the Wdf01000.sys error occurs while you’re installing or running an app, uninstalling or reinstalling it may fix the error. You can uninstall an app via Control Panel:
- On your keyboard, press the Windows logo key
 and R key simultaneously to open the Run box.
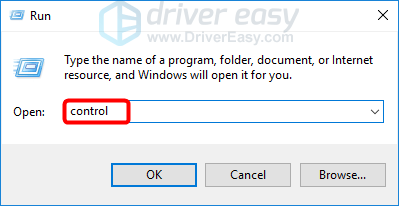
 - Type control, and press Enter.
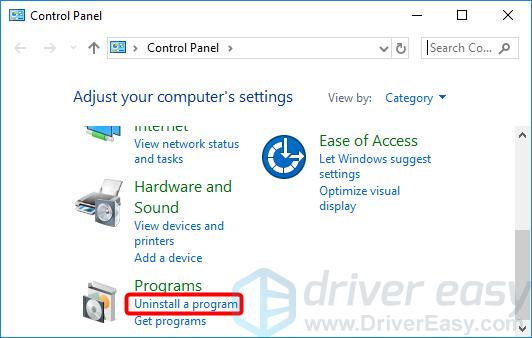
Under Programs, click Uninstall a program.
- Right-click on the app that may be causing the problem, and select Uninstall.
Fix 7: Run the blue screen troubleshooter
If you’re using Windows 10, you can also use the built-in troubleshooter to help fix your blue screen problem:
- Go to Windows Settings.
- Click Update & Security > Troubleshoot.
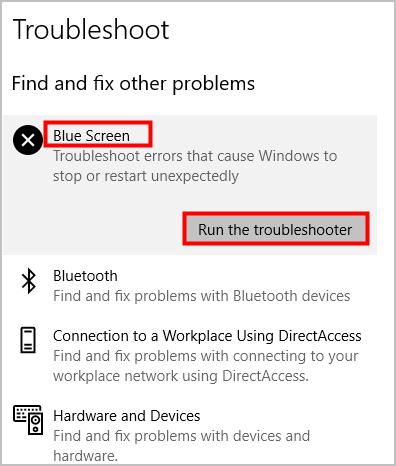
- Under the Find and fix other problems section, click Blue Screen > Run the troubleshooter to see if it can fix your problem.
Fix 8: Perform a system restore
If the steps above didn’t work for you and your Wdf01000.sys problem only occurs recently, we recommend performing a system restore on your computer. It’ll return your system files and settings to an earlier point in time when the BSOD error didn’t occur, without affecting your personal files.
Here’s how to perform a system restore:
- Type recovery in the Windows search box, then press Enter.
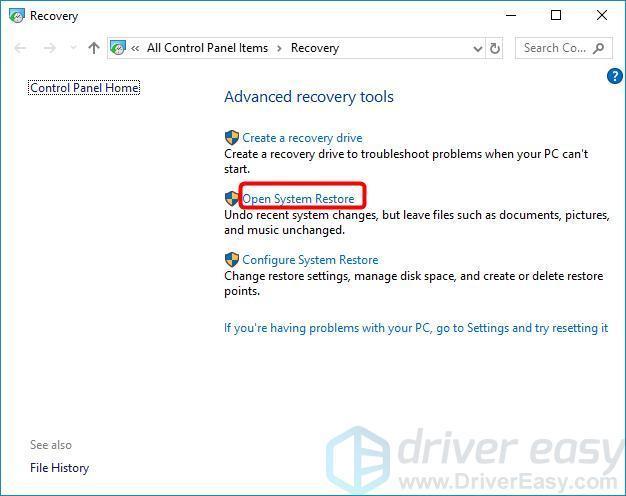
- At Recovery, click Open System Restore.
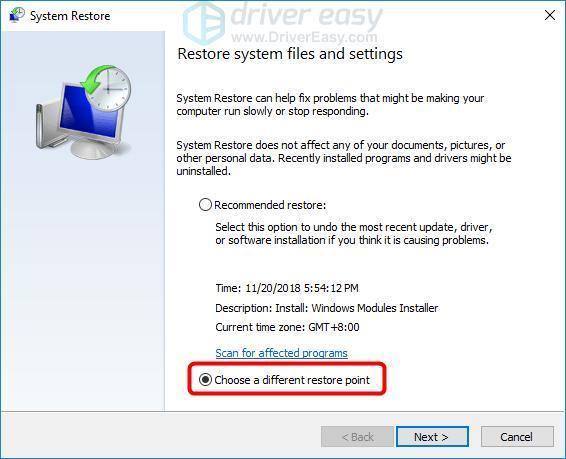
- Select Choose a different restore point, and click Next.
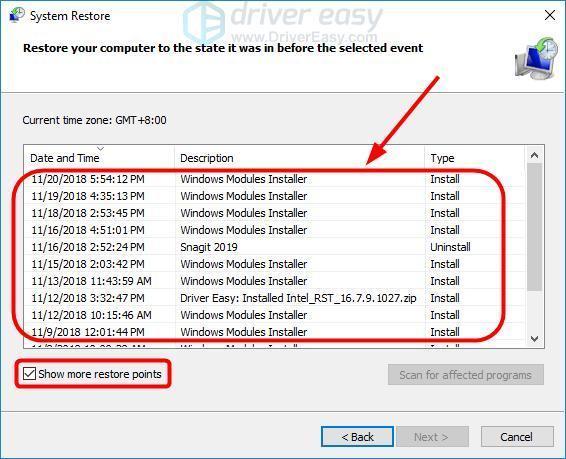
- Check the box beside Show more restore points. You should see a list of ‘restore points’. These are like backups of your computer, as it was at that particular date and time. Think back to a date when your computer worked properly, and select a restore point from that date or slightly earlier (but no later). Then click Next.
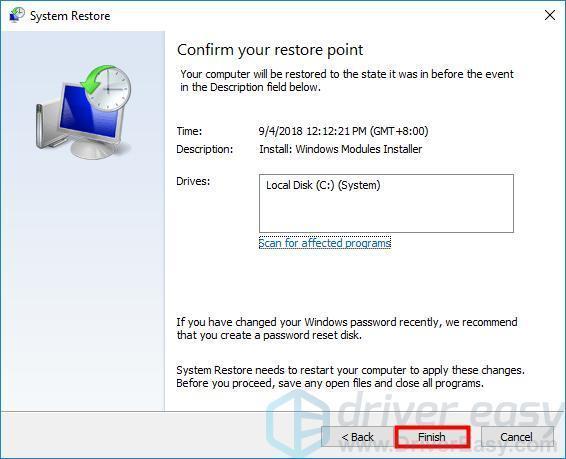
- Save any open documents on your computer, then click Finish.
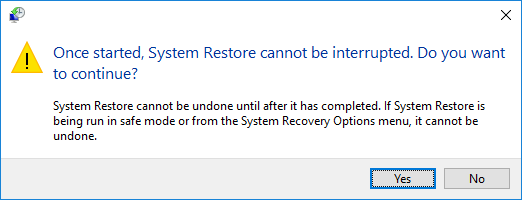
- Click Yes, and your PC will restart.
Hopefully this can help you out.
You’re, as always, more than welcome to leave a comment below to share your results or any other suggestions.


