
If your WiFi connection keeps dropping out, then reconnecting, you’re not alone. Many Windows users are reporting this problem. It’s frustrating, but don’t worry – it’s usually possible to fix the issue.
Here are three steps you can try to get your WiFi connection stable again. Just work your way through the list until your problem is resolved.
- Some quick checks
- Change the power management setting
- Reset the Wi-Fi AutoConfig service
- Update network adapter driver
Some quick checks
When your Wi-Fi disconnects and connects frequently, here are some quick checkups that you can do with your router and computer to see if they help:
- Restart your computer that’s having trouble staying online.
- Disable any proxy or VPN services if you have any running in the background, as they may interfere with the network connection.
- Move your computer closer to your router or modem.
- Power cycle your router and modem by unplugging them, waiting 30 seconds, then plugging them back in.
- Make sure your router firmware is up to date.
Step 1: Change the power management
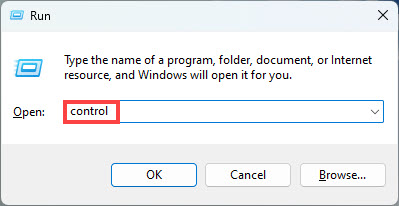
- On your keyboard, press the Windows logo key and the R key to open the Run command window.
- Type in control in the box and hit Enter.
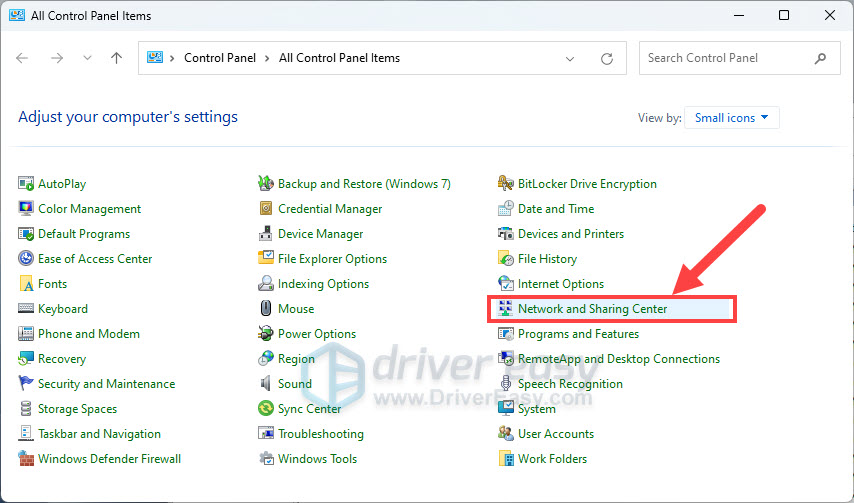
- Double-click on Network and Sharing Center.
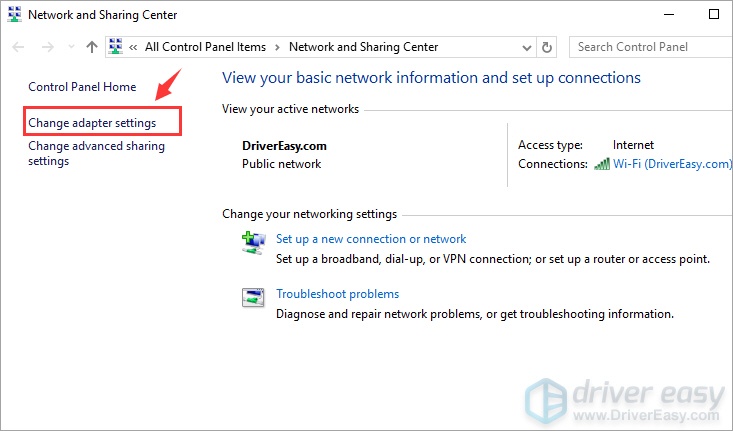
- Click Change adapter settings.
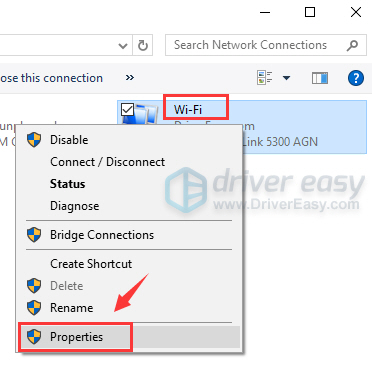
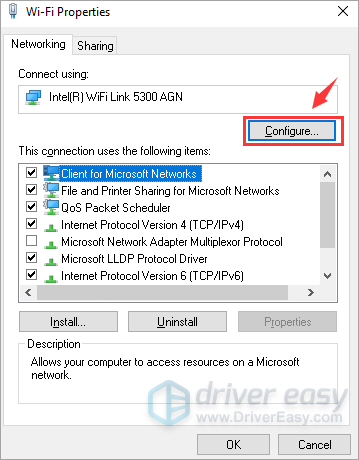
- Right-click your WiFi adapter and click Properties.
- Click Configure.
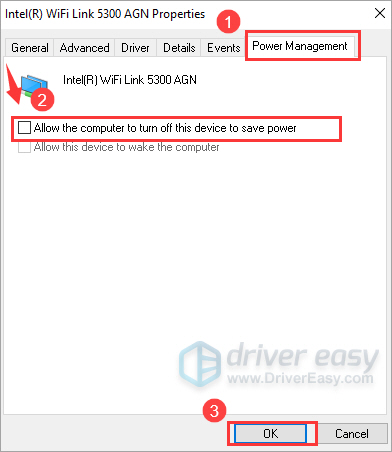
- Go to the Power Management tab. Untick the box next to Allow the computer to turn off this device to save power. Click OK.
Step 2: Reset the Wi-Fi AutoConfig service
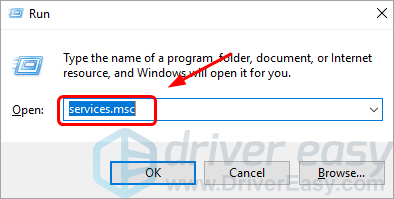
- On your keyboard, press the Windows logo key and R at the same time. Type services.msc and press Enter.
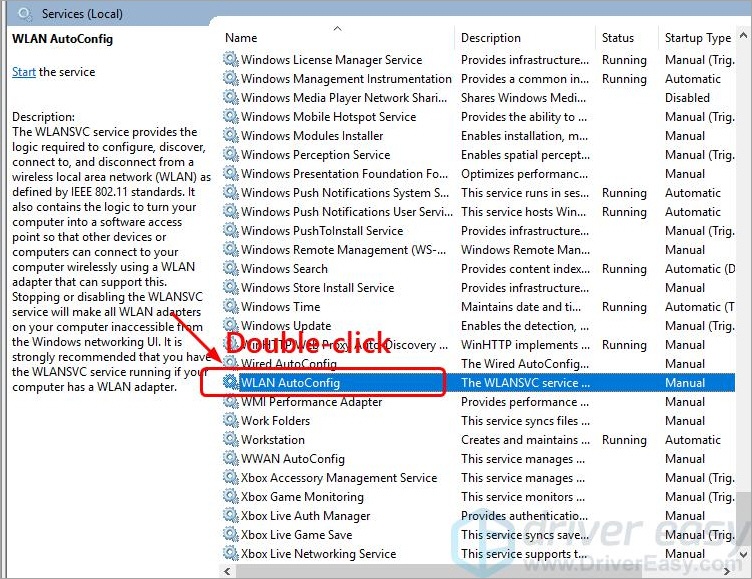
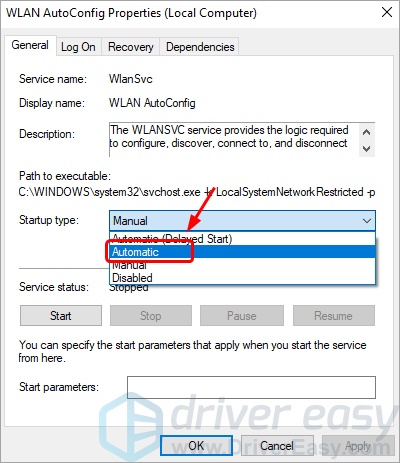
- Locate WLAN AutoConfig and double-click it.
- Change the Startup type to Automatic.
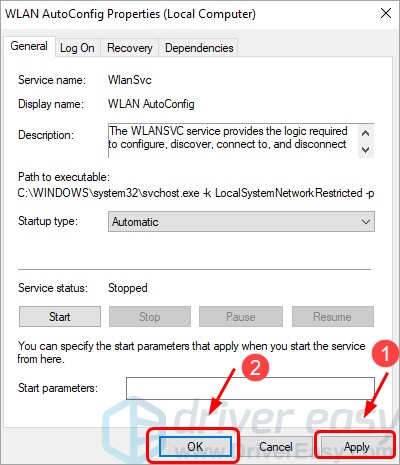
- Click Apply and OK to save and exit.
- Check to see if your Wi-Fi connection is back to normal. If not, you need to try the next step.
Step 3: Update network adapter driver
If the steps above don’t fix your problem, it’s likely that you’re using the wrong or corrupted network driver. To resolve this issue, you should try updating the wireless network adapter driver to the latest version.
There are two ways you can get the right drivers for your wireless network adapter: manually or automatically.
Manual driver update – You can update your network adapter driver manually by going to the manufacturer’s website for it, and searching for the most recent correct driver for it. Be sure to choose only drivers that are compatible with your variant of Windows.
Automatic driver update – If you don’t have the time, patience or computer skills to update your wireless network adapter drivers manually, you can, instead, do it automatically with Driver Easy.
Driver Easy will automatically recognize your system and find the correct drivers for your exact video card and monitor, and your variant of Windows, and it will download and install them correctly. Simply follow these steps:
- Download and install Driver Easy.
- Run Driver Easy and click the Scan Now button. Driver Easy will then scan your computer and detect any problem drivers.

- Click Update All to automatically download and install the correct version of all the drivers that are missing or out of date on your system.
(This requires the Pro version which comes with full support and a 30-day money-back guarantee. You’ll be prompted to upgrade when you click Update All. If you’re not ready to buy the Pro version, Driver Easy offers a 7-day free trial which includes access to all the Pro features such as high-speed download and one-click install. You won’t be charged anything until your 7-day trial has ended.)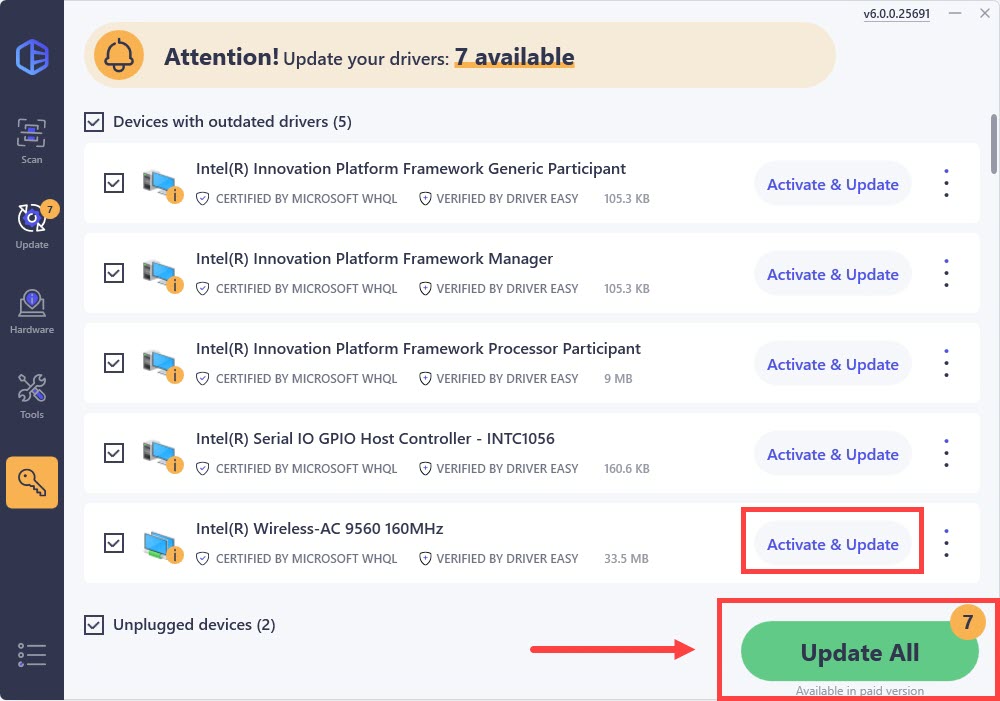
- Restart your computer for the changes to take effect.
After following these steps, your WiFi connection should be more stable. If you don’t experience an improvement, you might have a hardware issue. In this case, it’s a good idea to contact your computer manufacturer for help.
Hopefully, you resolved this issue after reading this post. If you have any questions or suggestions on this issue, you’re more than welcome to leave us a comment below. Thanks for reading!


