


Experiencing crackling or popping sounds? Outdated audio drivers could be the culprit. Fix it fast with Driver Easy—update your drivers and enjoy seamless audio in just a few clicks!
✓ Automatically detect all missing, outdated or mismatched drivers
✓ One click to update all drivers
✓ All drivers certified
✓ No internet? – Scan offline then download the right network driver on another PC
✓ Safe restore: roll back to the previously installed driver
And much more…
Picture this: you’re deeply resonating with a song or fully immersed in an intense gameplay session, when suddenly, popping and crackling noises start coming from your headphones or speakers. It’s a total mood killer! Thankfully, there are effective ways to troubleshoot and fix these audio issues on Windows 11.
Preliminary checks
Start by rebooting your PC. Audio crackling can often be caused by temporary system glitches, and a simple restart might resolve the issue. Then, depending on the specific type of your device, you can perform the following preliminary checks:
For wired headphones or speakers
For wired devices (e.g., 3.5mm jack or USB), check if the port is damaged. Try connecting to a different port to see if the audio quality improves.
For Bluetooth devices
If you connect speakers or headphones to your PC via Bluetooth, you should:
- Re-pair devices: If crackling is caused by connectivity issues, remove the device from your Bluetooth settings and pair it again.
- Ensure battery levels: Sometimes you may not notice that your devices have low battery, which can affect performance. So ensure that they’re adequately charged.
- Reduce interference: Keep your device away from potential signal disruptions and remove unnecessary devices from your Bluetooth settings.
To further troubleshoot your issues
If the above steps don’t work, try the following fixes:
1. Update audio drivers
Audio issues such as crackling or popping can be caused by outdated or corrupted audio drivers. If you can’t recall the last time you updated your drivers, now is the time to do so. Driver updates usually boost performance and fix compatibility issues.
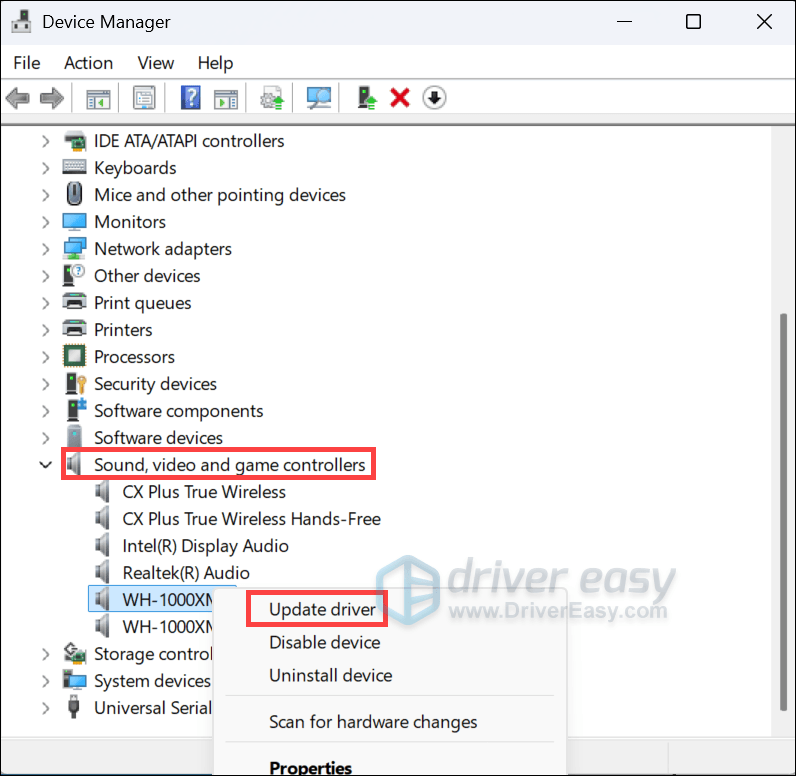
To update drivers, you can do it via the Device Manager. What you have to do is press the Windows logo key + R to open the Run box, then type devmgmt.msc and press Enter. This will open the Device Manager. From the window, expand the Sound, video and game controllers category, right-click on your device and select Update driver. Then follow the on-screen instructions to finish the process.
If you’re not comfortable manually updating drivers or prefer a simpler solution, tools like Driver Easy can automate the process. It’s a handy tool designed to simplify the process of updating drivers. And all the drivers are direct from the manufacturers.
To use Driver Easy:
- Download and install Driver Easy.
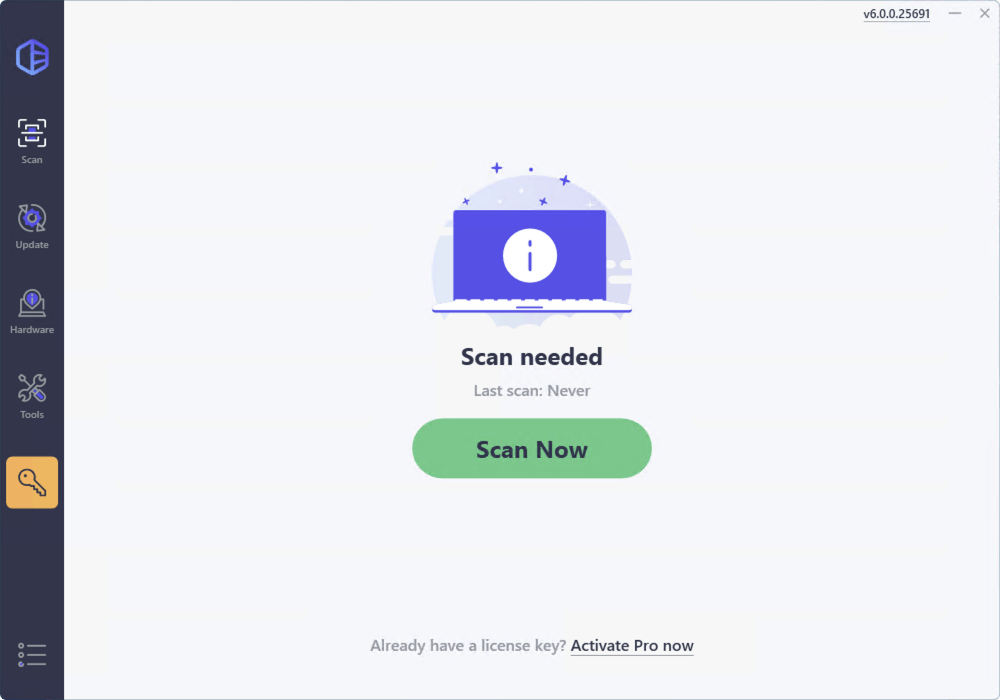
- Run Driver Easy and click the Scan Now button. Driver Easy will then scan your computer and detect any problem drivers.
- Click Update All to automatically download and install the correct version of all the drivers that are missing or out of date on your system (this requires the Pro version – you’ll be prompted to upgrade when you click Update All).
Alternatively, you can start a 7-day Free Trial, which gives you access to all premium features. After your trial, you can upgrade to the Pro version.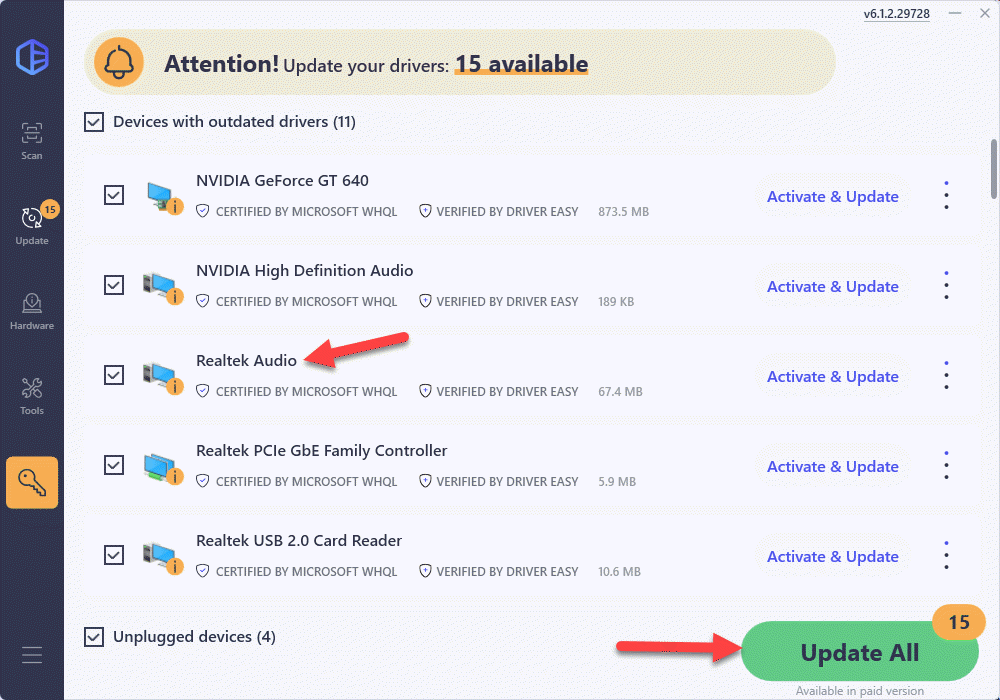
- Restart your computer for the changes to take effect.
2. Run the audio troubleshooter
Windows includes built-in troubleshooters designed to diagnose and resolve common audio issues. If you are having popping or crackling sound, you can try running the audio troubleshooter.
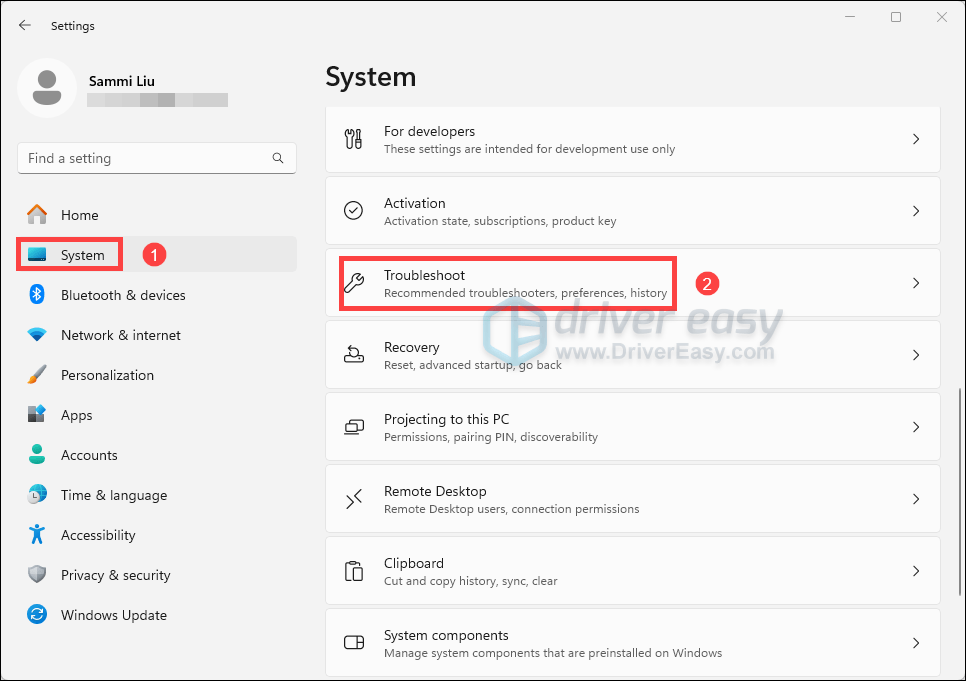
- On your keyboard, press the Windows logo key + I to open Settings.
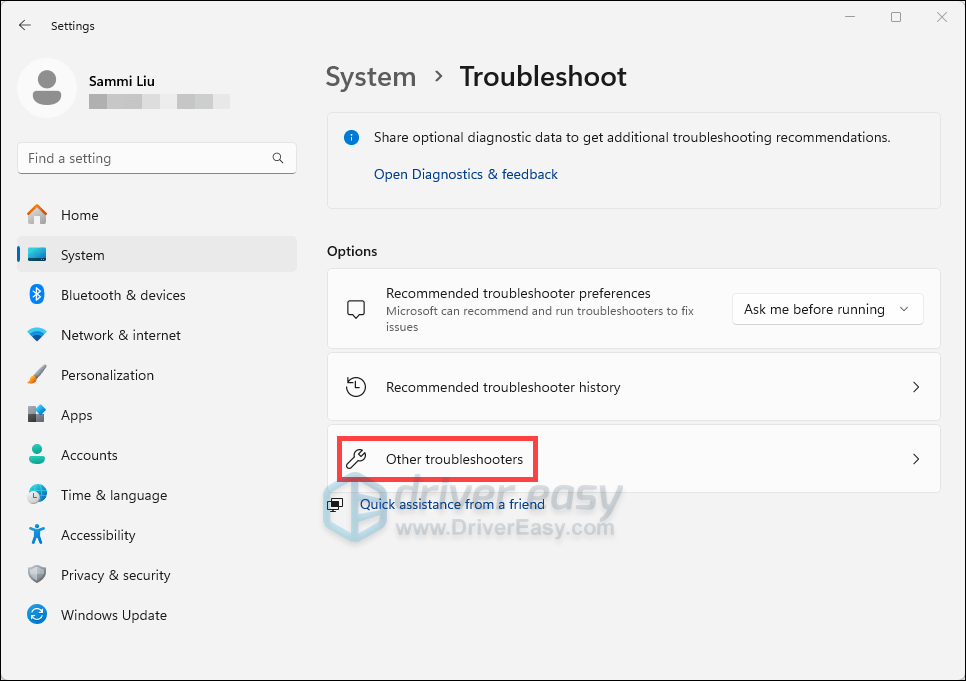
- From the left navigation pane, select System. Scroll down and click Troubleshoot.
- Click Other troubleshooters.
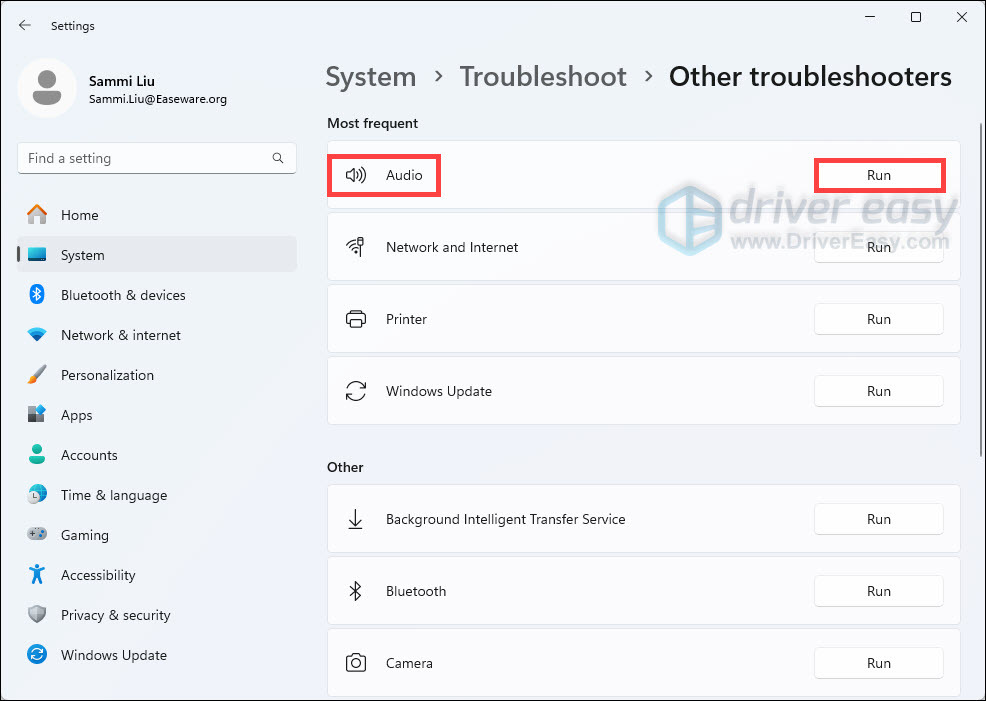
- Go to Audio section and click the Run button to start the audio troubleshooter.
If your issues persist, try the other fixes below.
3. Turn off audio enhancements
Audio enhancements, such as equalization or bass boost, are meant to improve sound quality but can sometimes cause popping, crackling, or distortion. To identify if they are the root causes for your issues, you can turn them off:
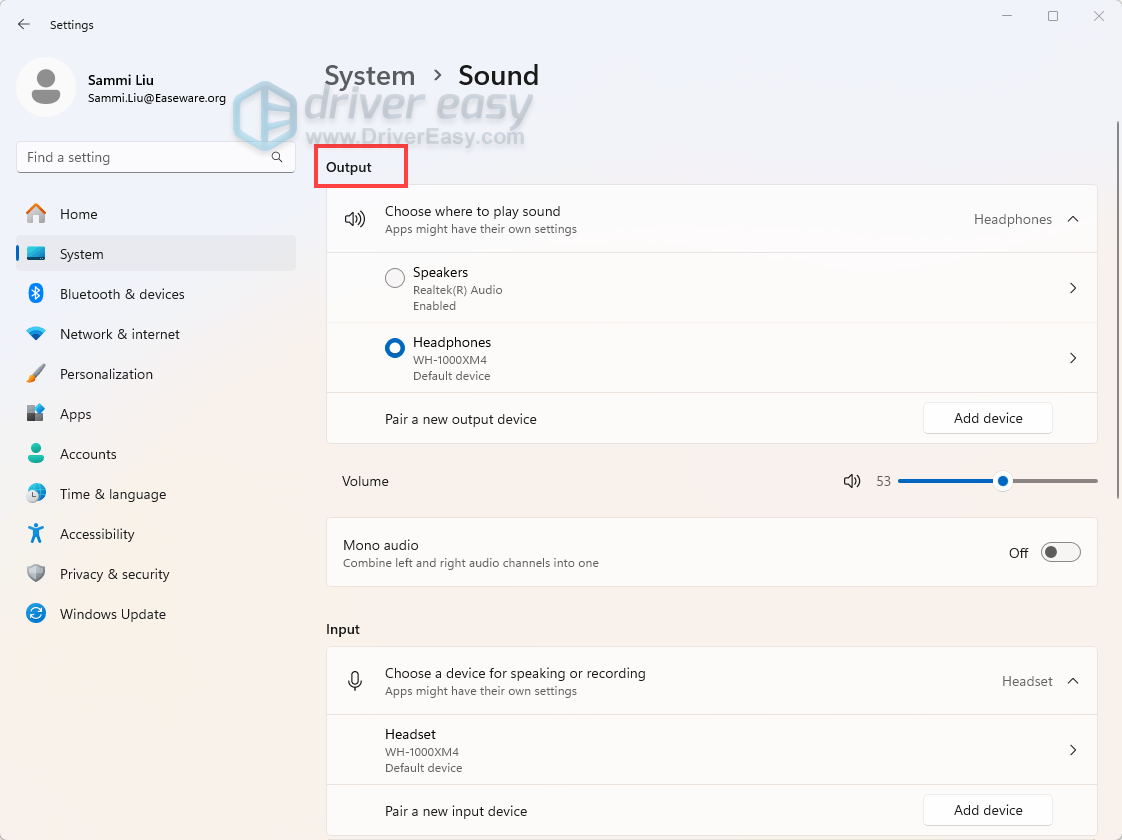
- Right-click on the speaker icon in the system tray and select Sound settings.

- Look for your output device and click on it.
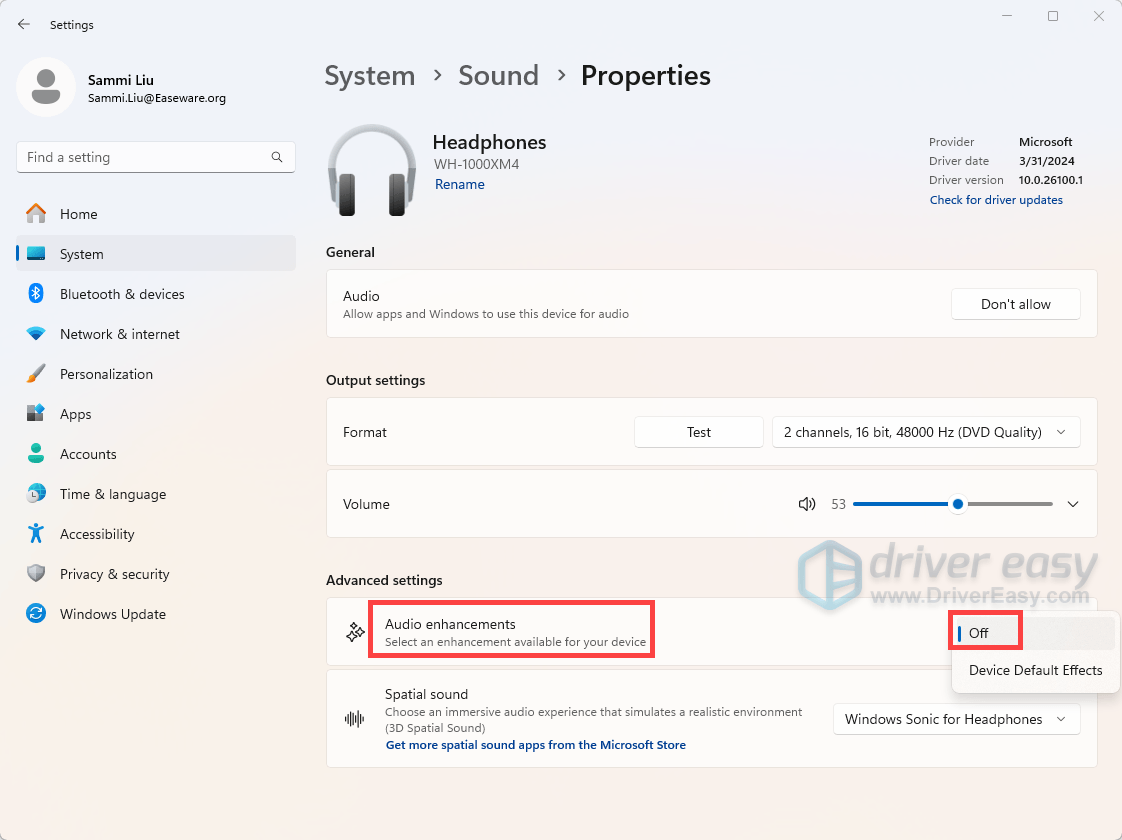
- Find Audio enhancements and select Off from the drop-down menu.
After applying the changes, play something and check the audio quality.
4. Try different audio formats
Popping and crackling can stem from file format or compatibility issues. Trying different audio formats can often resolve these problems. Below, we’ll walk you through the steps to test different formats to fix your audio problems.
- Right-click on the speaker icon in the system tray and select Sound settings.
- Look for your output device and click on it.
- Next to Format, change the setting and test it. If that doesn’t work, try changing the setting again.
If trying different audio formats doesn’t help, see below for additional troubleshooting.
5. Uninstall the latest Windows updates
If the issue started after a recent Windows update, uninstalling the update might help. Here’s how:
- On your keyboard, press the Windows logo key + I to open Settings.
- Select Windows Update > Update history.
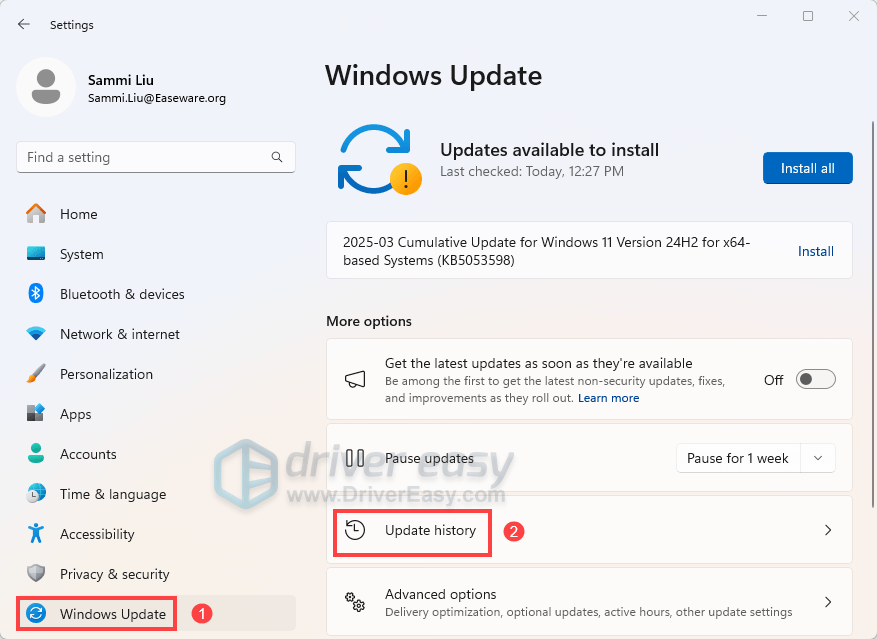
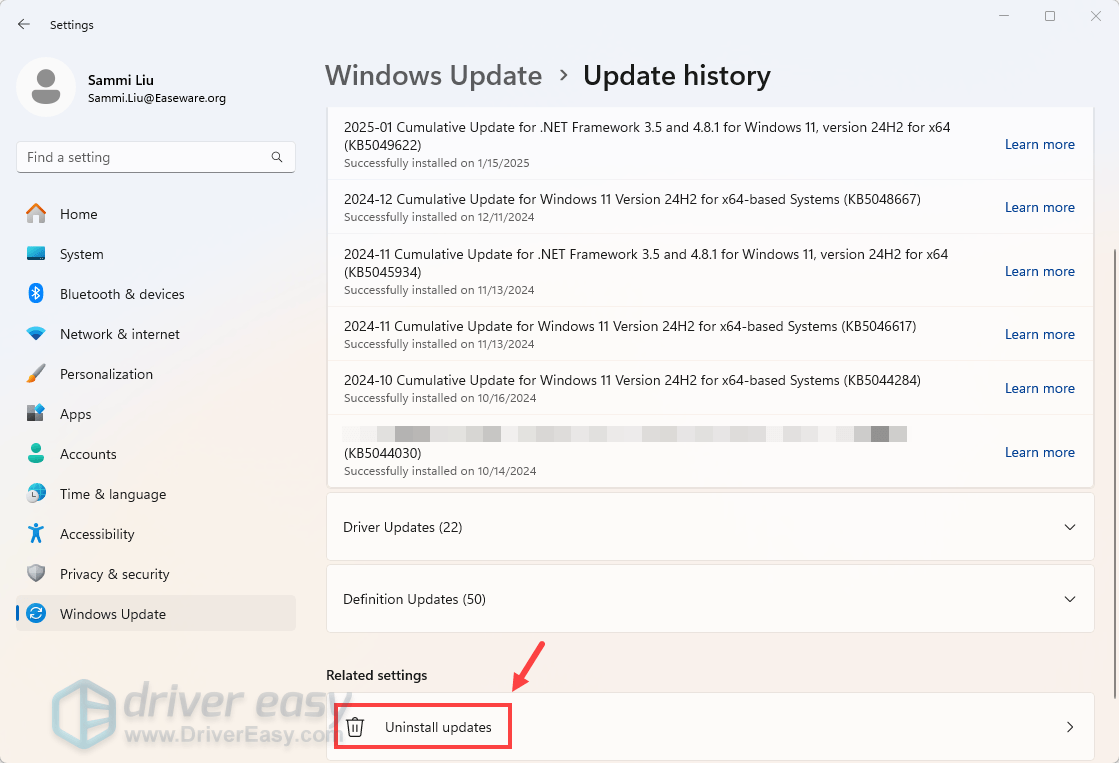
- Click Uninstall updates.
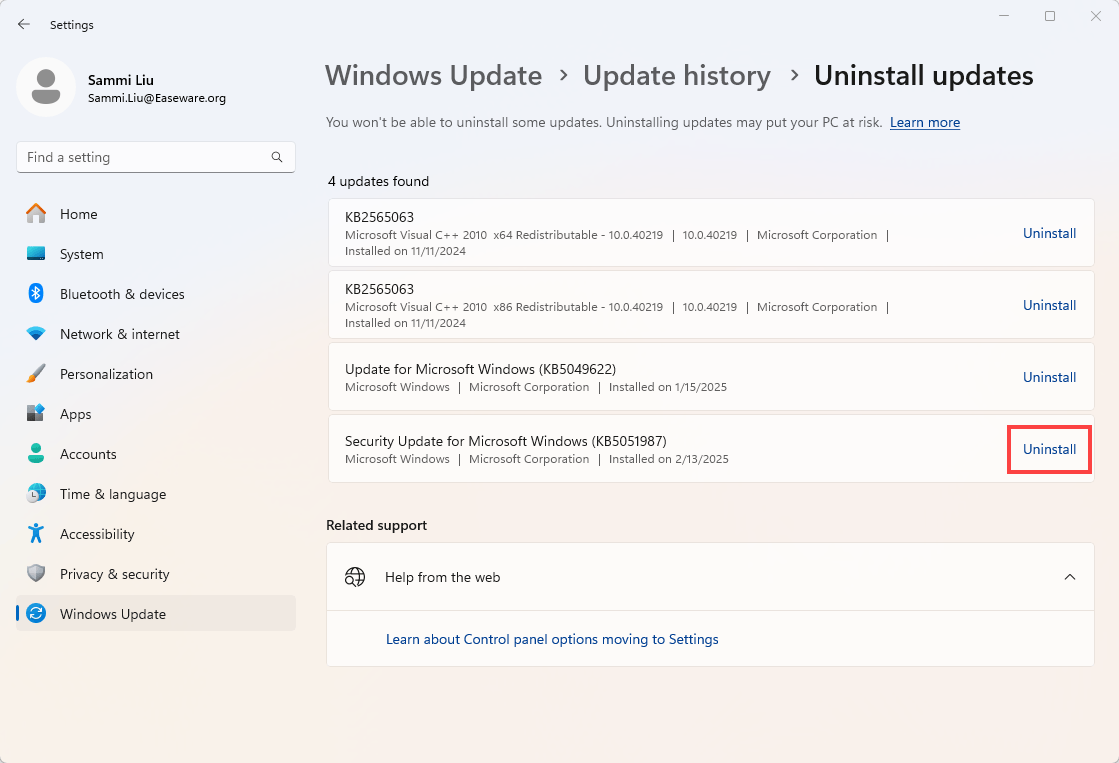
- Locate the latest Windows updates you’ve installed, then click Uninstall.
6. Repair corrupted system files
Corrupted or missing system files can cause various issues, including audio problems. Use the System File Checker (SFC) tool to scan and repair them.
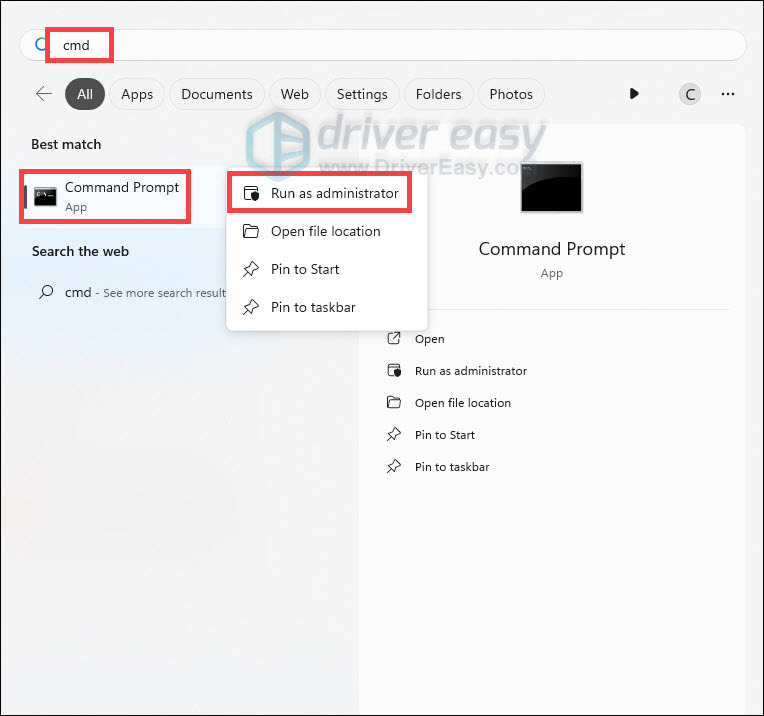
- On your keyboard, press the Windows logo key to open the Search menu. Type cmd, right-click Command Prompt from the list of results, and select Run as administrator.
- In the Command Prompt window, type sfc /scannow and hit Enter.
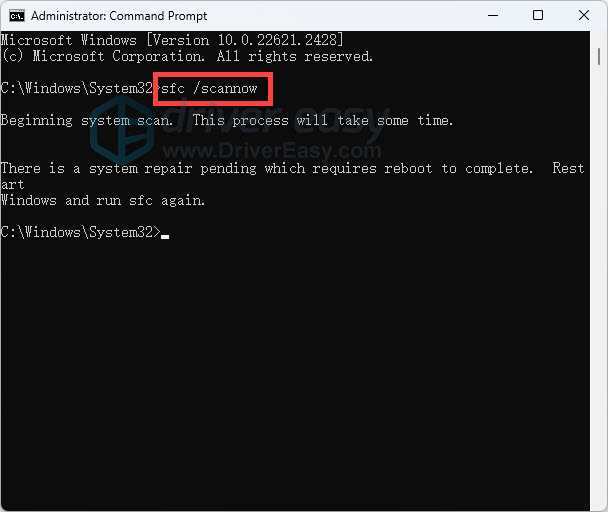
The sfc /scannow command scans and repairs protected system files using a cached copy. Do not close the Command Prompt window until the process is complete.
After the process is finished, you may receive one of the following messages:
| sfc /scannow result | What it means |
| Windows Resource Protection did not find any integrity violations. | The SFC tool did not detect any corrupted, missing, or damaged system files on your computer. This is a good sign! It indicates that your system files are intact and functioning as they should. |
| Windows Resource Protection could not perform the requested operation. | The SFC tool encountered an issue preventing it from completing the scan. Try rebooting into safe mode, running the DISM command, and running the sfc /scannow again. *To run the DISM command, you just need to execute the following commands sequentially: DISM /Online /Cleanup-Image /CheckHealth |
| Windows Resource Protection found corrupt files and successfully repaired them. | The operation was successful. |
| Windows Resource Protection found corrupt files but was unable to fix some of them. | It has detected corrupted system files but couldn’t repair them. To address this issue, view details of the System File Checker process to find the corrupted file, and then manually replace the corrupted file with a known good copy of the file. |
That wraps up our guide to troubleshooting your audio issues! We hope this was helpful. If you have any further questions or need additional assistance, feel free to leave a comment below, and we’ll get back to you as soon as possible.